If you’re new to Charitable, we’ve put together a simple step-by-step guide just for you! This guide is designed to give you an introduction to Charitable and get you started in getting up and running with a campaign, and to start receiving donations.
Note: If you haven’t yet installed Charitable into your WordPress site, then read this information first. Once you have Charitable installed, then come back here and continue reading to set up your settings and create your first campaign.
Charitable Setup Wizard
If you’ve installed Charitable for the first time, you will be greeted by a Setup Wizard. This offers quick ways to configure important settings, connect to your payment gateway, and create your first campaign.

We recommend spending 5 minutes going through this wizard, as it will help you customize important settings that include:
- Choose whether you’re raising funds for an individual, organization, or anything else so that Charitable can customize your experience accordingly
- Add your base country, currency, and currency format
- Turn on automated emails for donor and admin notifications
- Set up your payment gateway
- Create your first campaign
Once you complete the wizard, you’ll see a congratulations message. You can continue on to the Charitable dashboard.
In the guide below, we’ll show you how to find these settings and other features on your own at any time.
Configuring General Settings
Once Charitable is installed, in your WordPress dashboard, go to Charitable » Settings. Here, you’ll find a top menu with various options available.

In the General tab, you can customize the following:
Currency & Location Settings
- Select your “Base Country” from the drop-down options.
- Select your “Currency” from the drop-down options.
- If required, select your “Currency Format”, “Decimal Separator”, “Thousands Separator”, and “Number of Decimals”.

Donation Form Settings
The next section on the General Settings page is the Donation Form Display Options. This gives you overall control of the donation forms from your campaigns.

- Display Options: Select from the drop-down options to display the donation form:
- On a separate page
- On the same page
- Reveal in a modal
- Form template: Choose a standard or minimal form template
- Only Show Required Fields: This setting controls how many fields donors see on your donation forms. When enabled, donors will only see the minimum required fields needed for donations and payment processing. This is usually a first and last name, and email address.
Pro tip: Choose “Yes” for Only Show Require Fields if you want the simplest possible donation experience with minimal form fields. Keep this setting on “No” (the default) if you want to collect additional donor information, plan to add custom fields to your donation forms, or you need more donor details for follow-up communications.
Below this, there are more options to choose to diplay a login form so that donors can log in to their account.
Choose where to display the ‘minimum donation’ amount, any notices and validation errors. You can also choose the highlight color for form notices and errors to match the rest of your website.

Page Settings
Charitable automatically generates essential pages for your donation system to make it easier for you.

These include:
- Login page
- Registration page
- Profile page
- Donation receipt page
- Privacy policy page
- Terms & conditions page
You can override any of these default pages by selecting custom pages from the dropdown menus provided.
For first-time users: We recommend keeping the default pages initially. You can always customize them later once you’re more familiar with Charitable.
This gives you complete control over your donation experience while providing sensible defaults to get you started quickly.
If you have made any changes to the general settings, don’t forget to save your settings!
Setting Up Payment Gateways
This area controls your payment options, including which gateways are available, enabled, and set as default. When you first install Charitable, Stripe is enabled by default with test mode turned on.
Default Gateway: The “default gateway” is the first payment option shown to donors on your donation forms. You can change this to any enabled gateway on this page.
Test Mode: When checked, this enables test mode for all gateways. This is perfect for testing Charitable without making real payments, seeing how donations, receipts, and reports work, and training your team on the system.

Important: Make sure your connected gateways are using test API keys when test mode is enabled.
Charitable includes these payment gateways that are built into the core, so there are no add-ons or pro plans required:
Stripe is the fastest way to get started with a gateway in Charitable. To quickly connect with Stripe, click on “Gateway Settings” for Stripe and then “Connect With Stripe” button, and follow the onscreen instructions (you will be taken to Stripe’s website to connect).
Square is a popular payment processor that’s trusted by millions of businesses worldwide. To connect with Square, click on “Gateway Settings” for Square and then “Connect to Square Account” button.
You’ll be securely connected to Square with just a few clicks to begin accepting payments. Once connected, you can customize the gateway label that donors see on your donation forms and enable webhook functionality for real-time payment updates.
PayPal is a popular payment option for donors worldwide. To configure PayPal, you will need to “Enable Gateway” first then click on the “Gateway Settings” button for the “PayPal” payment gateway.
Offline Donations
This is perfect for bank transfers, checks, or other non-online payments.
You simply need to enable the gateway then click “Gateway Settings”. Inside, you can customize the label shown on donation forms, and add instructions for donors (e.g., bank transfer details.) Make sure you save your changes.
Offline mode is also great for testing donations without connecting a payment gateway.
Need more payment options? Additional gateways like Authorize.Net, Mollie, and others are available in the Pro plugin. Visit the Charitable integrations page to explore all available payment gateways.
Enabling Emails for Donor and Admin Notifications
Charitable has a variety of emails that can be sent to donors and you, as the campaign manager.

Go to Charitable » Settings » Emails. By default, emails will be disabled except for the password reset and email verification.
Enable each one by clicking Enable Email. (If you’re not using “Offline Donations,” then you don’t need to enable the “Donor: Offline Donation Receipt” and “Admin: New Offline Donation Notification” emails.)
For example, if you wanted to enable and set up a donation receipt email that goes out to a donor after they have completed their donation, follow these steps:
Click the Enable Email button for “Donor: Donation Receipt”.
Now, a new Email Settings button will appear – click it to view and edit the email details.

On the next page, customize your email by editing these areas:
- Email Subject Line
- Email Headline
- Email Body

Default text is automatically provided as a starting point. You can insert “email tags” to include dynamic content such as donor name and information, payment details, and donation summary.
The email tags are available when you scroll down the same page.
Use “Preview Email” to see how your email will look to recipients, then click “Save Changes” to finalize your donor receipt email setup.

Repeat this same process if you want to enable notifications for donations and campaign endings. Your donor receipt email is now ready to automatically send to contributors!
Creating Your First Campaign
Creating your first campaign is easy in Charitable!
Note: If you are looking for instructions on creating legacy campaigns, please read these instructions.
Add a New Campaign
To get started, go to Charitable » Add New Campaign in your WordPress menu.
This will open up the template library. You can add a name for your campaign. Below this, there are templates to choose from or you can choose a simple layout and build it from scratch.

When you hover over a template, you can preview it or select a template, and the campaign builder will open.
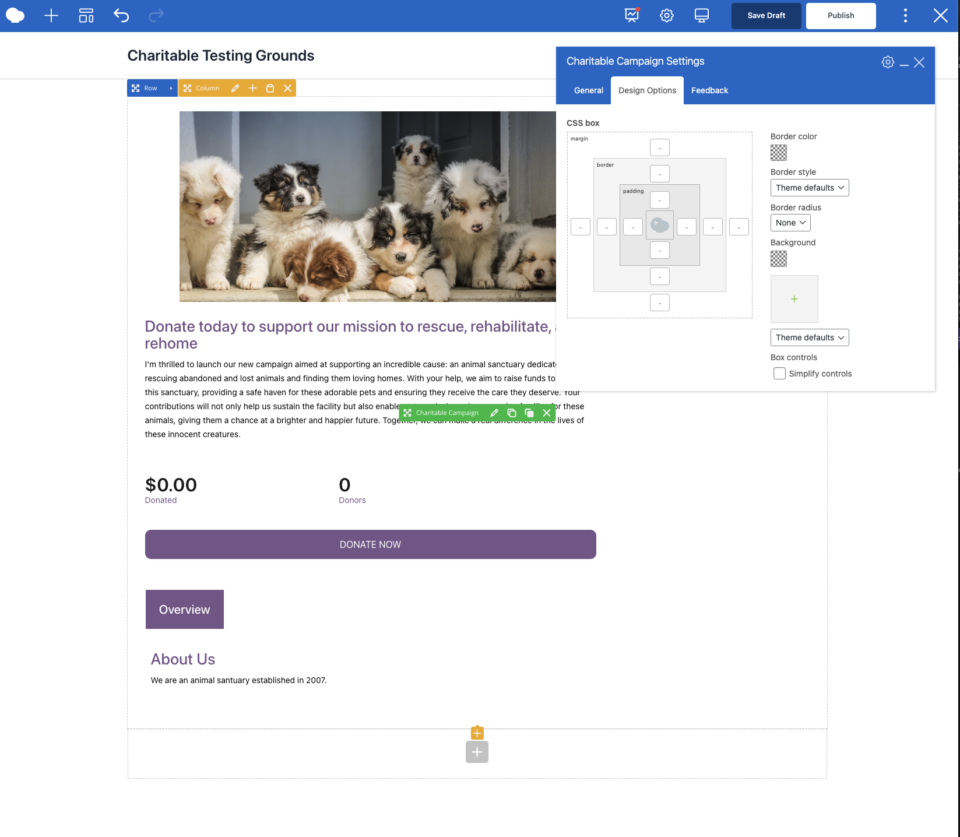
Customize Your Campaign
If this is your first time using the visual builder, when you create your first campaign, you will get a brief guided tour. This is designed to show you how to use the builder so you can get started quickly.

On the right side, you’ll see a preview of your campaign. This is an editable template, simply click on any field to make changes.
In the left taskbar, you’ll see 2 tabs, ‘Add Layout’ and ‘Layout Options’.
In the Add Layout tab, there are various fields available. You can drag and drop them into your campaign to add them in. A green tick on the field means they’ve already been added in.
If you click on any field in your preview, the Layout Options for that field will open in the left taskbar. You can adjust the settings, edit text, and make stylistic changes here.
Configure Campaign Settings
After you make adjustments here, click on “Settings” in the left hand menu.

In the General Settings tab, you can give your campaign a goal (or leave empty for no goal), an end date for the campaign (or leave blank if the campaign continues forever or when you manually stop it).
You can also add tags and categories here.
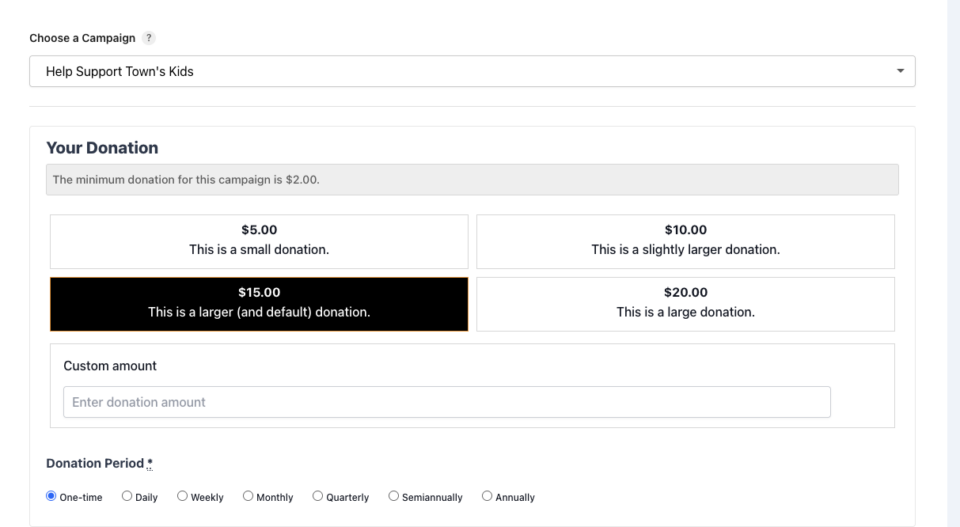
In the next Donation Options tab, you set what choices are available to the donor for this campaign.

Feel free to explore additional settings screens along with “Marketing” and “Payment” screens that can show you what additional options are available to you (and when you upgrade these can provide additional information, settings, and more).
Publish Your Donation Campaign
Once you have initially setup your campaign, hit the green “Save” button in the upper right. This saves the campaign information at any time, even if the campaign isn’t live yet.

The dropdown to the left of the button determines if you are saving the campaign in “draft” or publishing it as a public/live campaign. To make your campaign live and visible to the world, select “Publish” and click “Save” to update the campaign and publish it!
Add The Campaign to Pages and Posts
You can embed the campaign page on any existing or new page in your WordPress site. Once a campaign is live you can click the “Embed” button at the top of the campaign builder. There’s an embed wizard that will guide you through the process.

The wizard can also provide you a campaign shortcode you can use if you wish. This lets you add the campaign to any post, page, or widget area.
For more information on campaign shortcodes, you can read this page in our documentation: How to Use Campaign Shortcodes »
Added to this, you can also use readymade blocks available in the block editor. Edit any post or page, search for ‘Charitable’, and add the Charitable Campaign block.

Now you can choose the campaign from the drop down. Save and publish your page or post and see it live in action.
That’s it you’ve created and published your first donation campaign.
Need more help with this? We’ve created a detailed guide on setting up your first campaign »
Using a Simple Donation Form
If you want to show a simple donation form for the fundraiser, Charitable lets you do that. Once you’ve created your campaign, Charitable will assign a shortcode ID to it. You can find this under the Charitable » Campaigns page.

Then, you can use this shortcode on any page or post on your site.
[charitable_donation_form campaign_id=123]
Replace 123 with the campaign ID.
Read more on how to add your donation form to a different page.
Fundraising Dashboard & Reports
Once you start accepting donations, you’ll be able to monitor progress of your campaigns and incoming donations. You can access your reports under Charitable » Reports.
This will open the Charitable fundraising dashboard where complex donation data is transformed into clear, actionable insights you can actually use.

In the main dashboard, you’ll see visual graphs and charts that make it easy to spot trends without being a data analyst. You’ll also get an overview of:
- Total donations received, any refunds processed, and your net revenue
- Breakdown of payment methods that shows whether donors prefer credit cards, PayPal, or other options.
- Quick view of recent donation activity, including successful payments, failed transactions, and new donor registrations
- Individual campaign performance
- Top donors, recurring donors, and one-time donors
There are also detailed reports available that you can filter and export to use offline.
Learn about built-in reports »
Next Steps
Extensions: Charitable plans (Basic, Plus, Pro and Elite) offer many ways to extend functionality of Charitable. You can offer peer-to-peer fundraising on your site, allow recurring donations for regular donations, and provide PDFs, receipts, and anonymous donations to users.
Check out what extensions we offer and upgrade from lite to PRO to make Charitable more powerful and valuable to you and your donors. Once you have upgraded, you can learn easily how to install and activate Charitable extensions.
Displaying Campaigns: If you have multiple campaigns, you may want to display them as a collection within your posts or pages. There is a WordPress “campaign” block available to insert when using the WordPress editor. You can also accomplish this that with the [campaigns] shortcode.
Customization: Charitable is very customizable, even if you aren’t a professional developer. You can customize text, add custom fields to donation forms, disable or override certain options, and more. These are the best ways to initially discover how you can extend and customize Charitable:
- Check out our documentation.
- View the code snippets available in the library at WPCode and read more how you can use WPCode to install snippets right into Charitable without needing to be a developer.
- Contact us and we’ll be happy to answer your questions!
Translations: If you would like to translate Charitable into your language, there are several ways you can do so.
Lite vs Pro: Charitable offers a Lite version, which is free to use. You’ll only incur a 3% fee on your transactions from our end. We also offer a pro plugin that comes with advanced features such as recurring donations, donor management, donor portal, and much more. See the difference between Charitable Lite vs Pro »
More Information
Here are some of the more popular “how to” guides and help articles for new users:
- Create and Edit Donations in the WordPress Dashboard
- How to Use the Donor Management System
- Connect to Google Analytics
- Issues With Donation Emails Not Sending
- Resend Donation Emails from the Dashboard
- Widgets And Shortcodes
Want more fundraising tips and nonprofit advice?
We regularly share practical guides, proven strategies, and insider tips to help you raise more funds and build stronger donor relationships. Join thousands of nonprofits who get our best content delivered straight to them:
- Join our newsletter – Get weekly tips and exclusive guides in your inbox
- Subscribe to our YouTube channel – Watch step-by-step tutorials and success stories
- Follow us on LinkedIn – Connect with our community and get daily nonprofit insights
- Follow us on TikTok – Insightful & fun videos to help you grow your cause
- Follow us on Instagram – Fun reels with non-profit insights and tips
No fluff, just actionable advice from people who understand the challenges you face every day.
Frequently Asked Questions (FAQ)
I’m completely new to Charitable. Where should I start?
Start with the Setup Wizard that appears when you first install Charitable. It takes about 5 minutes and will guide you through the essential configuration steps including payment setup and creating your first campaign. If you missed the wizard, you can access all these settings manually through Charitable » Settings.
Do I need to install any additional plugins to accept donations?
No! Charitable includes built-in payment gateways (Stripe, Square, PayPal, and Offline Donations) that work right out of the box. No additional plugins required for basic functionality.
Can I test the donation process before going live?
Yes! Enable “Test Mode” under Charitable » Settings » Payment Gateways. This allows you to test donations without processing real payments. Make sure your payment gateways are using test API keys when in test mode.
What’s the difference between displaying donation forms “on the same page” vs “on a separate page”?
- Same page: The donation form appears directly on your campaign page
- Separate page: Donors are redirected to a dedicated donation page
- Modal: The form appears in a popup overlay
Choose based on your preference for user experience and page design.
Should I enable “Only Show Required Fields” for my donation forms?
Choose “Yes” if you want the simplest donation experience with minimal fields (usually just name and email). Choose “No” if you need to collect additional donor information for follow-up communications or plan to add custom fields later.
What pages does Charitable automatically create?
Charitable creates essential pages including login, registration, profile, donation receipt, privacy policy, and terms & conditions pages. You can customize these later or replace them with your own pages.
Which payment gateway should I choose?
Stripe is the fastest to set up and works well for most organizations. Square is great if you already use Square for other business needs. PayPal is familiar to many donors. You can enable multiple gateways to give donors more options.
What are “Offline Donations” and when should I use them?
Offline Donations are perfect for bank transfers, checks, or other non-online payments. Enable this if you accept donations through methods other than online payments. It’s also useful for testing without connecting a payment gateway.
How do I know if my payment gateway is working correctly?
Use Test Mode to process test donations. Check that you receive confirmation emails and that donations appear in your dashboard. Always test before launching your campaign publicly. Learn how to set up payment gateways.
Can I create multiple campaigns?
Yes! You can create unlimited campaigns. Each campaign can have its own goal, end date, and settings. Use the [campaigns] shortcode or WordPress block to display multiple campaigns together.
What’s the difference between setting a campaign goal and leaving it blank?
With a goal, donors can see progress toward your target amount, which can motivate giving. Without a goal, you have an ongoing campaign with no specific target. Choose based on your fundraising strategy.
How do I add my campaign to my website?
After publishing a campaign, use the “Embed” button in the campaign builder for a guided process. You can also use shortcodes like [charitable_donation_form campaign_id=123] or the Charitable Campaign block in the WordPress editor.
Can I edit my campaign after it’s published?
Yes! You can edit campaign content, settings, and appearance at any time. Changes are saved when you click the Save button.
What emails does Charitable send automatically?
Charitable can send donation receipts to donors, new donation notifications to admins, campaign ending notifications, and more. Most emails are disabled by default – enable only the ones you need under Charitable » Settings » Emails.
How do I customize the donation receipt email?
Go to Charitable » Settings » Emails, enable “Donor: Donation Receipt,” then click “Email Settings” to customize the subject line, headline, and body text. Use email tags to include dynamic content like donor names and donation amounts.
You may want to read Unlocking Donor Loyalty: Why Your Donation Receipt Email is More Important Than You Think.
What if donation emails aren’t sending?
Check your WordPress email settings, ensure your hosting provider allows email sending, and verify that emails aren’t going to spam folders. Consider using an SMTP plugin for more reliable email delivery.
Where can I see my donation reports?
Go to Charitable » Reports to access your fundraising dashboard. You’ll see visual graphs, total donations, payment method breakdowns, recent activity, and individual campaign performance.
Can I export my donation data?
Yes. The Reports section includes detailed reports that you can filter and export for offline use or integration with other tools.
How do I manage recurring donations?
Recurring donations are available in the Charitable Pro plugin (for Plus plans of higher). This feature allows donors to set up automatic monthly or yearly donations.
I made changes to settings but they’re not showing up. What should I do?
Always click “Save Changes” after making any modifications. If changes still don’t appear, try clearing your website cache if you’re using a caching plugin.
Can I customize the appearance of my donation forms?
Yes. You can customize colors, form templates (standard or minimal), and field display options. For more advanced customization, check the documentation for custom CSS and code snippets.
What’s the difference between Charitable Lite and Pro?
Charitable Lite is free but includes a 3% transaction fee. Pro plans eliminate this fee and include advanced features like recurring donations, donor management, peer-to-peer fundraising, and more payment gateways.
Can I translate Charitable into other languages?
Charitable supports multiple translation methods. See How to Translate Charitable.
How do I add custom fields to donation forms?
Custom fields are available in Pro plans. You can add fields for additional donor information that suits your organization’s needs.
Can I integrate Charitable with Google Analytics?
Yes. See How to connect Charitable to Google Analytics to track donation conversions and campaign performance.
Where can I get support if I have issues?
- Free users: Use the WordPress.org support forums
- Pro users: Contact support directly for priority assistance
- Documentation: Check the comprehensive documentation library
- Community: Join the newsletter and follow social channels for tips and updates
Are there video tutorials available?
Yes! Subscribe to the Charitable YouTube channel for step-by-step tutorials and success stories.
Need support? Have a question? If you are a lite/free user of Charitable, you can reach out to our team on the WordPress.org support forums. If you have an active license, feel free to reach out to us directly for priority support.