Installation
Installing Charitable Ambassadors is the same as installing any other Charitable extension. If you’re not sure how to do that, we recommend first reading our guide to installing Charitable extensions.
Setup
Once you have Charitable Ambassadors installed and activated, there are a few final steps required before your supporters can start creating peer to peer fundraisers or crowdfunding campaigns on your website.
Setting up Ambassadors pages
If you have previously created a Profile page in Charitable, using the [charitable_profile] shortcode, then Charitable Ambassadors will automatically set up a couple pages for you, relative to the URL of your Profile page.
Assuming you have pretty permalinks turned on, you will find these located at:
| Page | Purpose | Location |
|---|---|---|
| Campaign Submission page | This is where Ambassadors create and submit a campaign. | https://www.yoursite.org/{profile page slug}/submit-campaign/ |
| My Campaigns page | This is where Ambassadors can see their existing campaigns. | https://www.yoursite.org/{profile page slug}/my-campaigns/ |
Prefer a little more control over these pages? Read on to find out how you can create your own pages below.
Optional: Create a custom Campaign Submission page
Creating a Campaign Submission page is simple enough:
- Go to Pages > Add New.
- Give your campaign a name and in the content area, add this shortcode:
[charitable_submit_campaign]. - Publish your page.
- Go to Charitable > Settings > General.
- For the “Campaign Submission Page” setting, select the page you just created.
- Click on Save Changes.
Note: If you previously add the automatically generated “Submit a Campaign” page to your menu, you will need to update this to the new one. Simply edit your menu, removing the old page and adding your new one.
Optional: Create a custom My Campaigns page
Creating a custom My Campaigns page is the same basic process as described above for creating a Campaign Submission page:
- Go to Pages > Add New.
- Give your campaign a name and in the content area, add this shortcode:
[charitable_my_campaigns]. - Publish your page.
- Go to Charitable > Settings > General.
- For the “My Campaigns Page” setting, select the page you just created.
- Click on Save Changes.
Note: If you previously add the automatically generated “My Campaigns” page to your menu, you will need to update this to the new one. Simply edit your menu, removing the old page and adding your new one.
Adding your Ambassadors pages to a menu
To do that, you can simply add them to one of your WordPress menus.
- Go to Appearance > Menus in your WordPress dashboard.
Note: If you prefer to edit menus while previewing the changes in your site, go to Appearance > Customize > Menus instead. - Select the menu where you would like to add the page links.
- From the menu items box, click on Charitable.
Note: If you don’t see a “Charitable” box, make sure you are on the latest version of Charitable and check Screen Options to make sure that the “Charitable” option is checked there. - Check the “Submit a Campaign” and “My Campaigns” pages and click Add to Menu.
- Click on Save Menu.
Note: If you’re doing this in the Customizer, don’t forget to hit Save & Publish when you’re done.
At this point, your website is ready for your supporters to start creating campaigns!
Settings
Now that you have successfully set up the ability for your supporters to create campaigns, we recommend taking a little while to become familiar with the options available to you with Charitable Ambassadors.
If you followed the steps above showing how to create custom My Campaigns and Campaign Submission pages, you will have already noticed that you can configure some Ambassador-specific page settings via Charitable > Settings > General.
Most other settings are just a couple tabs over, accessible via Charitable > Settings > Ambassadors.
General Settings
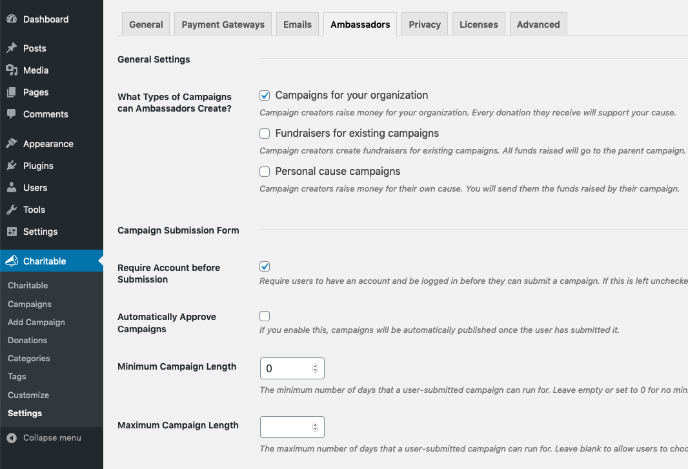
What Types of Campaigns can Ambassadors Create?
Out of the box, Charitable supports three different types of campaigns:
| Type of campaign | How it works | Who receives the funds |
|---|---|---|
| Campaigns for your organization | A campaign that raises money for your organization. It’s considered a top-level campaign and isn’t generally part of a bigger fundraising campaign. | Your organization |
| Fundraisers for existing campaigns | A campaign that is raising funds for an existing campaign. This is great if you’re running a large fundraising campaign and would like people to be able to create fundraising pages for it. | Your organization |
| Personal cause campaigns | A campaign that raises money for the creator’s own cause. This is suitable for crowdfunding websites. If you’re a non-profit, you’ll probably want to leave this unchecked. | The campaign creator |
Campaign Submission Form Settings
These settings apply to all campaign submissions, regardless of the type of campaign.
Require Account before Submission
Choose whether campaign creators should create an account before they can submit a campaign, or afterwards.
Note that in either case, they will be required to create an account eventually.
For a more detailed outline of these two options, read this:
Automatically Approve Campaigns
When this option is enabled, campaigns are automatically marked as Publish and can start receiving donations straight away.
If you would prefer to manually approve campaigns, leave this turned off.
Minimum Campaign Length
Choose the minimum length of campaigns on the website, in days. If you leave this empty or set it to 0, there is no minimum campaign length.
Maximum Campaign Length
Choose how long campaigns can run for. If you want to allow campaign creators to create campaigns of any length, leave this blank.
Field Settings
Here you can customize how different fields work in the campaign form:
| Field | Options |
|---|---|
| End Date | Choose whether campaign creators will choose a specific end date for their campaign, or set a length instead. |
| Categories | Show the category field as a list of checkboxes, a drop-down select box, or disable it altogether. |
| Tags | Show the tag field as a list of checkboxes, a drop-down select box, or disable it altogether. |
| Donation Options | Choose whether to allow campaign creators to set suggested donation amounts for their campaign. |
| Recurring Donations | Choose whether campaign creators can enable recurring donations for their campaign. Note: this only shows if the Donation Options field is enabled and you have the Recurring Donations plugin active. |
Personal Cause Settings
If you have not enabled “Personal cause campaigns” option, you will not see these settings.
How Will You Send Money to Ambassadors?
Choose how you will send money to campaign creators when they receive donations.
There are currently two main options, outlined below.
| Option | Distribution Type | Description |
|---|---|---|
| PayPal | Manual | You will manually transfer funds to the campaign creator’s PayPal account. |
| Stripe Connect | Automatic | When a donation is made, the money is automatically sent to to the campaign creator. Note: This option is only available if you have the Stripe Connect plugin activated. |
For more about how Stripe Connect works, read its documentation:
Email Marketing Settings
If you don’t have the Newsletter Connect extension active, you will not see these settings.
Subscribe Campaign Creators to Email Marketing List
Choose the opt-in mode for campaign creators. Options include:
- Disabled – Campaign creators will not be added to an email marketing list.
- Opt-in checkbox, not checked by default
- Opt-in checkbox, checked by default
- Automatic opt-in – Campaign creators will automatically be added to an email marketing list.
Email Marketing List
Choose the list that you would like campaign creators to be added to.
Campaign Creator Donations Report Settings
These settings apply to the exportable donations reports that can be provided to campaign creators.
Allow Campaign Creators to Export Donation History
Choose whether campaign creators should be able to access a CSV report of all donations made to their campaign.
Include Personal Details for Donors
If campaign creators can access the report, choose whether they will be able to see the name, email, address and phone number of any non-anonymous donors to their campaigns.
Any donations from anonymous donors will automatically have those fields left out.
Campaign Settings
Charitable Ambassadors adds a few new fields to the campaign editor in the admin, inside of the Campaign Settings meta box.
In the left hand column of the meta box, you will see several new tabs:
Submission Details
Type of Campaign
The type of campaign submitted by the user. One of:
- Campaigns for your organization
- Fundraisers for existing campaigns
- Personal cause campaigns
Parent Campaign
This campaign’s parent campaign. The parent campaign will reflect any donations received by this campaign.
Submission Data
All of the details given by the campaign creator when they submitted their campaign.
Peer to Peer Fundraising
If you have not enabled “Fundraisers for existing campaigns” option, you will not see this tab.
Allow peer to peer fundraisers for this campaign
Whether to enable peer to peer fundraisers (i.e. child campaigns) for this campaign.
Supported fundraiser types
Choose whether to allow team and individual fundraisers, just teams, or just individuals.
Show team members on team pages
Choose whether to display the team members on team pages.
Fundraiser title
Choose whether fundraisers can set their own title, or whether a title will be automatically generated based on their name.
Fundraiser end date
Choose whether fundraisers can set an end date for their fundraiser.
If the parent campaign has an end date, this option will be disabled and all peer to peer fundraisers will automatically share the parent campaign’s end date.
Fundraiser goal
Choose whether fundraisers can set a goal for their fundraiser.
Default fundraiser goal
Set a default goal to use for peer to peer fundraisers. Leave empty to have no default goal.
Fundraiser content
Choose whether fundraisers can add their own text about the fundraiser, or whether the default fundraiser content should always be used.
Default fundraiser content
The default content to show on peer to peer fundraising pages.
Fundraiser featured image
Choose whether fundraisers can upload their own feature image, or if the default image should always be used.
Default featured image for fundraisers
Set a default featured image for all peer to peer fundraising pages.
Emails
Charitable Ambassadors adds quite a few new emails, which can be optionally enabled and customized to suit your needs.
| Recipient | When it is sent | |
|---|---|---|
| Admin: New Campaign Notification | One or more administrators | When a new campaign has been submitted by an Ambassador. |
| Admin: Submitted Campaign Requires Action | One or more administrators | When a campaign has been submitted but the Ambassador has to complete some user action. |
| Campaign Creator: Submitted Campaign Requires Action | The campaign creator | When the campaign creator has submitted a campaign, but they have to complete some action before it can be processed. |
| Campaign Creator: Campaign Submitted | The campaign creator | When the campaign creator has submitted a new campaign. |
| Campaign Creator: Campaign Approved | The campaign creator | When the campaign creator’s campaign has been approved by a site administrator. |
| Campaign Creator: Campaign Ending | The campaign creator | When the campaign creator’s campaign is ending in a few days. |
| Campaign Creator: Campaign Ended | The campaign creator | When the campaign creator’s campaign has ended. |
| Campaign Creator: Donation Notification | The campaign creator | When the campaign creator’s campaign has received a donation. |
| Team Member: Invitation to Join Team | Team member | When someone is invited to join a team. |
Shortcodes
[charitable_submit_campaign]
The [charitable_submit_campaign] shortcode allows you to display a campaign form on a page.
For more information about its optional arguments, with usage examples, see the shortcode docs: Submit Campaign Shortcode.
[charitable_my_campaigns]
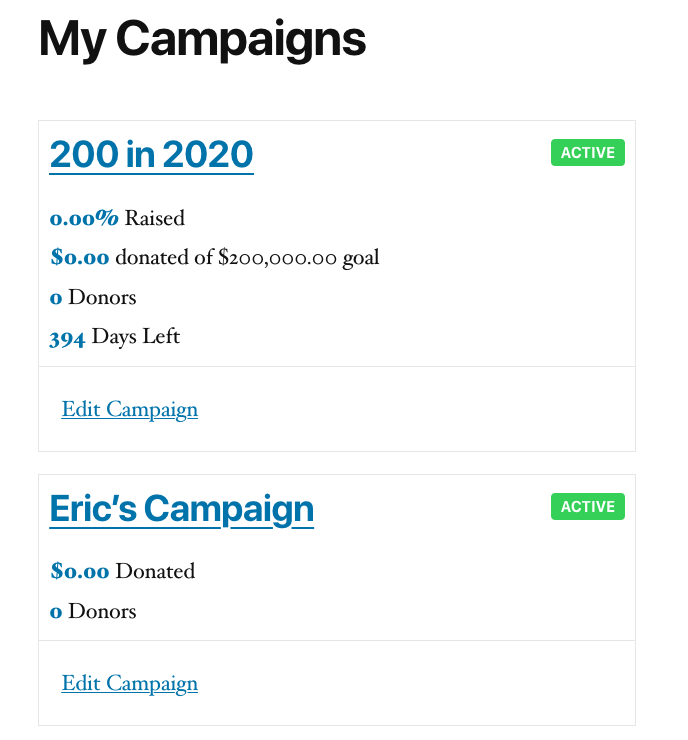
The [charitable_my_campaigns] shortcode displays the logged in user’s campaigns. There are no parameters.
Usage
[charitable_my_campaigns][charitable_creator_donations]
The [charitable_creator_donations] shortcode allows you to add a table showing the donations received by the current logged in user.
Usage
[charitable_creator_donations][charitable_fundraise_button]
The [charitable_fundraise_button] shortcode adds a link or button that people can click to go to the fundraising form for a particular campaign.
See its documentation for more information about its parameters: Fundraise Button Shortcode.
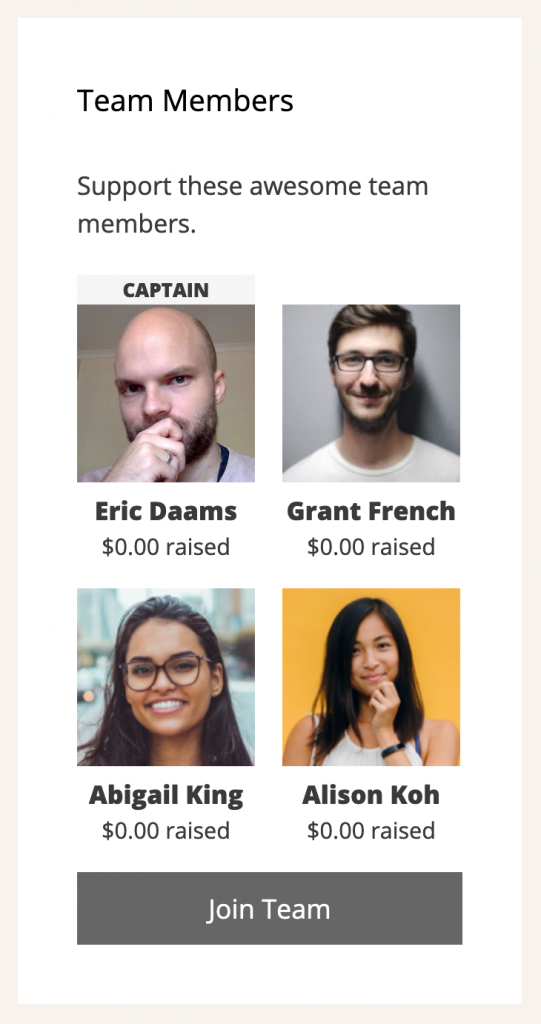
[charitable_team_members]
The [charitable_team_members] shortcode adds a grid showing a particular fundraising team’s members.
Find out more: Team Members Shortcode.
Widgets
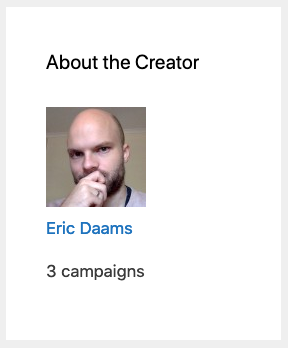
Campaign Creator Widget
Show information about the creator of a campaign. This can be configured to show for the campaign currently viewed, or to show the creator of a specific campaign.
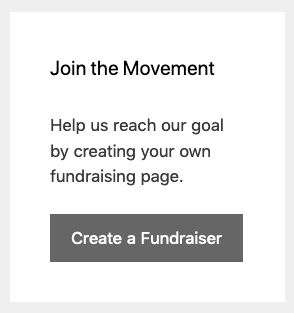
Fundraise Button Widget
Show a button for people to create a fundraiser for a campaign.
You can set a widget title, choose the the campaign, customize the button text, add an optional description and display either a link or a button.
Team Members Widget
The Team Members Widget allows you to show all the team members in the the current team, or a specific team. You can set a title, customize the button text, choose how many columns to show the members in, and add an optional description.