Want a real, working donation form on your homepage, a landing page, or in the middle of a blog post, without a shortcode and without sending donors to a separate page?
The Donation Form block does exactly that. This guide walks you through adding it, configuring it, and styling it to match your site.
Before You Start
The Donation Form block is a native WordPress block that renders a complete, working Charitable donation form directly inside the block editor, on any page or post. Before you add one, make sure you have:
- Charitable Pro 1.8.17 or later installed and activated.
- At least one published campaign, unless you plan to use the block only on a campaign template with “Use current campaign.”
Important Note: The Donation Form block is available in Charitable Pro and is not part of the free Lite plugin.
Important: Place only one Donation Form block per page. Charitable’s server-side rendering and caching exclusions are built around a single live form per page, and a second instance is unnecessary for donors and can create confusing duplicate submissions.
Adding the Donation Form Block to a Page or Post
The block works like any other block in the WordPress editor, so there’s no separate screen or wizard to learn.
- Open the page or post where you want the form to appear, in the WordPress block editor.
- Click the block inserter (+) and search for Donation Form.
- Click the Donation Form block to insert it.
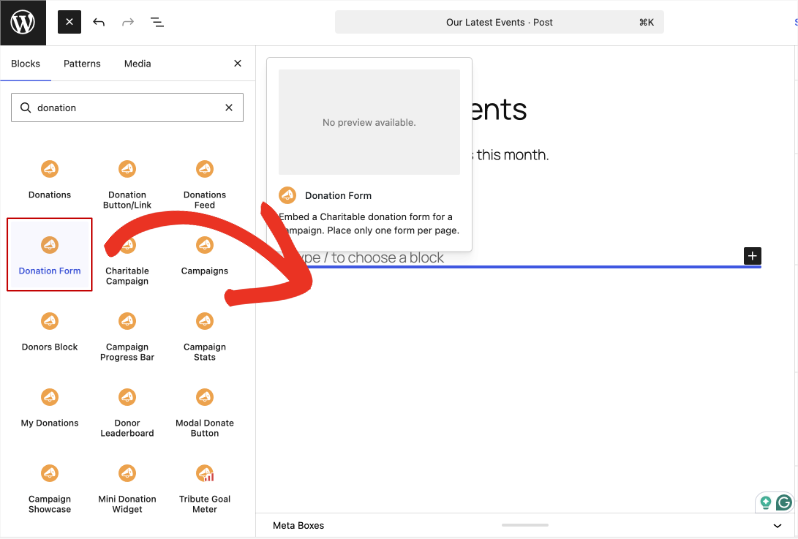
Right after you insert it, the block shows a placeholder asking you to select a campaign. It won’t render a form until a campaign is chosen, so that’s the next step.
Choosing a Campaign
The block needs to know which campaign’s donation form to display. You set this from the block settings sidebar, not from the block itself.
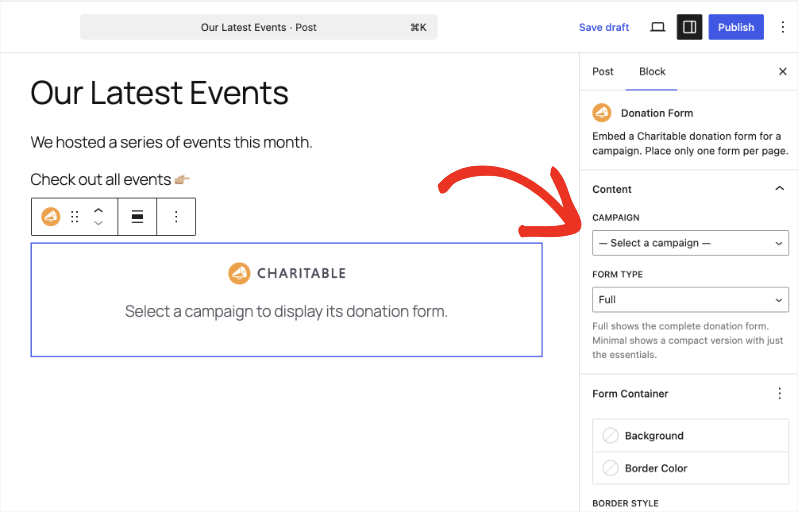
- With the block selected, open the block settings sidebar (click the block, then the settings icon if the sidebar isn’t already open).
- Under Content, open the Campaign dropdown.
- Choose a published campaign, or select Use current campaign.
The two options behave differently:
- A named campaign – The block always shows that campaign’s form, no matter where the page is published. Use this on a homepage, landing page, or blog post promoting a specific campaign.
- Use current campaign – The block binds dynamically to whichever campaign the visitor is currently viewing. Use this on a campaign template so every campaign automatically gets a donation form in the same spot, without editing each campaign individually.
As soon as a campaign is selected, the block editor shows a full-fidelity preview: the campaign’s real donation amounts, its default selected amount, the custom-amount field if enabled, and the actual field order. It’s not a gray placeholder, so what you see while editing is what donors will see.
Choosing Full or Minimal
Still under Content in the block settings, the Form Type dropdown controls how much of the form is shown:
- Full: Renders the complete donation form: amounts, custom amount, all donor fields, and payment. Use this whenever the form is the main focus of the page.
- Minimal: A compact layout with donation amounts and payment only. Use this in tighter spaces like a sidebar, a footer, or partway through a longer page where a full form would feel heavy.
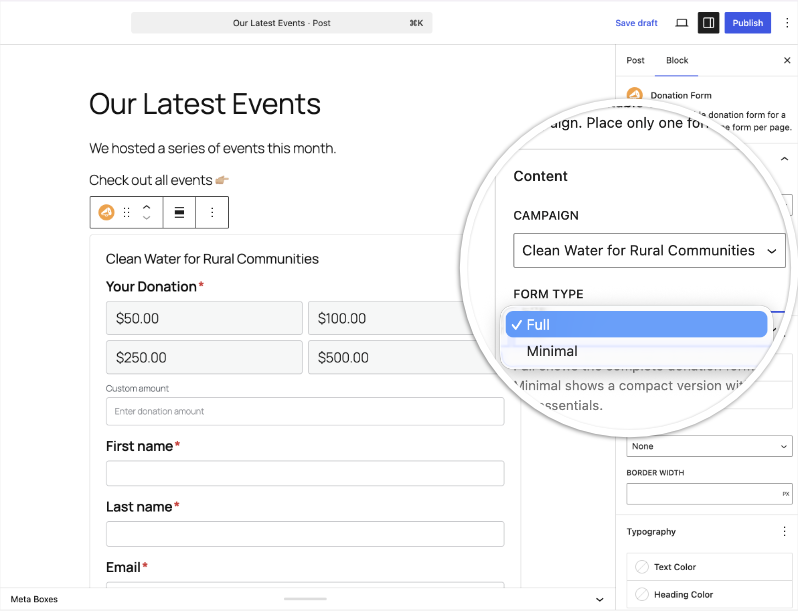
The preview updates immediately when you switch between the two, so you can compare before deciding.
Styling the Form
Below Content, the block settings sidebar has nineteen styling controls grouped into five sections. None of them require CSS or a theme file, and every change updates the live preview as you make it.
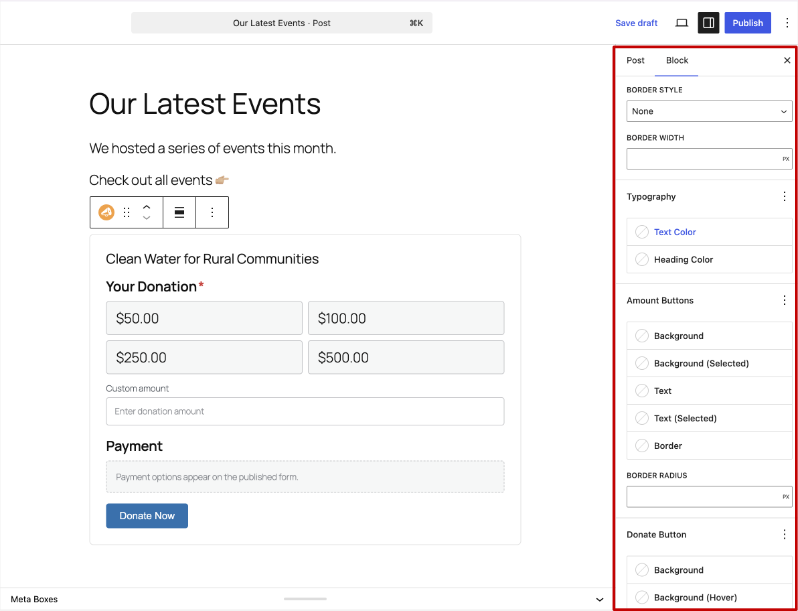
- Form Container: Background color, plus a border with its own style, width, and color, for the box that wraps the whole form.
- Typography: Text color and heading color for the form’s labels and titles.
- Amount Buttons: Background, selected-state background, text color, selected-state text color, border color, and corner radius for the donation amount buttons.
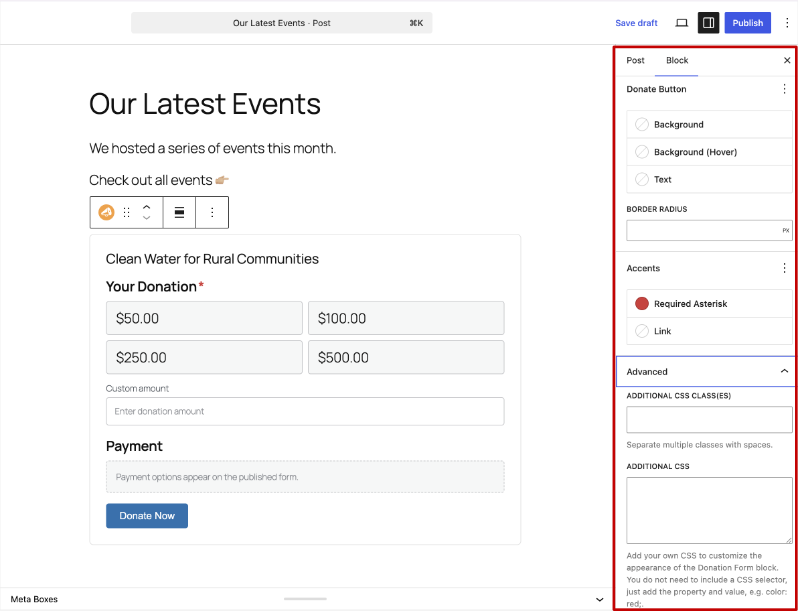
- Donate Button: Background color, hover background color, text color, and corner radius for the submit button.
- Accents: Link color and the color of the required-field asterisk, the small detail that’s easy to overlook but stands out once it clashes with your page.
Pro tip: Set the Form Container background and border first, then work down through Typography, Amount Buttons, and Donate Button. Getting the container right tells you how much contrast the rest of the form needs.
Every block instance gets its own scoped styles, generated specifically for that block. If you place a Donation Form block on more than one page, each one can be styled completely differently, and none of them will affect any other.
Converting an Existing Shortcode to the Block
If you already have a page or post using the [charitable_donation_form] shortcode, you don’t need to remove it and start over.
- Open the page or post that contains the shortcode in the block editor.
- Click into the Shortcode block that holds it.
The shortcode automatically converts to a Donation Form block, already pointed at the same campaign the shortcode specified. From there, you can style it or change its settings like any other Donation Form block.
Note: The shortcode itself still works if you leave it as-is. Conversion only happens when you edit the block that contains it.
Publishing and What Donors See
Once you’re happy with the campaign, form type, and styling, click Publish or Update. The form is now live on that page.
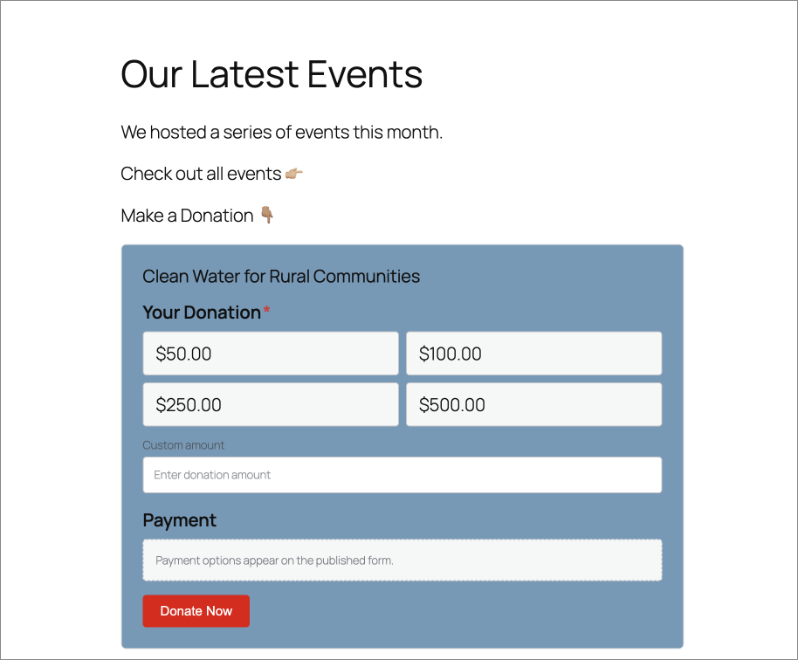
Donors see the same fields, amounts, and payment options they’d get from the standard campaign donation page, rendered securely on the server rather than assembled in the browser. There’s nothing for them to click through to reach it, and nothing extra for them to load.
Note: Any page containing a live Donation Form block is automatically excluded from full-page caching, so donors always see a current, working form. You don’t need to add a manual cache exclusion.
FAQs on Donation Form Block
Does this require Charitable Pro?
Yes. The Donation Form block ships in Charitable Pro 1.8.17 and is not available in the free Lite plugin.
What’s the difference between Full and Minimal?
Full shows the complete donation form with all fields. Minimal shows a compact version with donation amounts and payment only, better suited to sidebars, footers, or tighter spaces.
Can I add more than one Donation Form block to the same page?
You can, but we recommend one per page for the cleanest, fastest experience. Each instance is style-scoped independently, so a second form won’t inherit the first one’s colors.
Will it work with my block theme or full-site editing?
Yes. The block uses standard WordPress block registration and alignment support, so it works with block themes and full-site editing the same way any other core block does.
I set a campaign, but the form isn’t showing my custom fields.
Double-check the custom fields are added to that campaign’s donation form under the campaign’s own builder settings. The block always mirrors whatever fields the campaign itself is configured to collect.
Do my existing shortcodes still work?
Yes. A shortcode keeps working until you edit the block that contains it, at which point it converts to a Donation Form block automatically.
That’s it! You’ve learned how to add, configure, and style the Donation Form block.
Next, you may also want to read how to customize your WordPress donation form without code, or learn more about Charitable’s donation forms.
Helpful Links
🤝 Get help when you need it
Connect with Customer Support →
📑 Find the guide you need
Browse the Documentation Hub →
⬇️ Download proven strategies, campaign ideas, and expert tools
🔗 Let your AI Assistant do the fundraising work for you.
Connect Charitable to your AI assistant →
💸 Get Free Fundraising Resources
Head to the Charitable Fundraising Hub →
🤔 Got questions about Charitable?
Charitable FAQs →
Need help understanding non-profit terms and jargon?
See our Non-Profit Glossary →