
With Charitable Fee Relief, you can allow your donors to cover the processing fees when they donate.
It’s easy and requires zero coding – just a few clicks.
You can also fine-tune the processing fees by setting a fixed fee per donation, calculating the fee as a percentage, or through a mixture of both. This allows you to tweak your settings so that the extra fee your donor pays exactly matches the fee that you will be charged by your payment processor.
For example, if your payment processor charges you 2.9% + ¢30 per donation, you can configure Fee Relief to charge exactly that.
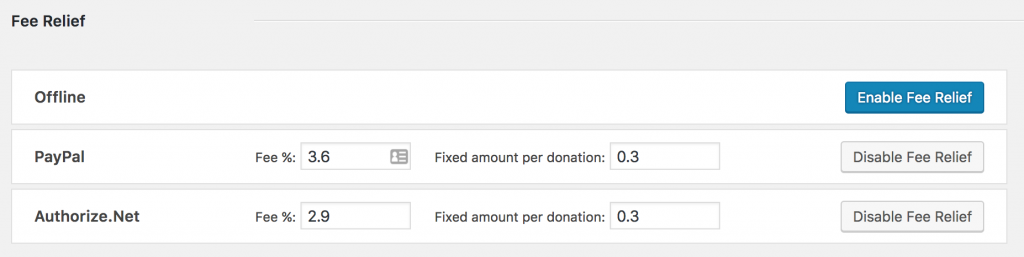
Of course, different gateways charge different fees, so Fee Relief allows you to configure how the fees are calculated on a per-campaign basis. You can also keep Fee Relief disabled for particular gateways:
Let’s get started.
Minimum requirements:
- Recommended: Charitable 1.6.8+
- PHP 5.3+
- Charitable Plus plan
Not yet a Charitable Pro user? Sign up today and get up to 50% off on your plan. We’re confident you’ll love raising funds with Charitable. If, for any reason, Charitable is not the right fit for you, we’ll refund your purchase with our 14-day money-back guarantee. Get Charitable Pro Now »
Not sure Charitable Pro is right for you? Take Charitable Pro for a spin! Try the Charitable Pro Demo →
What’s In This Guide?
How To Install Fee Relief
Installing Charitable Fee Relief is the same as installing any other Charitable addon.
In your WordPress dashboard, go to Charitable » Addons. Here look for “Fee Relief” and install and activate it.
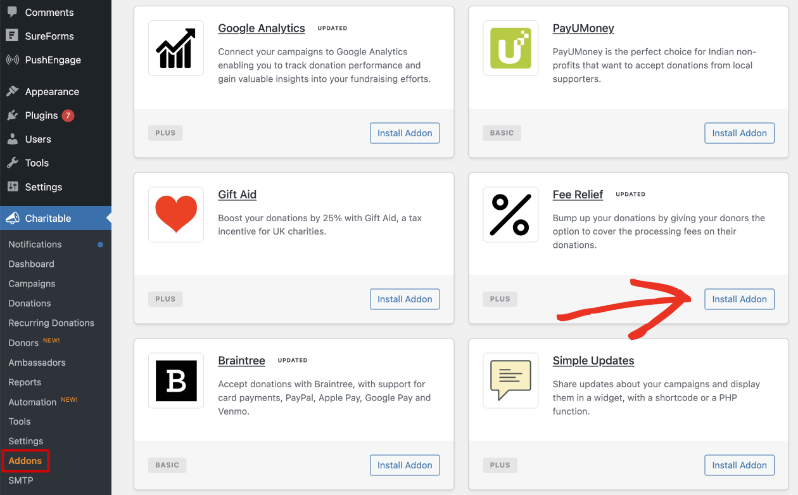
That’s it. You’re ready to use it.
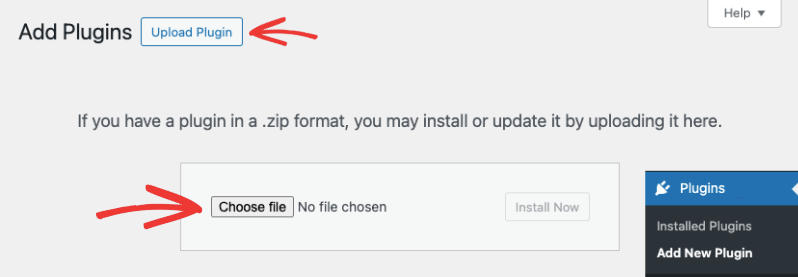
You can also download this addon from your Charitable account under the Downloads tab. Then upload the plugin to your WordPress site under Plugins » Add New » Upload Plugin.
Need more help? We recommend first reading our guide to installing Charitable extensions.
How to Customize Fee Relief Settings
Once you have activated Fee Relief, go to Charitable » Settings » Advanced » Fee Relief.
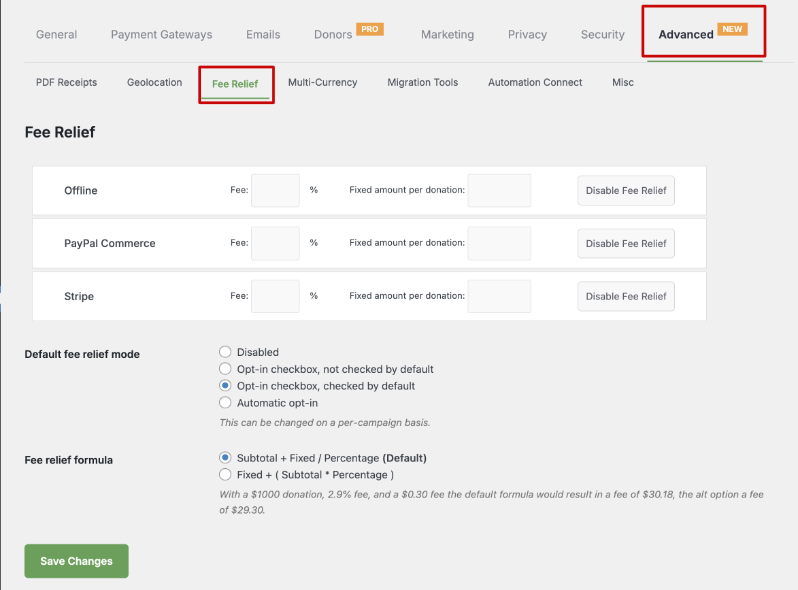
On this page, you’ll see a number of settings. We’ll walk through each one.
Setting Fee Relief for Each Gateway
By default, Fee Relief is enabled for all gateways but the amount or percentage is not set. You can enable and disable Fee Relief for gateways as you wish using the button available on the right.
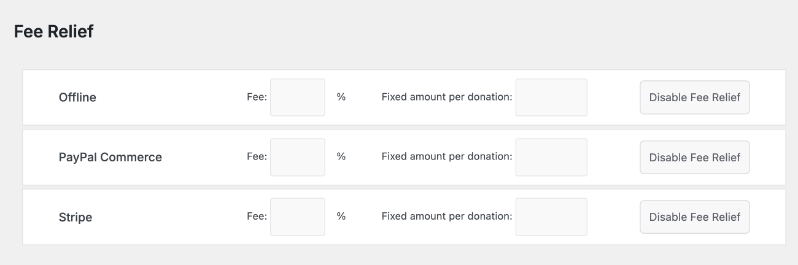
Next, you can set a fee as a combination of a percentage and a fixed amount per donation. These settings are designed to correspond to the way many payment gateways set their fees.
For example, PayPal commonly charges 2.9% and ¢30 per donation. To cover the PayPal fee, then, you would enter 2.9 in the “Fee %” field and 0.30 in the “Fixed amount per donation” field.
Choosing The Fee Relief Mode
Fee Relief has four different modes of integrating with your donation form, and the mode can be changed on a per-campaign basis.
By default, Fee Relief will add a checkbox to your donation forms to allow donors to cover the processing fees. This can be set to be checked or unchecked by default.
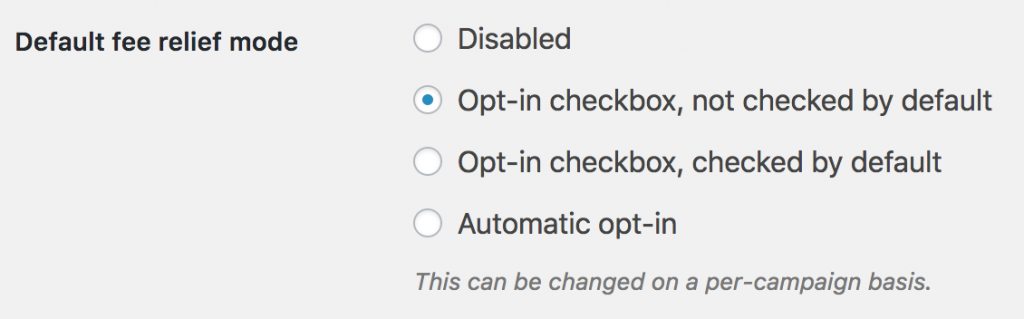
The 4 modes you can use include:
- Disabled: Fee Relief is not enabled on campaigns by default. Enable it for specific campaigns via the campaign settings.
- Opt-in checkbox, not checked by default: Show an un-checked checkbox in the donation form. The donor must deliberately check the box to pay the processing fees.
- Opt-in checkbox, checked by default: Show a checked checkbox in the donation form. Unless the donor un-checks the box, they will pay the processing fees.
- Automatic opt-in: Automatically add the processing fees onto the donation total, without displaying a checkbox in the donation form. The donor cannot opt-out of paying the processing fees.
This can be changed on a per-cmapaign basis. We’ll show you how to do that in the next section.
Deciding Fee Relief Calculation
Charitable makes it easy to decide what kind of formula you want to use.
You can choose:
Subtotal + Fixed/Percentage – This is the default setting
Fixed + (Subtotal * Percentage)
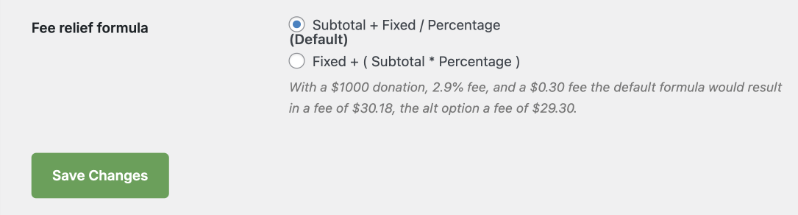
With a $1000 donation, 2.9% fee, and a $0.30 fee the default formula would result in a fee of $30.18, the alt option a fee of $29.30.
Changing Fee Relief in Individual Campaign Settings
Open any campaign in the campaign builder, and go to the Settings » Fee Relief tab. In case you haven’t enabled it, you’ll see an option to enable Fee Relief here.
Next, you can choose your Fee Relief mode. This mode will apply only to this campaign.
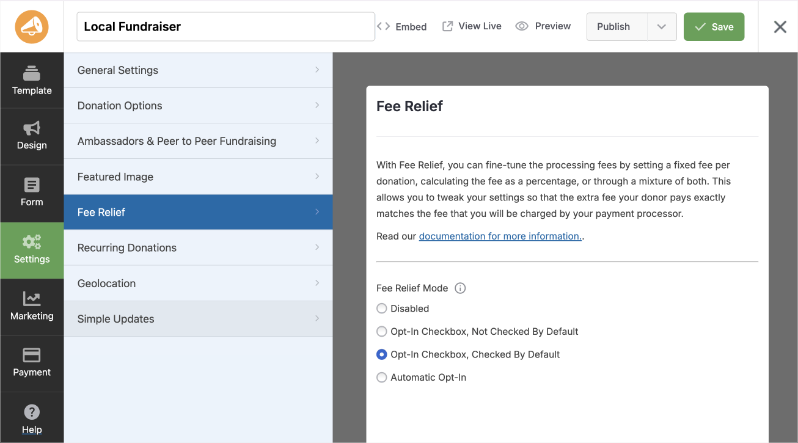
Finally, you can keep Fee Relief disabled site-wide and only enable it for particular campaigns.
The choice is yours.
Make sure you hit the Save button at the top-right corner of the screen.
That’s it. You now know how to use Fee Relief in Charitable. For more about this feature, visit the Fee Relief feature page »
Supported Gateways for Fee Relief
Fee Relief supports the following gateways:
Fee Relief is available in the Charitable Pro plugin (Plus plan or higher).
Not yet on Charitable Pro? You can get up to 50% off when you sign up for or upgrade to Charitable Pro. We want to ensure that you can try the advanced fundraising features like Recurring Donations, Donation Recovery, and more at a significantly reduced cost.
Join over a million satisfied Charitable Pro users today. Every purchase comes with a 14-day money-back guarantee, ensuring you’re supported every step of the way.
If you have any questions or need assistance, our support team is ready to help you make the most of these new features.
Not sure Charitable Pro is right for you? Take Charitable Pro for a spin! Try the Charitable Pro Demo →
More Documentation
- Fee Relief Developer hooks
- Setting Up Payment Gateways
- How to Use the Donor Dashboard
- How to Use the Donor Management System
Helpful Links
🤝 Get help when you need it
Connect with Customer Support →
📑 Find the guide you need
Browse the Documentation Hub →
⬇️ Download proven strategies, campaign ideas, and expert tools
Get the Fundraising Kit →
💸 Get Free Fundraising Resources
Head to the Charitable Fundraising Hub →
🤔 Got questions about Charitable?
Charitable FAQs →
Need help understanding non-profit terms and jargon?
See our Non-Profit Glossary →
Charitable Has 1+ Million Downloads!
Trusted by millions to power successful fundraising campaigns. Try Charitable risk-free today.
✅ 14-day money-back
✅ Transparent pricing
✅ Code-free setup


