
Charitable Documentation

Learn how to make the most of Charitable with clear, step-by-step instructions.

How to Set Up Cash App in Charitable

Enabling Cash App payments provides your donors with a convenient and secure way to donate quickly from their phones.

This tutorial will guide you through the process of setting up Cash App payments in Charitable.

Cash App payments can be enabled through the Stripe payment gateway within Charitable.

Note: The Cash App payment method is available exclusively for Stripe accounts registered in the United States.

Step 1: Enabling Stripe Payments

Before you can enable Cash App payments, you must first ensure that Stripe is enabled within Charitable.

In your WordPress dashboard, navigate to Charitable » Settings » Payment Gateways tab.

If Stripe is not already enabled, activate it. Then follow our guide to connect your Stripe account to Charitable.

After enabling Stripe and saving your changes, click the ‘Gateway Settings’ button.

This will open the Stripe configuration page where you can manage various payment methods, including Cash App.
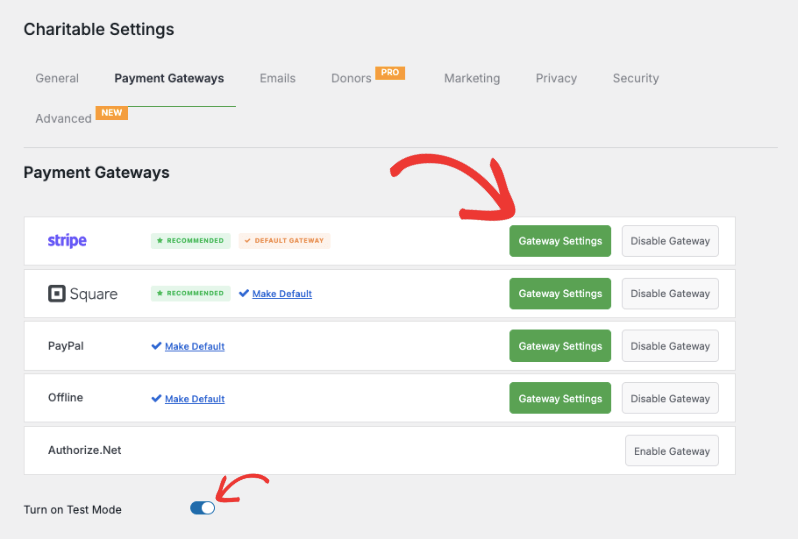
Stripe gateway settings

We recommend turning on Test Mode and saving your changes. This will allow you to thoroughly test the payment process without processing real transactions.

Step 2: Accessing Gateway Settings

Inside the Gateway Settings page, enable Cash App from the list of available payment methods. All you have to do is click the toggle siwtch to turn it on.
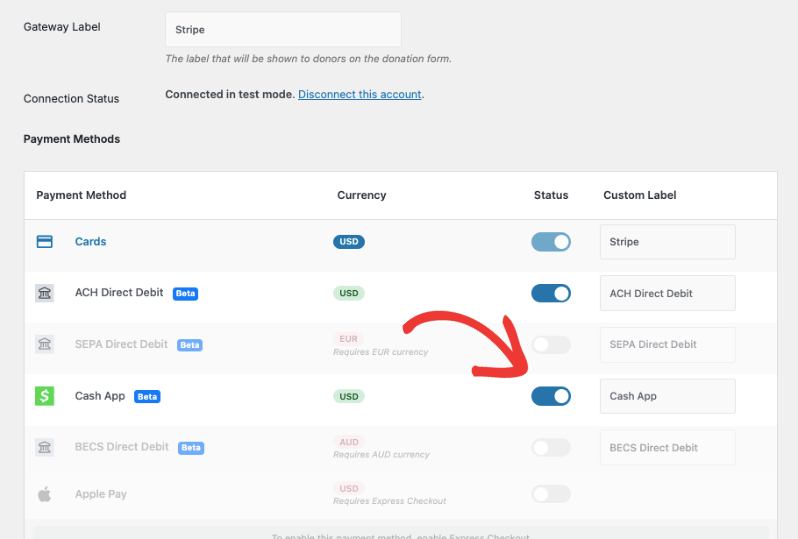
Enable CashApp

On the same page, you can also configure other Stripe settings like Express Checkout and Stripe Checkout.

You can also choose the layout of your credit card fields and how they appear on your donation form.
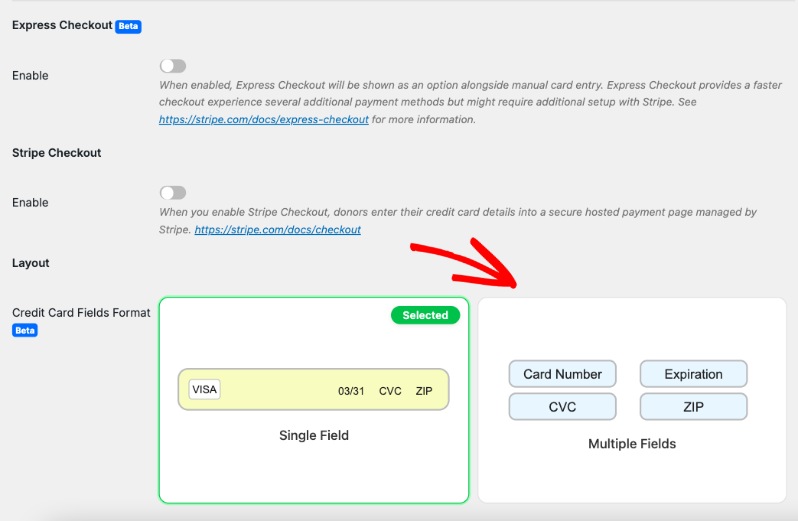
Credit card field formats in donation form

Next, you’ll need to add your statement descriptor. This is the description that will appear on your donors’ bank statements. By default, it shows the campaign title.

Below the statement descriptor settings, you’ll find fields to add your Stripe Live Key and Live Publishable Key, as well as your Test Keys if using Test Mode.
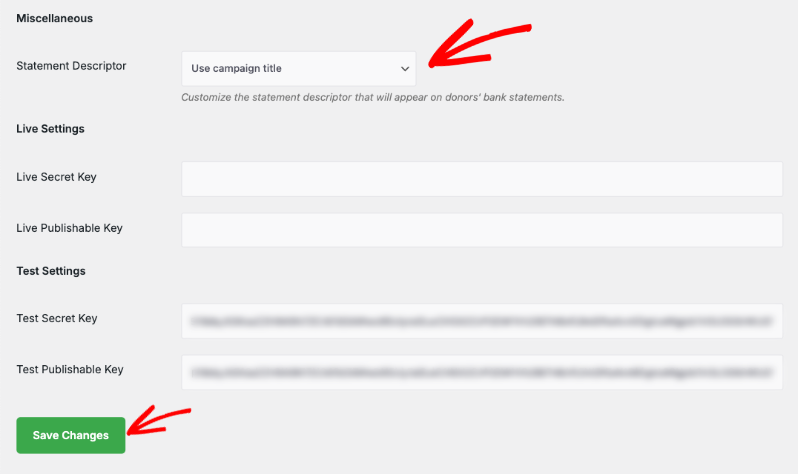
Stripe keys

Remember to save your settings by clicking the ‘Save Changes’ button after making any modifications.

Step 3: Testing Your Cash App Setup

Once you’ve saved your settings, it’s time to test your Cash App integration!

Navigate to a campaign page on your website. Initiate a donation to access the donation form.

In the Payment section, you should now see Cash App as a payment option.
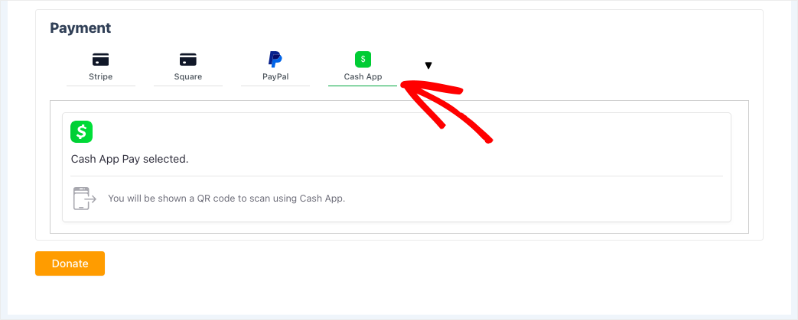
Cash App in payment form

If you don’t see it immediately, a dropdown menu with additional payment options will be available.

Select Cash App here.
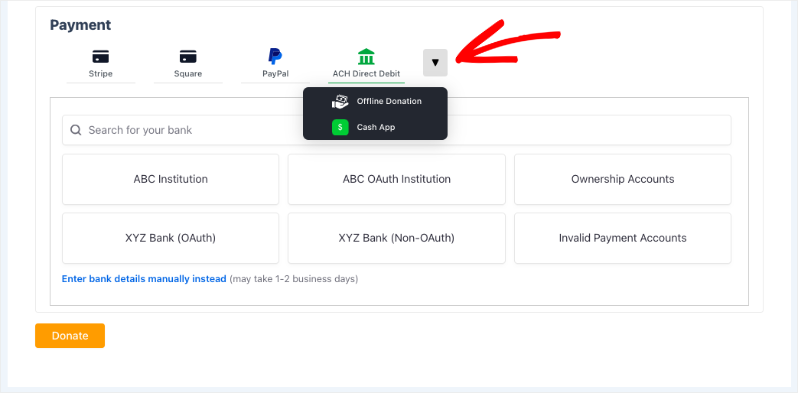
Dropdown menu for more payment options

A Cash App QR code will appear, prompting you to scan with your phone’s camera to pay. Follow the on-screen instructions to complete the donation.

If you are using test mode, you can simulate a scan.
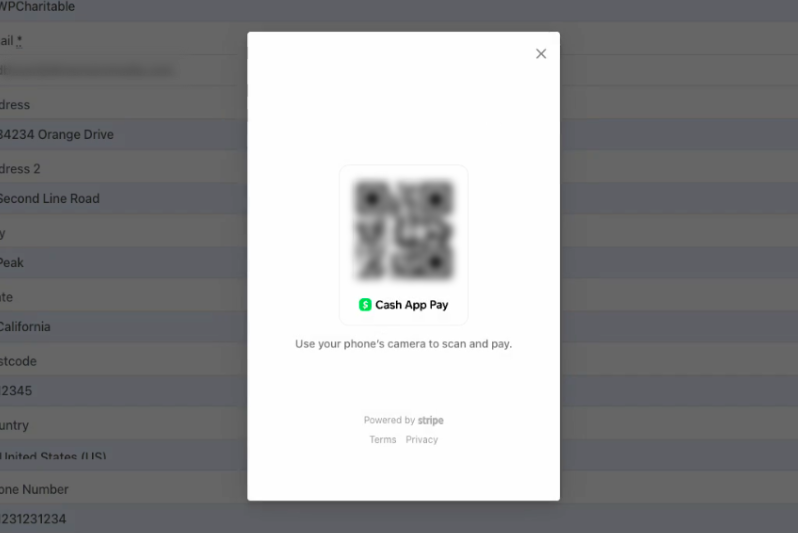
Scan Cash App page

This will take you to the Cash App Pay test payment page.

Here, you can authorize a test payment and even check a fail test payment.
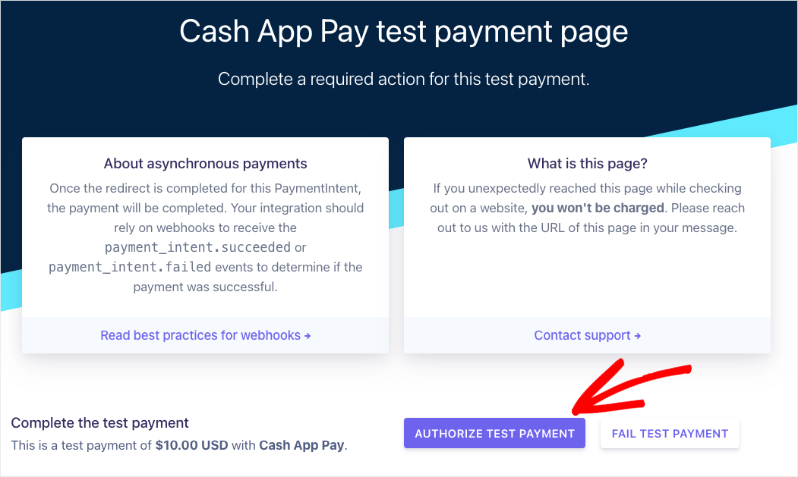
Cash App Pay test payment

When your payment is successful, you’ll see the donation receipt appear on screen.
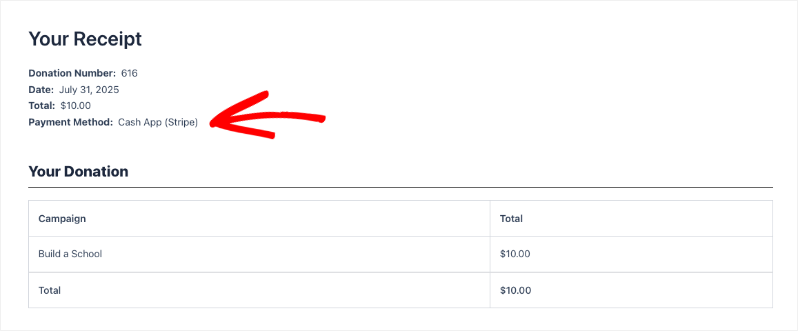
Cash App donation receipt

Congratulations! You have successfully set up and tested Cash App via Charitable!

Viewing Your Cash App Donations

Now that you’ve successfully set up Cash App, let’s explore how to view and manage your donations.

You can find all your donation records under Charitable » Donations. Here, all donations are organized neatly for easy access.
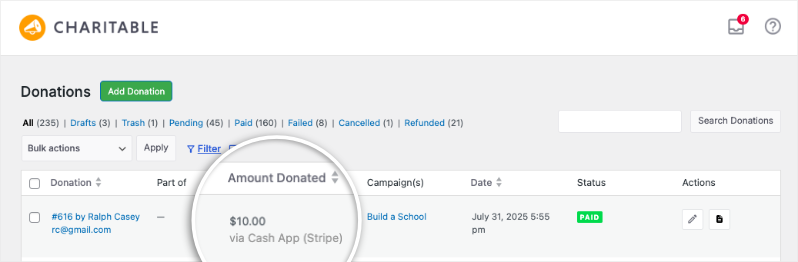
Cash App Payment method used in donations tab

You’ll see key information like the donor’s name, the donation amount, the payment gateway used – in this case, Cash App (Stripe), the campaign name, the date of the donation, and the payment status.

If you click to view or edit a specific donation record, you’ll find detailed payment method information, including the specifics of the Cash App transaction. This allows you to easily review and track payments received via this method.
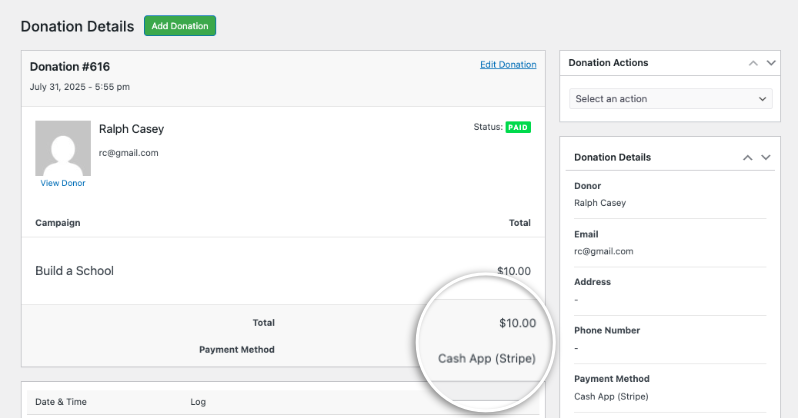
Cash App payment method in donation record

That’s it! You now know how to set up and view your Cash App donations within Charitable.

FAQs – Cash App Payments in Charitable

Here are some frequently asked questions regarding setting up and using Cash App payments in Charitable:

What is Cash App?

Cash App is a secure payment method that allows donors to make donations directly from their phone.

Do I need a separate account to process Cash App?

No, you can process Cash App payments through your existing Stripe account.

What information do you need to provide to enable Cash App?

You will need your Stripe live keys (if applicable) and to ensure Stripe is enabled.

What is a QR code?

A QR code is a code that can be scanned with your phone’s camera to quickly make a payment.

How can I test Cash App Payments?

You can use Stripe’s test mode to simulate a scan and check a success or fail payment.

Where can I view my donation records?

You can view all donations under Charitable » Donations.

Interested in offering more payment options to your donors? See our list of payment integrations »


Still have questions? We’re here to help!

Last Modified:

What's New In Charitable

View The Latest Updates
🔔 Subscribe to get our latest updates
📧 Subscribe to Emails

Email Subscription

Join our Newsletter

We won’t spam you. We only send an email when we think it will genuinely help you. Unsubscribe at any time!

ambassadors New

👤 Creator Profiles: Put a Face to Every Peer-to-Peer Campaign

Ambassadors 3.3.0 now provies Creator Profiles — giving your supporters a permanent, shareable public home that turns one-time fundraisers into ongoing relationships.

👤 Public Creator Pages: Give every fundraiser an instant, clean landing page at /creator/their-name/ to showcase their custom avatar, bio, and a browsable grid of their campaigns.

📊 Proof of Impact: Boost donor trust by displaying site-wide milestones on the profile—like total funds raised and total donor counts.

💳 Interactive Hover Cards: When donors hover over a creator’s name on a campaign page, a compact card expands with their bio and social handles right at the moment of decision.

📍 Responsible Location Sharing: Allow creators to safely show local supporters where they are based using only city, state, and country details.

🛠️ Self-Serve Customization: Fundraisers can update their own profiles and link up to six social networks directly from the My Campaigns hub, saving you admin time.

Ready to empower your advocates? Update to Ambassadors 3.3.0 and turn on “Enable Public Creator Page” today!

Improvement Payments

📱 Turn Mobile Scrollers Into Donors: Meet Charitable’s Mollie Upgrade

Losing mobile supporters because they hate typing out long card numbers on their phones? Charitable’s updated Mollie integration features:

⚡ One-Tap Wallet Checkout: Enable donors to complete their gifts instantly using Apple Pay or Google Pay with a simple face scan, fingerprint, or tap.

💰 No Extra PCI Burden: Skip complex domain verification and security compliance since all wallet transactions run safely through Mollie’s hosted checkout.

🛠️ Custom Cancel Routing: Keep the experience predictable by automatically sending donors who back out to your cancellation page, or use developer filters to route them to a custom page.

Visit this page to learn more.

ambassadors improved New

Moderation and Directory Screens In Ambassadors 3.0

Ambassadors 3.0 has new features: moderation and directory screens… now easily see those who are earning donations on your peer to peer network – including campaign creators that might need to be verified – all in one place. Generate reports, email ambassadors and campaign creators directly and more.

🚀 See when campaign creators and ambassadors have updated their campaigns, what donors/donation they have brought in and more.

🎉 Manually add ambassadors and campaign creators, and approve them in one-click!

Visit this page to learn more.

New Payments

⚡ Unlock India-Based Donations: Meet Charitable’s Native Razorpay Integration

Trying to collect donations in India? Charitable’s native Razorpay integration features:

⚡ Instant UPI Integration: Accept fast, local donations directly inside your form via apps like PhonePe, Google Pay, Paytm, and BHIM without sending donors away from your site.

📲 Auto-Generated Campaign QRs: Instantly render scannable QR codes encoding a UPI deep link directly on your public campaign pages and sidebars for an effortless “scan-to-give” experience.

💰 Dual Local & Global Reach: Headline your campaigns in INR while seamlessly accepting major international currencies like USD, EUR, GBP, and CAD to maximize global support.

🔁 Seamless Recurring Giving: Fully integrates with the Charitable Recurring addon to manage automatic monthly subscriptions directly through Razorpay without extra code.

↩️ Automatic Two-Way Sync: Keep your books perfectly clean with two-way refund syncing—issue a refund inside WordPress or your Razorpay dashboard and both sides update automatically.

🔒 Webhook-Verified Security: Automatically protect your donation records using HMAC-signed webhook verification to ensure every status update represents real money cleared on the rails.

Visit this page to learn more.

Integration New

🎉 New Built-in PushEngage Integration

Struggling with falling email open rates and rising ad costs just to keep your supporters engaged? Charitable’s built-in PushEngage integration features:

🔔 Zero-Fee Direct Messaging: Deliver crisp, instant pop-up notifications straight to your donors’ desktops and mobile devices.

⏱️ Four Smart Automated Triggers: Automatically send updates for immediate donation thank yous, full-list campaign launches, urgent “ending soon” alerts, and goal milestone celebrations.

📈 Group Momentum Broadcasts: Turn private milestones into public wins by automatically broadcasting alerts to your entire subscriber list the moment a campaign hits 50%, 75%, or 100% of its goal.

📊 Automatic Analytics Tracking: Monitor exactly where your incoming notification traffic is coming from with built-in attribution that requires zero complex configuration.

Visit this page to learn more.