Charitable now includes native integration with the Elementor page builder, featuring four purpose-built widgets that allow you to create professional donation pages without any coding knowledge.
These widgets seamlessly integrate with your existing Elementor designs and provide full control over your fundraising content.
This guide will show you how to use the Charitable widgets inside the Elementor builder.
Don’t have Charitable yet? You’ll need to install it first. The Elementor widgets feature is available in the Charitable Pro plugin).
Table of Contents
Finding Charitable Widgets in Elementor
When you create pages with the Elementor page builder, on the left taskbar, you can click on the + icon to access the Elements menu.
You can search for these widgets, for example, to search for the donate button, simply type “donate” in the search bar and you’ll see it populate. You can also scroll down to find four ready-made Charitable widgets that seamlessly integrate with your design:
- Campaigns
- Donate Button
- Donation Form
- Campaigns (Gallery style)

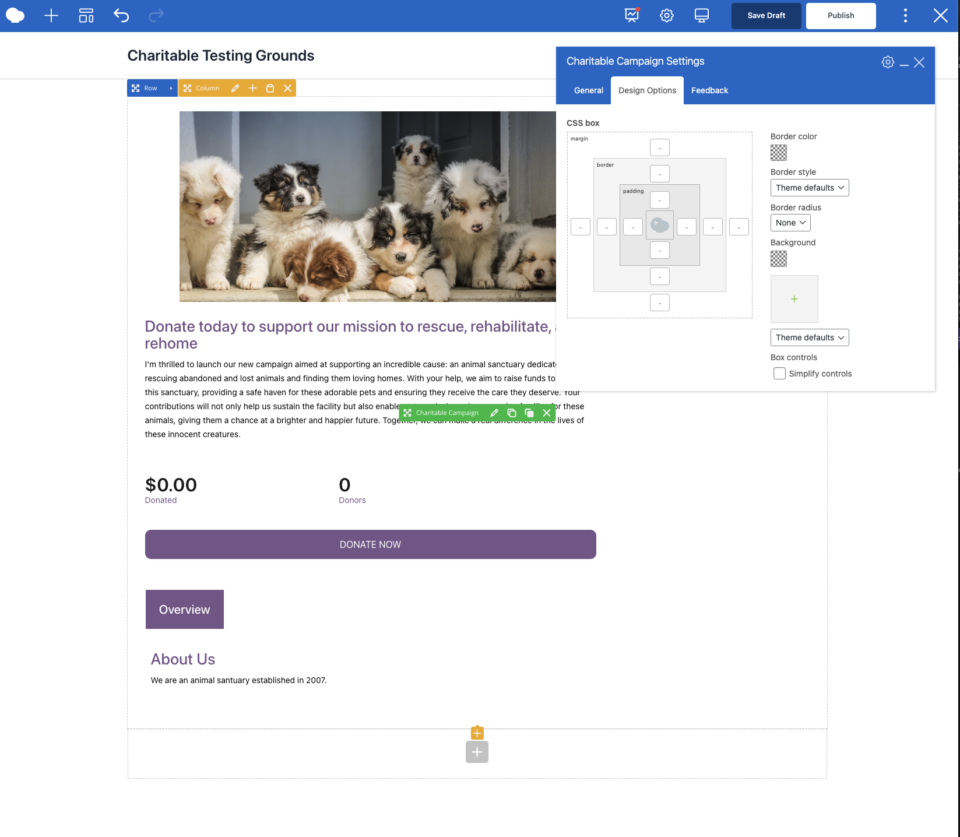
Adding the Campaigns Widget
The Campaigns widget lets you showcase individual campaigns with all their compelling details.
To add this widget to your page, drag and drop it into your design where you would like it to appear.

In the left taskbar, you can add a title for this section. Below that, a dropdown menu appears. Select your campaign and a preview will appear in your design.

Now you can preview, save, and publish with ease.
Adding the Donate Button Widget
This Donate button widget is perfect for adding donation CTAs throughout your site – in your header, sidebar, or at the end of blog posts.
To add this simple “Donate” button to your page, drag and drop the widget into your page design.

Now you can add a label for the button. This is the text that will show up inside the button.
Belore that, you can select your campaign that you want for this button.

If you want the campaign to open in a new tab, use the toggle switch here to enable that feature.
The last option here lets you show this widget as a Button or as Link text.
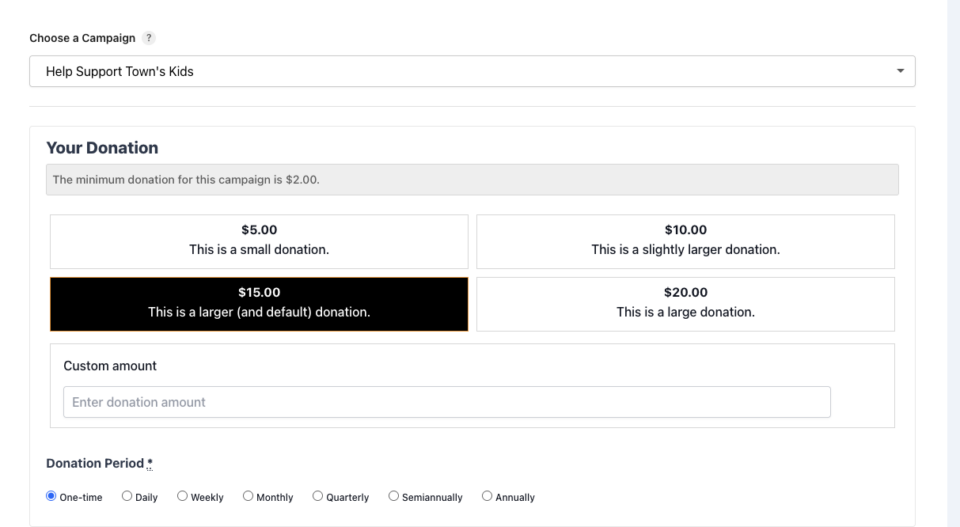
Adding the Donation Form Widget
Add the Donation Form widget to your page design by dragging and dropping it.

The preview the form directly in the Elementor builder (due to how forms work), just hit the preview button or publish to see it live.

You can preview your page design or hit the publish button to see your form in action.
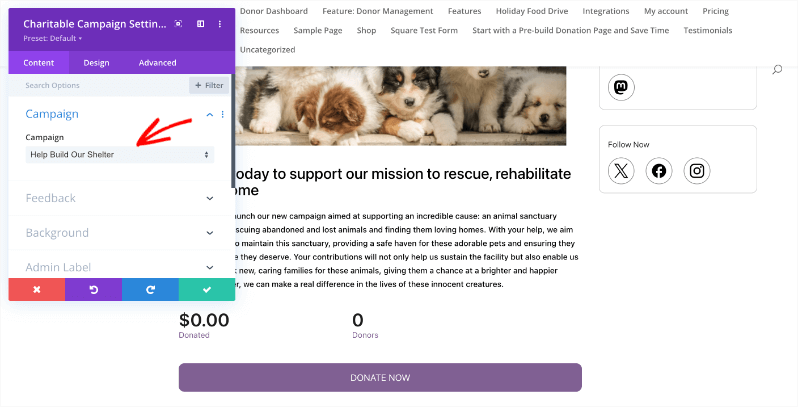
Adding the Campaigns Widget
The Campaigns widget lets you create a gallery of your campaigns. This allows donors to see all the campaigns you want to showcase and they can donate according to their passion and inclination.

When you add the Campaigns widget to your page, you’ll see all your campaigns appear like so with options to edit the gallery on in the left taskbar:

In this taskbar, you can tweak the settings:
- How many campaigns to display
- Order by Date, Popularity, Ending Soon, Title or Random
- Sort by ascending or descending order
- Add categories
- Show campaigns created by a specific users
- Exclude specific campaigns if needed
- Include/Exclude inactive campaigns
- Column layout (2, 3, 4 columns)
This widget lets you create all sorts of filtered views to create the campaign showcase you need.
The Campaigns widget is helpful to organize and showcase your projects and fundraisers. Here a few ways in which you can use this widget in pages:
- Campaign Gallery
- Ways to Give
- Partner Projects
- Community Collaborations
- Sponsored Campaigns
- Peer-to-peer Fundraisers
- Ambassador Campaigns
- Double Your Impact
- Cause Spotlights
Now you’ve learned how to add these widgets to your pages in Elementor. Next, let’s learn how to style them.
Styling The Charitable Widgets in Elementor
For all the four widgets, you can style them with the regular Elementor Styling options.
Under the Style or Advanced tab, standard Elementor button styling options are available.

Here, you can:
- Modify colors, typography, padding, borders
- Change alignment, width, size, position
- Add hover effects and animations
- Add CSS ID and classes
- Change the background
Once you’ve added and customized your widget, make sure you save your changes. Preview and publish your page in Elementor.
That’s it. Not sure how to create a fundraiser? Learn How to Set Up Your First Campaign »