
Do you want to build a website for your charity? Looking for a professional design that’s easy to set up and can be done on a budget?
Creating a website for your nonprofit can feel like a big task, but it’s one of the most important things you can do to share your mission, connect with supporters, and make a real impact. If you’re wondering where to start, you’re in the right place!
This guide will show you how to build a website that takes care of all the checkpoints – design, fundraiser campaigns, forms, integrations, online donations, donor management, and donation receipts – all without any coding and technical knowledge.
In this guide, I’ll walk you through 7 simple steps to create your own nonprofit charity website using WordPress. We’ll skip the complicated technical stuff and focus on clear, actionable steps so you can get your website up and running smoothly.
Trust me, you don’t need to be a web development whiz to do this! You’ll be able to build a professional-looking website that reflects your organization’s heart and values.
Let’s get started!
What’s In this Guide?
Here’s a table of contents to help you navigate this post:
- Getting Started: Choosing the Right Foundation
- Setting Up Your WordPress Site: The Initial Steps
- Designing Your Online Presence: Choosing and Customizing a Theme
- Adding Essential Functionality: Installing Key Plugins
- Creating Your Core Content: Essential Pages for Your Nonprofit
- Creating Fundraisers & Accepting Donations
- Optimizing for SEO
- Taking Care of Security & Backups
- FAQs
Okay, let’s lay the groundwork for your nonprofit’s online home with the first crucial step.
Getting Started: Choosing the Right Foundation
When it comes to building a powerful and effective website for your nonprofit, the very first decision you’ll make is choosing the right platform.
At this stage, you want to select a foundation that’s not only strong but will last for years to come.
New website owners look for the cheapest solutions, which seems sensible at the time.
But there are things you need to watch out for. Let’s see if I can make this relatable.
When you book a flight ticket on a budget airline, the cheapest ticket comes with baggage restrictions, no refund for cancellation, no meal – nothing. It’s fine, you just want to board a plane and fly to your destination.
When you get to the airport, you find out that you didn’t print your boarding pass on your own, and there’s an additional fee. Your bag is slightly over the limit, and there’s a huge penalty! You want to order a meal, but there’s just no option.
It’s the same with your website. The cheapest may seem fine at the beginning, but the additional charges pile up, and you’ll find your options limited as you grow.
Keep in mind, this isn’t a short flight. If you want your website to last a long time, you need to pick a platform that’s reliable, flexible, and gives you full control – at an affordable rate.
There are many hosted platforms like Wix and Squarespace. These platforms take care of everything for you, such as your web hosting and domain (If you don’t know what that is, I’ll explain soon). Basically, you don’t need to worry about the technical side of things.
BUT – there are serious limitations in how much you can customize your website, how you grow it, and most importantly, how you monetize it. Added to that, the pricing is much higher. You will also find that along the way, you need to pay to unlock every new feature.
If you have the budget for it and you don’t mind the limitations, then these platforms are fine.
But if you want total control over your website – what you do with it, how you run it, how you scale – then my #1 recommendation is WordPress.
Why Choose WordPress?
WordPress.org is 100% free to use. It gives you total control and flexibility. The best part is that it’s open source. This means the code is available to anyone to modify, so there are developers all around the world who create themes and extensions for WordPress.

These extensions (popularly known as plugins) can add new features and functionality to your site ,such as a contact form, SEO sitemap, shopping cart, or a table reservation system.
WordPress has over 60,000+ plugins and 30,000+ themes. Many of them are free, so when you want a new feature – say a contact form on your site – there’s a free plugin for that. You just need to install it on your site and use it.
Interested to know more? See Why Non-Profits Should Choose WordPress »
Before we proceed, there’s something important you need to know about.
You might have heard of both WordPress.org and WordPress.com, and it’s important to understand the difference.
What’s the Difference Between WordPress.org and WordPress.com?
- WordPress.org is the free, open-source software that gives you complete control and flexibility over your website. It’s the platform I recommended when the nonprofit I worked with decided to upgrade their online presence. With WordPress.org, you can install any themes and plugins you want, customize your site extensively, and truly own your content. This was a key factor for us, as we wanted a website that could grow and adapt to our changing needs without limitations.
- WordPress.com, on the other hand, is a fully hosted platform that offers a simpler, more hands-off approach. While it can be easier to start with, it often comes with more restrictions in terms of customization, plugins, and control, and can become more expensive in the long run. For a nonprofit aiming for a unique and feature-rich website, WordPress.org provides the freedom and power you need.
Now that we know why we’re choosing WordPress.org, the next essential steps are securing your domain name and setting up web hosting.
Getting Your Domain Name and Hosting
If you choose a hosted platform like Wix, you pay for a plan, and they will include the domain and hosting. With WordPress.org, you need to buy these items on your own. It’s easy – don’t worry. Let’s understand what they mean.
- Your domain name is your website’s unique address on the internet (e.g., yournonprofit.org). It’s how people will find you online, so choose a name that is easy to remember, relevant to your mission, and ideally ends with “.org” to signify your nonprofit status.
- Web hosting is the service that lets you rent a server or space on a server to make your site accessible to others on the internet. This is where your website’s files will be stored.
You can think of hosting like renting a store to set up your website, where people can come and visit, while the domain name is just the name of the store.
Many reliable web hosting providers offer packages that include both hosting and a domain name, often for free for the first year, which can save you both time and money.
Here too, there are cheap plans, but you have to buy addons separately. Let’s look for one that’s affordable and gives you maximum benefits.
You’ll see many kinds of hosting plans – shared, managed, dedicated, and VPS. If you want to know the differences in detail, read this guide: Web Hosting 101.
Unless you need tight security and have a big budget, you don’t need managed and dedicated plans.
You can choose a shared hosting plan. This means you’ll share a server with other websites – sort of like a co-working space but you get your own room. It’s cheaper than renting an entire floor of a building, and it’s good enough for most non-profits.
Just make sure to pick a reliable web host. Read reviews, make sure there’s good customer support, and check what they offer.
My #1 recommendation is Bluehost.
Why?
Their hosting plans start at $3.99 per month (for the first year). This includes all of this for free:
- Free Domain for 1st Year
- AI Site Creation Tools
- Free SSL Certificate Included
- 1-Click WordPress Install
- Free CDN (makes your site load faster)
- Expert 24/7 Support
- Secure Reliable Hosting
- Managed WordPress Updates
- 24/7 Chat Support

You can grab a coupon online and get this plan at $1.99 per month (for the first year). See WPBeginner and IsItWP – both these sites regularly share awesome deals on WordPress products.
Setting Up Your WordPress Site: The Initial Steps
Now that you’ve got your domain name and hosting set up, let’s move on to the next important phase: Setting Up Your WordPress Site. This is where you’ll actually get inside your new website and start making it your own.
If you’ve selected Bluehost, you’ll see an option to add a website. You just need to fill in a few details and WordPress will be automatically installed for you.

If you need help with installing it on your own, follow this guide: How to Install WordPress.
During installation, you’ll be prompted to create a username and password. Keep these details safe!
Once you have that done, you’ll need to access your WordPress dashboard by logging in with the same username and password. Usually, you can access it by going to your website’s address followed by /wp-admin (for example, yournonprofit.org/wp-admin/) in your web browser.

Now think of the dashboard as the control center for your entire website. It might look a little overwhelming at first, but don’t worry, you’ll get the hang of it quickly.
On the left-hand side, you’ll find the main menu with options to manage your posts, pages, themes, plugins, settings, and more.
Before you start adding content or changing the design, it’s a good idea to configure some basic WordPress settings.
This will ensure your site is set up correctly from the beginning. You can find these settings by navigating to Settings in the left-hand menu.
General Settings: Here, you can set your Site Title and Tagline. Your site title is usually the name of your nonprofit, and the tagline is a short description of what you do.

These are often displayed in search engine results and at the top of your website, so make sure they accurately represent your organization. You can also set your preferred time zone and date format on this page.
Permalink Settings: This is a crucial setting for how your website’s URLs (web addresses) will look. Search engines and people both prefer clean, easy-to-understand URLs. By default, WordPress might use a less informative structure.
Go to Settings » Permalinks.

I strongly recommend choosing the “Post name” option. This will make your URLs look like yournonprofit.org/about-us/ or yournonprofit.org/our-latest-campaign/, which is much better for SEO (Search Engine Optimization) and user-friendliness.
Next, go to the Reading tab. Here you can choose to make your homepage a static page or a gallery of your latest posts. I would recommend choosing static. That way, you’ll build a homepage that reflects what your organization does.

Finally, under the Discussions tab, you can control whether people can leave comments on your posts. You can also adjust how you’re notified about them.

Taking a few minutes to configure these basic settings right after installing WordPress will set a solid foundation for your nonprofit’s website. It’s like making sure the address on your building is clear and easy to find before you open your doors!
Tip: Setting a SEO-friendly permalink structure like “Post name” is highly recommended. This simple step can make a big difference in how easily search engines can understand and index your website’s content, helping more people find your important cause.
Designing Your Online Presence: Choosing and Customizing a Theme
With the foundational steps in place, let’s move on to making your website look and feel like your own! This next step is all about Designing Your Online Presence: Choosing and Customizing a Theme.
Think of a WordPress theme as the visual skin of your website. It controls the overall design, layout, colors, fonts, and the general look and feel that your visitors will experience. Choosing the right theme is crucial because it not only affects how your website looks but also how easy it is for people to navigate and engage with your content.
When we switched our nonprofit’s website to WordPress, finding a visually appealing theme that perfectly matched our brand was one of the most exciting parts. It instantly gave our online presence a much more professional and trustworthy feel.
WordPress offers a vast library of both free and premium themes. You can browse and install free themes directly from within your WordPress dashboard by going to Appearance » Themes.

This is a great place to start, as there are many well-designed and functional free themes available. You can use the search and filter options to find themes that suit your nonprofit’s needs and style.
Take a look at 25+ Best Non-Profit WordPress Themes for Charities & Causes
Now you might be wondering why there’s an option to upload a theme or choose premium themes.
There are many third-party theme providers that create and sell themes. Some popular options include SeedProd, Thrive Themes, Divi, and Astra. Many of these brands offer free and paid themes.
SeedProd offers themes and a drag-and-drop builder. This makes it really easy to create and customize your site.

The only thing you need to be aware of here is that when you commit to a third-party builder, you need to be sure that it’s reputable and reliable. Switching builders later is possible but it can get complicated.
Once you’ve found a theme you like, installing it is straightforward. For free themes, simply click the “Install” button followed by “Activate” within the Appearance » Themes section.

If you’ve purchased a premium theme, you’ll usually download it as a ZIP file. To install it, go to Appearance » Themes and then select “Upload Theme” and choose the ZIP file you downloaded.
After uploading, click “Install Now” and then “Activate” to apply the theme to your site.
The real magic happens when you start customizing your theme to match your nonprofit’s brand and mission.
Most themes offer customization options through the WordPress Customizer (usually found under Appearance » Customize in your dashboard). Here, you can typically change things like your site logo, color scheme, fonts, background images, and menu layouts. Premium themes often come with even more extensive customization settings.
You can build pages and posts using the WordPress block editor (Gutenberg). If you feel that’s limited, you can explore drag-and-drop builders like Elementor, Beaver Builder, and SeedProd.
Tip: As you’re choosing a theme, make sure it is responsive. This means your website will automatically adjust its layout to look good on all devices, whether it’s a desktop computer, a tablet, or a smartphone.
With more and more people accessing websites on their mobile devices, a responsive design is absolutely essential for reaching your audience effectively. You can usually preview how a theme looks on different devices before activating it.
Take your time to explore different options and find a theme that not only looks great but also provides a user-friendly experience for your supporters.
Adding Essential Functionality: Installing Key Plugins
All right, now that you have the look and feel of your website in place with a theme, let’s talk about adding power and specific features.
Think of WordPress plugins as apps for your website. They are pieces of software that you can install on your WordPress site to extend its functionality and add new features without needing to write any code. For a nonprofit organization, plugins are invaluable tools that can help you achieve your mission more effectively, from accepting donations and managing donor relationships to optimizing your site for search engines and enhancing security.
Installing a plugin is usually a straightforward process. Within your WordPress dashboard, navigate to Plugins » Add New. You can search for plugins by name or browse the featured or popular options. Once you find a plugin you want, click “Install Now” and then “Activate” to enable it on your site. Some plugins may require further configuration after activation, so be sure to check their settings page.

There are thousands of free and premium plugins available in the WordPress plugin directory and from third-party developers. Knowing which ones are essential for your nonprofit can save you time and effort.

Here are some key categories of plugins that you should consider:
🚧 Coming Soon/Maintenance Mode: I recommend installing a free plugin like SeedProd that will let you turn on Coming Soon mode. This will hide your website while it’s under construction and display a nice page to anyone who happens to land on your site. SeedProd makes it as easy as 1 click to enable/disable coming soon mode.
💰 Donation Plugins: If your primary goal is to raise funds online, a dedicated donation plugin is crucial. These plugins allow you to create custom donation forms, set up recurring donations, manage donor relationships, and run successful fundraising campaigns.
- Charitable as a top-rated WordPress donation plugin specifically for nonprofits, noting its ease of use, customizable campaign features, integration with multiple payment processors (like PayPal and Stripe), and lack of transaction fees.
- WPForms, though a general form builder, can be used to create donation forms and come with features like spam protection.
- WP Simple Pay is noted for its beginner-friendliness and quick setup for accepting one-time and recurring payments.
For more details, see The Best Ways to Accept Donations Online » and The Best Recurring Donation Solutions »
📋 Contact Form Plugins: A reliable contact form plugin is essential for allowing visitors to easily get in touch with your organization. WPForms is an excellent and user-friendly option for creating various types of forms, including contact forms, registration, login, surveys, polls, and volunteer signups.
📧 Email Marketing Plugins: Building an email list is vital for keeping your donors and supporters informed and engaged. Plugins like OptinMonster can help you create effective email signup forms, such as popups and sidebar forms, to grow your newsletter list. Many donation plugins, like Charitable, also offer integrations with popular email marketing services like Mailchimp and ActiveCampaign.
🔎 Search Engine Optimization (SEO) Plugins: To help more people find your cause online, you need to optimize your website for search engines. SEO plugins like All in One SEO make it easier to optimize your website’s content and settings for better search engine rankings.
🛡️ Security Plugins: Protecting your website from malicious attacks is paramount. Security plugins like Sucuri and MalCare can help safeguard your site.
🚀 Performance/Caching Plugins: A fast-loading website provides a better user experience and can also improve your SEO. Caching plugins like WP Super Cache help improve website speed by storing frequently accessed data.
🏗️ Page Builder Plugins: While many themes offer customization options, page builder plugins like SeedProd, Thrive Theme Builder, and Divi provide even greater control over your website’s layout and design through drag-and-drop interfaces. SeedProd is easy to use for creating landing pages and even entire websites without coding knowledge.
🔄 Backup Plugins: Once you’ve created your site, you’ll want to make a backup. On the internet, there are many things that can go wrong. You can lose your site due to a hacker, malware, human error, accidental deletion of files, or a server crash. Use a plugin like Duplicator to quickly back up your site. You can even set up a schedule so that it creates a new backup regularly and stores it safely for you.
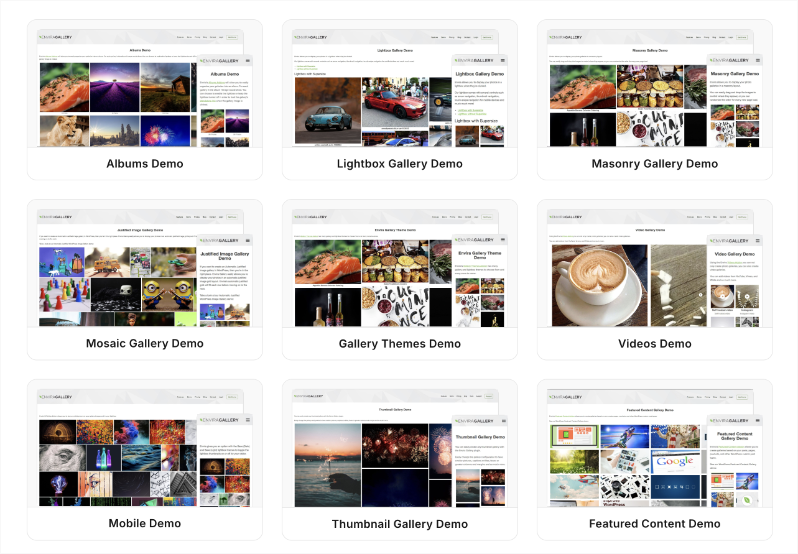
🎞️ Slider and Gallery Plugins: There are plugins like Envira, Imagely, and Soliloquy that let you create beautiful galleries or sliders to showcase photos, videos, and even docs.
Here’s a full list of recommended plugins for non-profits »
Tip: When choosing plugins, pay attention to their ratings, reviews, and the last time they were updated. A plugin that is regularly updated and has positive reviews from other users is generally a safer and more reliable choice. It’s also wise to avoid installing too many plugins, as this can sometimes slow down your website. Only install the ones that are truly essential for the functionality you need.
If you’re looking for great deals for non-profits on tools & software, head to Best Non-Profit Deals & Discounts »
Creating Your Core Content: Essential Pages for Your Nonprofit
Okay, with your theme and essential plugins in place, the next crucial step is Creating Your Core Content. These are the fundamental pages that will provide your visitors with the information they need to understand your mission, work, and how they can support you.
Here are some essential pages that almost every nonprofit website should have:
Homepage: This is often the first page visitors will see, so it needs to make a strong impression.

Your homepage should clearly and concisely communicate:
- Who you are
- What your mission is
- What impact you are making
It should also provide clear pathways for visitors to learn more, donate, volunteer, or get involved. Consider using visuals and strong calls to action to engage visitors immediately. This is where I advocate for using page builders like SeedProd that come with readymade pages that are already visually appealing and conversion-focused homepages.
About Us Page: This page is crucial for building trust and credibility. Share your organization’s history, mission statement in detail, values, and the people behind the cause (staff, board members, volunteers).

Personal stories and testimonials can be very effective here. This helps visitors connect with your organization on a deeper level.
Our Programs/What We Do Page: Clearly outline the specific programs and activities your nonprofit undertakes to achieve its mission. Use compelling language and visuals (photos, videos) to illustrate your activities and their positive outcomes.Explain:
- What you do
- Who you serve
- The impact of your work
Get Involved/Volunteer Page: Make it easy for people to support your cause beyond just donations. Provide detailed information on how people can volunteer their time and skills.

Include any application processes, upcoming volunteer opportunities, and the benefits of volunteering with your organization.
Donate Page: This is a critical page for fundraising. Your donate page should be easy to find, user-friendly, and secure. Use a dedicated donation plugin like Charitable to create customizable donation forms. Ensure you offer options for one-time and recurring donations. Clearly explain how donations will be used and the impact they will have. Consider using compelling visuals and a clear call to action like a prominent “Donate Now” button. You can even design forms that match your brand for a seamless giving experience.
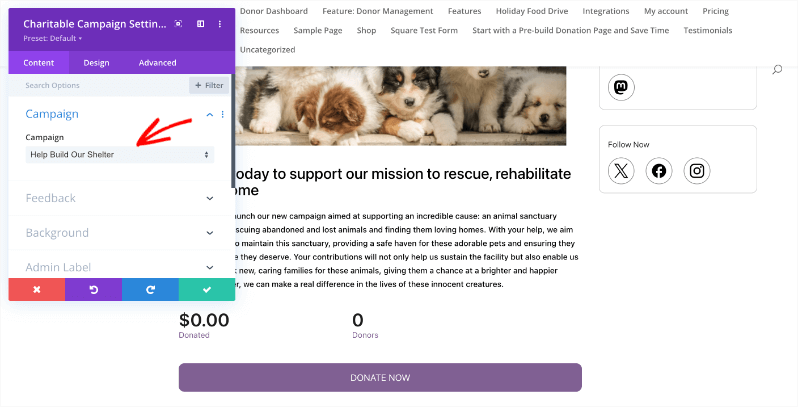
What I love about Charitable is that it also lets you create individual fundraiser campaigns for specific causes. Here’s a sample of that:

We’ll discuss this in detail in the next section.
Contact Us Page: Provide clear and multiple ways for people to get in touch with your organization. Include a contact form, your physical address (if applicable), phone number, email address, and social media links. A map (which can be embedded using Google Maps) can also be helpful if you have a physical location.
Blog/News Page: Regularly publishing blog posts and news updates is a great way to share your stories, highlight your impact, provide updates on your work, and engage your audience.

This can also help improve your website’s SEO by providing fresh, relevant content.
Privacy Policy and Terms of Service Pages: These are legally required pages that outline how you collect and use user data and the terms of using your website.
When creating these pages, remember to:
- Use clear and concise language that is easy for everyone to understand.
- Incorporate compelling visuals (high-quality images and videos) to enhance engagement.
- Ensure easy navigation between pages with a well-structured menu.
- Optimize your content for readability with headings, subheadings, bullet points, and sufficient white space.
- Proofread all content carefully before publishing.
That’s it. Your website is ready. You can disable coming soon mode if you enabled it earlier. Your website wil be live and ready for visitors.
Next, I’ll show you how to accept donations online, create beautiful fundraisers, and manage it all with ease.
Creating Fundraisers & Accepting Donations
Most non-profits struggle with tight budgets – losing donors over time, dealing with messy donation data, and low online visibility. Before long, they question whether building a website was a mistake.
Here’s the hard truth: a website needs love. Once you launch it, just like growing a plant, you have to water it and maintain it.
- You’ll need to renew your domain and hosting when the time comes.
- You need to roll out updates to your WordPress software, plugins, and themes when they’re available.
- You also need to ensure that you have a security plugin active on your site and that your content is backed up regularly.
Now the best way to grow your site and make this website work for you is by raising funds through it.
The easiest way to raise funds online is by using a plugin called Charitable. It’s the most popular donation plugin with 1+ million downloads!

Charitable is specifically designed for nonprofits and understands the unique requirements of charitable organizations.
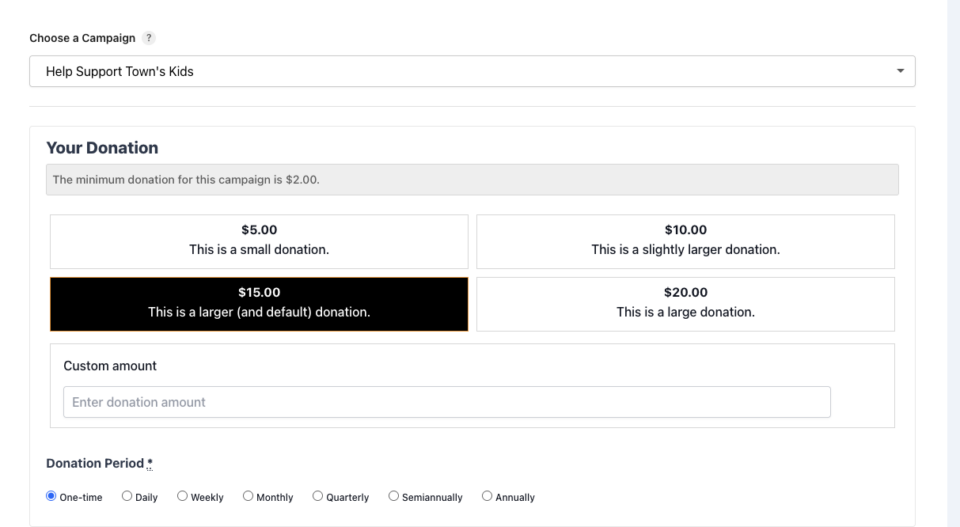
You can set up beautiful, customizable donation forms in just minutes, without touching a line of code. Whether you need one-time gifts, monthly recurring donations, or full peer-to-peer campaigns, it handles everything smoothly.
Donors give securely through Stripe, PayPal, or other gateways you already trust. You get a clean dashboard to track funds, send personalized thank-yous, and pull reports that make grant applications easier. Nonprofits worldwide have raised millions this way – powering everything from emergency appeals to annual galas.
One of the most significant advantages of Charitable is its ease of use.
It features a drag-and-drop campaign builder that allows you to visually create beautiful fundraising campaigns in minutes without needing any coding knowledge.

You can also get started quickly with pre-made, customizable donation page templates that are designed to look professional and help you raise more money.


These templates are categorized by popular causes, making it easier to find a design that suits your needs.
Charitable is built by people who understand non-profits in and out. So every feature you may need is built-in. Here are a few key features:
- You can create custom donation forms to suit your specific needs, including options for one-time, recurring donations, and peer-to-peer fundraising.
- Charitable integrates seamlessly with multiple popular payment gateways like PayPal and Stripe, ensuring secure transaction processing.
- A major benefit is that Charitable Pro does not charge any extra transaction or platform fees on top of what your payment gateway charges, allowing you to keep more of the donations you receive.
- It offers features for efficient donor management, allowing you to track donor information, send personalized receipts, and manage donor relationships effectively.
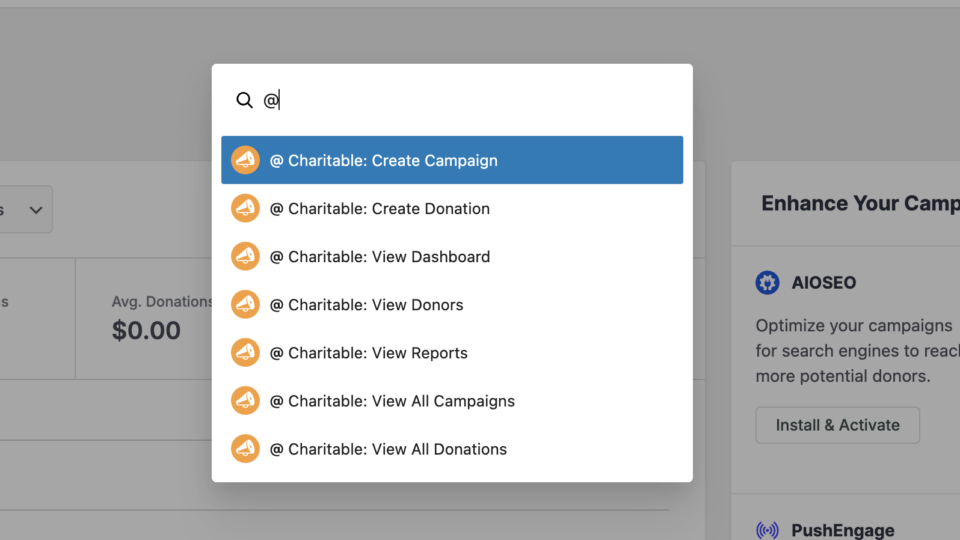
- You can launch and manage targeted fundraising campaigns, set goals, and track progress in real-time.
- You get robust reporting and analytics to give you insights into donor behavior and campaign performance, helping you refine your strategies.
- It supports peer-to-peer fundraising, empowering your supporters to create their own fundraising campaigns on your behalf and broaden your reach.
- Connect to your favorite marketing integrations, allowing you to sync your campaigns and streamline your workflow and convert one-time donors into ongoing supporters.
Added to all this, Charitable prioritizes security by ensuring sensitive payment details are never stored on your website. It is also responsive and mobile-ready, ensuring your donation pages look and work great on all devices.
When you compare Charitable to similar solutions, Charitable is significantly cheaper starting at just $69 per year. Other solutions cost between $199 to $1800 per year for the same features. See GiveWP vs Charitable and Donorbox vs Charitable.
Finally, Charitable is known for its dedicated customer support team, ready to assist you with any questions or issues you may encounter. There’s plenty of detailed documentation and step-by-step guides to help you make the most of the plugin.
Ready to try Charitable? Get the Lite version or try out Charitable Pro with a 14-day money back guarantee.
For step by step guides, see how to get started with Charitable and how to launch your first campaign »
Optimizing for SEO
Optimizing your WordPress website for Search Engine Optimization (SEO) is crucial for your nonprofit because it helps more people find your cause online, potentially leading to increased donations and volunteer sign-ups.
All in One SEO (AIOSEO) is the best WordPress SEO optimization plugin and toolkit for charity websites.

Here’s how AIOSEO can help your nonprofit’s SEO efforts:
- Comprehensive SEO Toolkit: AIOSEO is a complete SEO toolkit that allows you to control various aspects of your website’s SEO, from on-page optimization to XML sitemaps and schema markup.
- Ease of Use: It is beginner-friendly and doesn’t require you to learn complicated SEO jargon. It provides simple explanations for how to improve your content.
- Setup Wizard: The plugin comes with an easy-to-install and set up wizard that automatically helps you choose the best SEO settings for your nonprofit and establishes the proper SEO foundations for your site in less than 10 minutes.
- On-Page Analysis: AIOSEO features TruSEO on-page analysis, guiding you on how to optimize individual posts and pages for better search engine rankings.
- Technical SEO Features: It includes features like smart XML sitemaps to help search engines crawl your site effectively.
- Local SEO: If your nonprofit has a local presence, AIOSEO offers local SEO features to help you rank better in local search results.
- Rich Snippets Schema: This feature helps search engines understand your content better and can lead to more appealing search results.
- Internal Linking Assistant: Helps you improve your site’s structure by suggesting relevant internal links.
- Social Media Integration: Allows you to optimize how your content appears when shared on social media platforms.
- Error Tracking: The plugin includes 404 error tracking to help you identify and fix broken links on your site.
- SEO Search Statistics and Keyword Tracking: Provides insights into your website’s search performance and allows you to track the rankings of important keywords.
- Free Version: The free version of AIOSEO comes with everything you need to optimize your WordPress site.
- Nonprofit Discount: For more powerful features, you can upgrade to the Pro version. AIOSEO offers a special discounted license to nonprofits on their Pro plan for just $99 per year, which is 80% off the regular price. Get the AIOSEO non profit deal here »
By using AIOSEO, your nonprofit can ensure that your website is easy to find online, allowing you to reach more potential donors and supporters from all over the world.
It simplifies the process of optimizing your content for search engines, enabling you to focus more on your core mission.
Taking Care of Security & Backups
Ensuring the security of your nonprofit’s WordPress website and having a reliable backup system in place are critical for protecting your data, maintaining your online presence, and building trust with your donors and supporters.
Security
Why Security Matters: Nonprofit websites are not immune to cyber threats. Hackers may target your site to steal data, spread malware, or disrupt your operations. Prioritizing security protects your website, your donors’ information, and your organization’s reputation.
Key Security Measures:
- Keep WordPress Core, Themes, and Plugins Updated: Regularly updating your WordPress installation, themes, and plugins is one of the most important security measures you can take. These updates often include security patches that address known vulnerabilities. WordPress makes this process easy with notifications in your dashboard, allowing you to update with just a few clicks.
- Use Strong Passwords: This is just basic security. Ensure every user on your website is using a strong password and 2-factor authentication.
- Install a Security Plugin: Security plugins can significantly enhance your website’s protection.
- Sucuri is a popular, freemium option that offers features like malware scanning, website cleanup, firewall protection, blocklist monitoring, and security notifications.
- MalCare is another WordPress security plugin. Its free version includes an in-depth scanner and a firewall that provides real-time protection against attacks.
- Implement Website Firewall: Security plugins like Sucuri offer firewall protection to block malicious traffic before it reaches your website.
- Regularly Scan for Malware: Use your security plugin to regularly scan your website for malicious code and malware.
- Monitor Security Logs: Pay attention to security logs and audit trails to identify and respond to any suspicious activity promptly.
- SSL Certificate: Having an SSL certificate (HTTPS) encrypts data transmitted between your website and visitors. If you want your site to show up on Google results, it’s is mandatory to have an SSL certificate installed.
Check out this guide for more: Complete WordPress Security Guide »
By prioritizing security and staying up-to-date, you can ensure your nonprofit’s website remains safe from cyber threats.
Backups
Why Backups are Essential: Despite your best security efforts, things can still go wrong. Human error, plugin conflicts, failed updates, or a successful cyberattack can damage or even destroy your website. Having a recent backup allows you to quickly restore your site and minimize downtime and data loss.
Key Backup Practices:
- Use a Backup Plugin: WordPress backup plugins automate the process of creating backups.
- Duplicator Pro is the best WordPress backup and site migration plugin. It allows you to create complete backups of your website, including database files, and restore them easily. The plugin is user-friendly for beginners and allows you to schedule automatic backups.
- The free version of Duplicator lets you create manual backups.
- Automate Backups: Schedule your backup plugin to create backups automatically on a regular basis. The frequency of backups will depend on how often you update your website content.
- Store Backups Securely Offsite: It’s crucial to store your backups in a location separate from your web hosting server. Duplicator supports various backup locations, including cloud storage services like Dropbox, Google Drive, and Amazon S3. This ensures that if something happens to your server, your backups are still safe.
- Test Your Restore Process: Periodically test your backup restore process to ensure that you can successfully recover your website in case of an emergency.
- Consider Your Hosting Provider’s Backup Service: Many web hosting providers also offer backup services. However, it’s generally recommended to have your own separate backup solution as well for added security and control.
By using a consistent backup routine, you’ll have peace of mind knowing that a functional version of your nonprofit website can be restored if needed. Both security and reliable backups are essential for your nonprofit organization.
FAQs
How much does it cost to build a nonprofit website with WordPress?
The basic costs include domain name and hosting come to $1.99 per month. So you’ll pay $23.88 per year for the website. You can choose free themes, builders, and plugins to make your site work.
If you choose premium options like Charitable Pro, you’ll add $5.75 per month (billed at $69 per year).
Do I need technical skills to build a nonprofit website?
Not necessarily. While some technical knowledge helps, modern WordPress themes and page builders make it possible to create a professional site without coding. Plus, hosts like Bluehost have AI creators now that will build your website for you. You just have to customize it.
Which features are essential for a nonprofit website?
From my experience, you’ll need:
- Donation system
- Event calendar
- Volunteer sign-up forms
- Newsletter integration
- Contact forms
- Social media integration
How can I accept donations on my website?
Install and activate the Charitable plugin on your site. Then follow our guide to set up your donation forms and payment gateway. You’ll be all set to accept donations in under 30 minutes.
Is WordPress secure enough for handling donations?
Yes, when properly set up. Use reputable payment processors, keep WordPress updated, and install a security plugin. We recommend additional security measures when handling financial transactions.
How long does it take to build a nonprofit website?
With focused effort, you can have a basic site up in a weekend with page builders like SeedProd. You get premade templates, you can use AI tools to generate customized content. You’ll need to add images and configure your site’s settings which takes about an hour. A more comprehensive site with full functionality typically takes 2-4 weeks. The key is starting with essential features and adding more as needed.
Creating a WordPress website for your nonprofit doesn’t have to be overwhelming. With the right tools and approach, you can build a professional site that serves your mission and engages your supporters.
Remember to focus on what matters most: making it easy for supporters to connect with your cause. Start with the essentials – clean design, clear donation paths, and compelling storytelling. You can always add more features as your organization grows.
From my experience helping hundreds of nonprofits get online, the most successful websites are those that started with a clear purpose and grew intentionally. Don’t feel pressured to implement every feature at once.
Check out our detailed video tutorials for step-by-step guidance on building your nonprofit website. We’re here to help you create a digital presence that truly serves your mission.
Stay Connected for More Nonprofit Resources
For more tutorials and videos tailored to nonprofits, subscribe to our YouTube channel. We regularly publish expert tips, step-by-step guides on migrations like this GiveWP to Charitable switch, fundraising strategies, and practical resources to help your organization succeed.
🗞️ Get weekly tips and exclusive guides in your inbox
Join our newsletter →
🎥 Watch step-by-step tutorials and success stories
Subscribe to our YouTube channel →
👩🏽💻 Connect with our community and get daily nonprofit insights
Follow us on LinkedIn →
🥳 Fun reels and non-profit insights
Follow us on Instagram →
👀 Insightful & fun videos to help you grow your cause
Follow us on TikTok→
🌎 Subscribe and follow for general fundraiser tips
Get Fundraiser Tips on TikTok →
Remember: Your website is more than just a digital brochure – it’s a powerful tool for creating real-world change. Now get out there and start building!


Leave a Reply