Feeling overwhelmed every time you research “online donation platforms”?
You start looking at options, get buried in technical features you don’t understand, and close the browser tab. Meanwhile, supporters keep asking how they can donate online, and you keep having to tell them you’re “working on it.”
The truth is, you don’t need to understand payment gateways or API integrations. You just need to know which platform works for organizations like yours and how to set it up without the headache.
This guide cuts through the confusion and shows you exactly what to choose and how to get it running this week.
What You Need to Start Accepting Donations Online
Let’s be honest here – you can’t accept donations online without somewhere for people to actually donate. If you don’t have a website yet, we need to fix that first.
First Things First: You Need a Website
If you’re reading this without a website, you’ll need to grab a domain name and hosting, then install WordPress. I know that might sound intimidating, but stick with me.
Why WordPress? Simple. It gives you complete control over your site without locking you into some proprietary system. When your nonprofit grows (and it will), you won’t be stuck paying outrageous monthly fees or begging a platform to add features you need. Plus, there are tons of donation tools built specifically for WordPress. See why WordPress works for non-profits »
Our friends over at WPBeginner have a fantastic step-by-step guide and YouTube video tutorial that walks you through the entire setup process. They make it genuinely easy to follow, even if you’ve never touched a website before.
Once Your Website is Ready: Pick Your Donation Solution
Now comes the fun part. You have three solid options based on what you actually need to accomplish:
Full-Fledged Fundraising Solution: Charitable
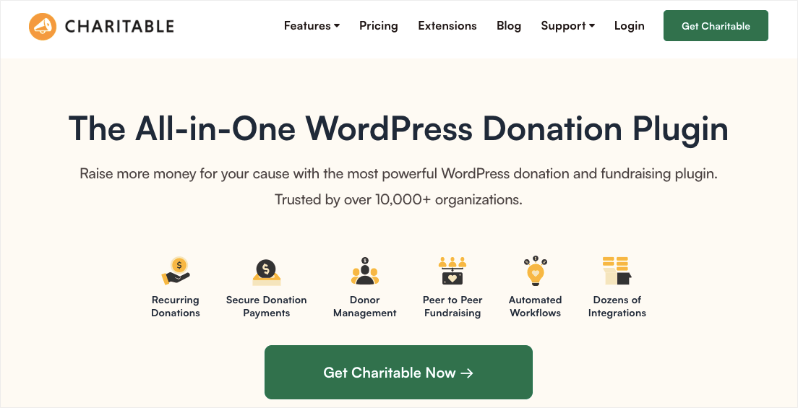
Choose this if you’re running campaigns, need to track donors, want to send automatic thank you emails, and basically turn your website into a complete fundraising operation. This is for organizations that are serious about growing their online giving and want all the tools to make it happen.
Choose this if you’re running campaigns, need to track donors, want to send automatic thank you emails, and basically turn your website into a complete fundraising operation. This is for organizations that are serious about growing their online giving and want all the tools to make it happen.
Here’s what you get:
- Create fundraising campaigns with goals and progress bars
- Keep track of who donates and how much they’ve given over time
- Send automatic thank you emails when donations come in
- Set up monthly giving so donors can contribute regularly
- See detailed reports on your fundraising performance
- Accept payments through Stripe, PayPal, or offline methods
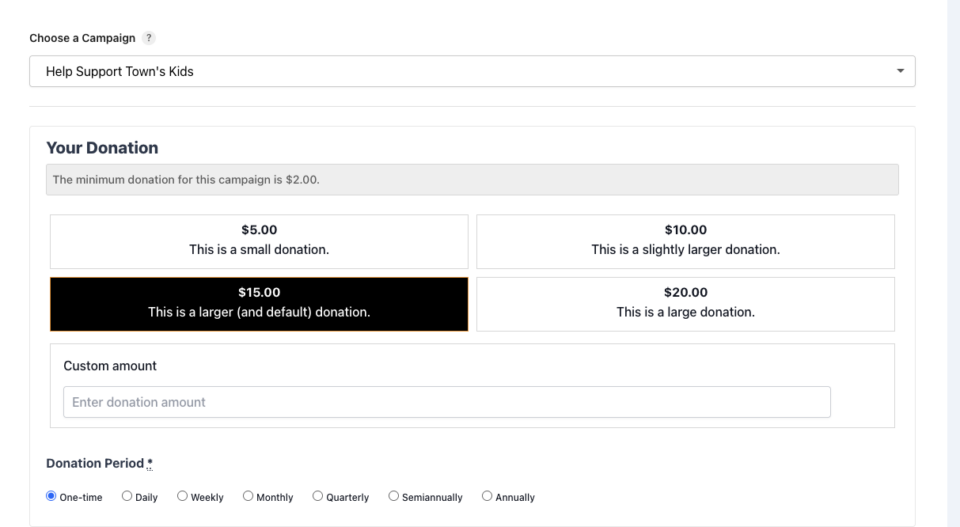
- Create donation forms with suggested amounts that actually convert
- Let supporters create their own fundraising pages for your cause
- Connect with your email newsletter to follow up with donors
- Display donor comments to encourage others to give
- Generate proper tax receipts automatically
- Share campaigns easily on social media
- Sort your donors by giving amount or frequency to target follow-ups
This is perfect for nonprofits ready to take their fundraising seriously and need more than just a simple donation button.
Simple Set Up: WP Simple Pay
This is perfect when you just need people to be able to donate quickly and easily. No complicated campaigns or donor management – just clean, professional payment forms that work. Great for organizations that want to accept donations without all the extra complexity.
Here’s what you get:
- Create simple donation buttons that embed anywhere on your site
- Accept one-time donations or set up recurring monthly giving
- Works seamlessly with Stripe for secure payment processing
- Mobile-friendly checkout that works on any device
- Let donors choose their own amount or pick from suggested options
- Collect basic donor information without overwhelming forms
- Get instant email notifications when donations come in
- View all payments in a simple dashboard inside WordPress
- Handle subscription management automatically for monthly donors
- Customize receipts and confirmation emails
- No monthly fees – you only pay processing costs when people donate
- Recover processing fees by asking donors to cover it
Easy Donation Forms: WPForms

Use this when you want to create beautiful donation forms that tell people exactly what their money accomplishes. You can add images, explain what a $50 donation provides, show impact stories, and make the giving experience more personal. It’s ideal for organizations that need to connect emotionally with donors while keeping the technical side simple.
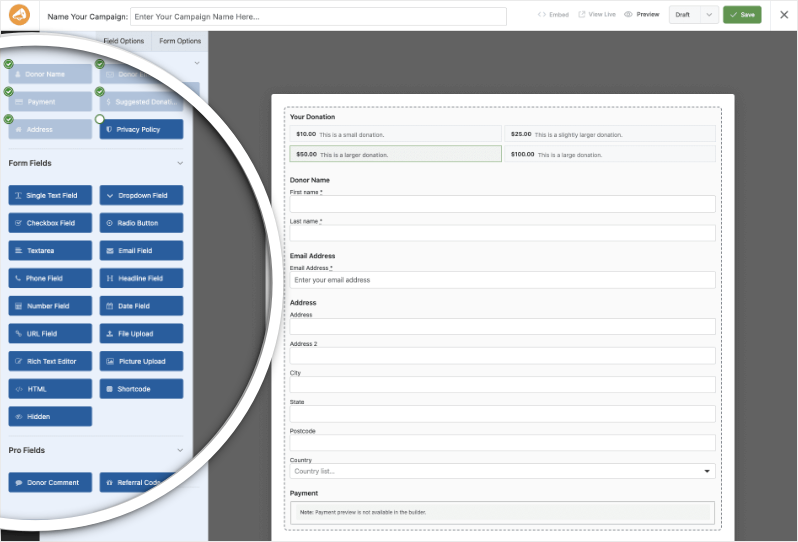
- Build custom donation forms using a simple drag-and-drop builder
- Add images and descriptions that show exactly how donations help
- Create different donation levels with specific impact stories for each amount
- Works with Stripe, PayPal, and Square for secure payment processing
- Embed forms anywhere on your website or in blog posts
- Collect donor information beyond just payment details if needed
- Set up conditional fields that show different options based on donation amount
- Create multi-step forms that don’t overwhelm donors
- Send personalized confirmation emails with impact information
- View all donation entries in an organized dashboard
- Create surveys or volunteer signup forms alongside donations
The best part? You can always start simple and upgrade later. Your website will grow with your needs.
Now that you know your plugin options, let’s talk about the other piece of the puzzle – how the money actually gets from your donor’s credit card to your bank account.
Understanding Payment Gateways (Don’t Worry, It’s Simple)
Here’s something important: your donation plugin doesn’t actually process the payments. That job belongs to something called a payment gateway – think of it as the middleman that safely handles the credit card transactions between your donor and your bank account.
The most popular options for nonprofits are:
- Stripe – Clean, reliable, and works with almost every donation plugin
- PayPal – Everyone knows it, and many donors already have accounts
- Square – Great rates and easy setup, especially if you already use Square for in-person payments
The key is making sure your chosen donation plugin supports your preferred payment gateway.
That’s it! That’s all you need. Below is a quick guide to set up.
If you’re more of a visual learner and prefer watching someone walk through the process, we’ve got you covered with a detailed step-by-step video tutorial:
Quick Set Up Guide to Accept Online Payments
Once you’ve picked your solution, getting it installed is straightforward. Log into your WordPress admin area (that’s usually yourwebsite.com/wp-admin), then head to Plugins » Add New.
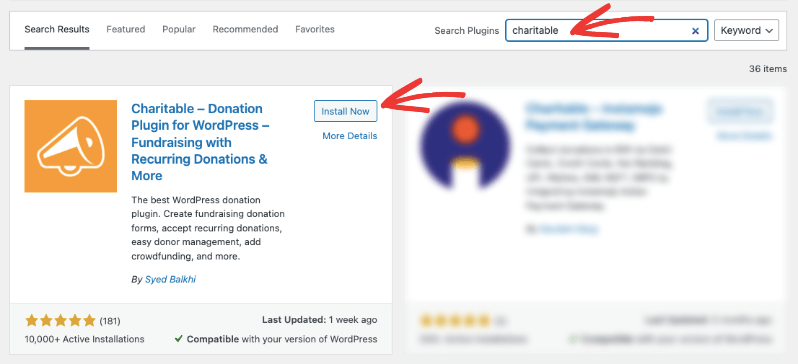
Search for your chosen plugin – whether that’s Charitable, WP Simple Pay, or WPForms – and click install.
Setting Up Charitable
If you go with Charitable, you’ll see a setup wizard pop up right after installation that walks you through the entire process step by step. No guessing, no confusion – just follow the prompts.
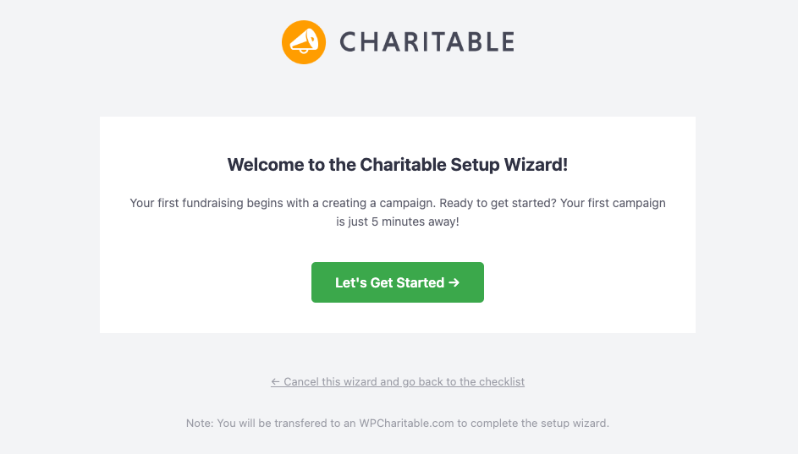
Here’s a helpful guide on the complete Charitable setup process if you want to see what you’re getting into.
Once the setup wizard is complete, connecting your payment gateway is next.
In your WordPress admin, go to Charitable » Settings » Payment Gateways. You’ll see all the gateways Charitable supports.
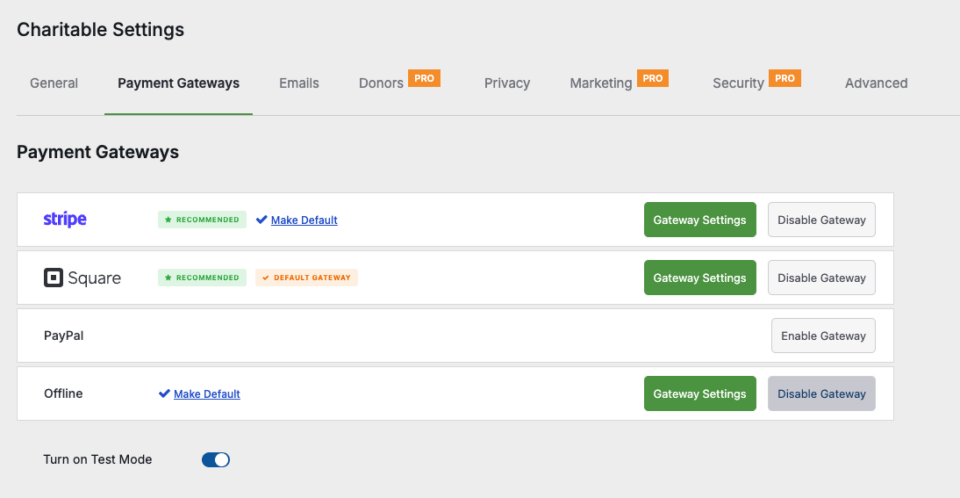
First, enable “Test Mode” before going live. Run a fake transaction to make sure everything works properly, then switch off test mode when you’re ready for real donations.
Now find your payment gateway (Stripe, PayPal, etc.) and click on “Enable Gateway.”
A green “Gateway Settings” button will appear. Click on it to go to the settings page where you can configure your gateway.
For Stripe, you’ll need your publishable key and secret key from your Stripe dashboard. For PayPal, just enter your PayPal email address and choose between Standard or Pro.
Learn how to connect your payment gateway here »
Now head to Charitable » Campaigns » Add New to create your first fundraising campaign. Choose a template and the visual builder will open. Here, you can customize text, set your goal, add descriptions and images, then publish it.
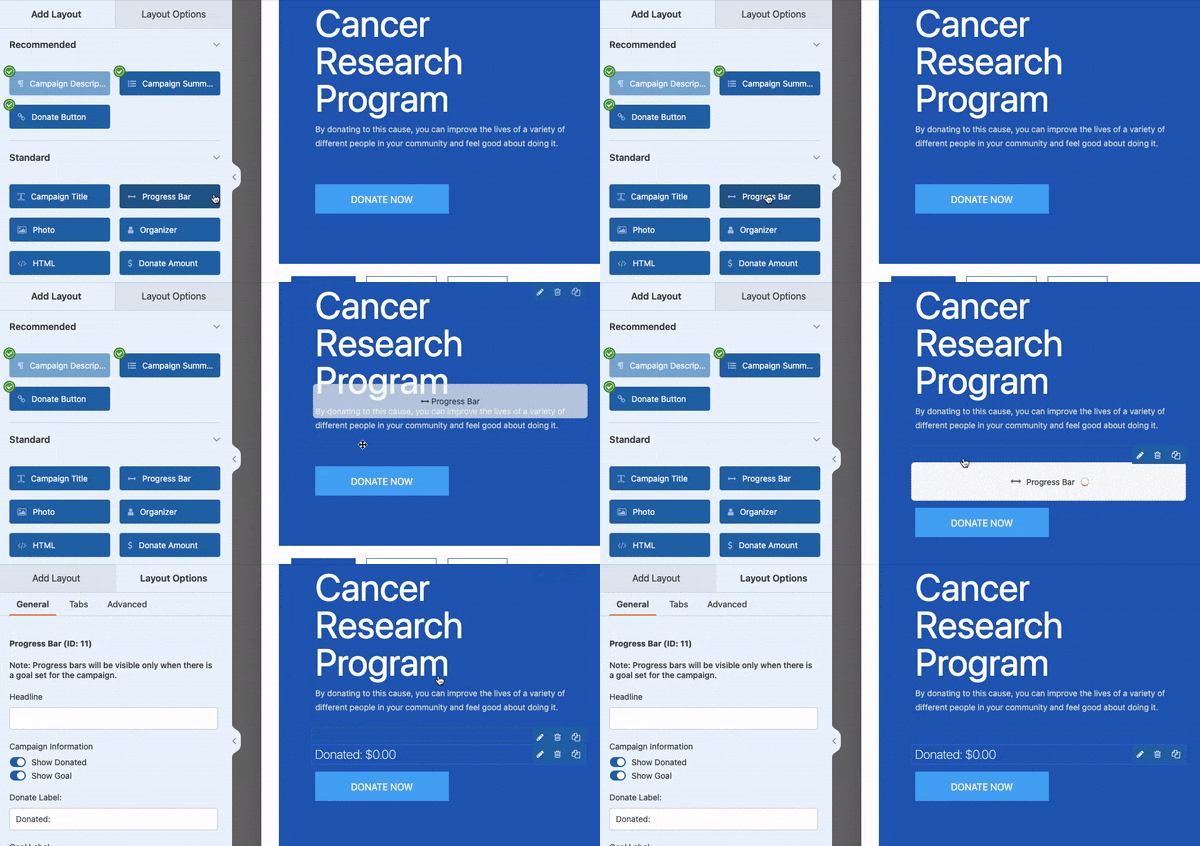
See How to Create Your First Campaign »
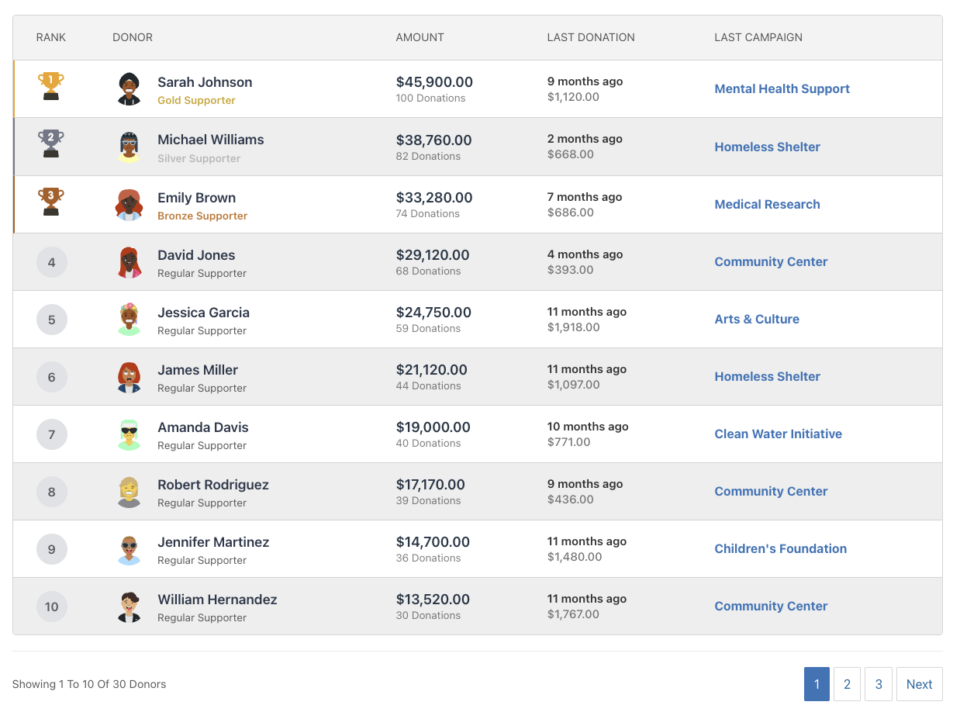
Once donations come in, you can see all your records in the Donations tab right in your WordPress dashboard. Every donation, donor detail, and payment status will be there – no need to log into multiple platforms or hunt through emails. You also get readymade reports to see which is your best campaign, top donors, recurring donors, and more.
The entire setup takes about 15 minutes once your payment gateway account is ready.
Setting Up WPForms
WPForms takes a different approach – instead of campaigns, you’re creating donation forms that you can embed anywhere on your website. You’ll want to grab the WPForms Pro version since the free version doesn’t include payment processing.
Go to WPForms » Add New and you’ll see form templates. Look for the “Donation Form” template – it gives you a head start with all the basic fields already set up.
Then you can customize your form. This is where WPForms shines. You can add images showing exactly what donations accomplish, write compelling descriptions about your cause, and create different donation amount options. Want to show that $25 feeds a family for a week? Add an image and description right in the form.
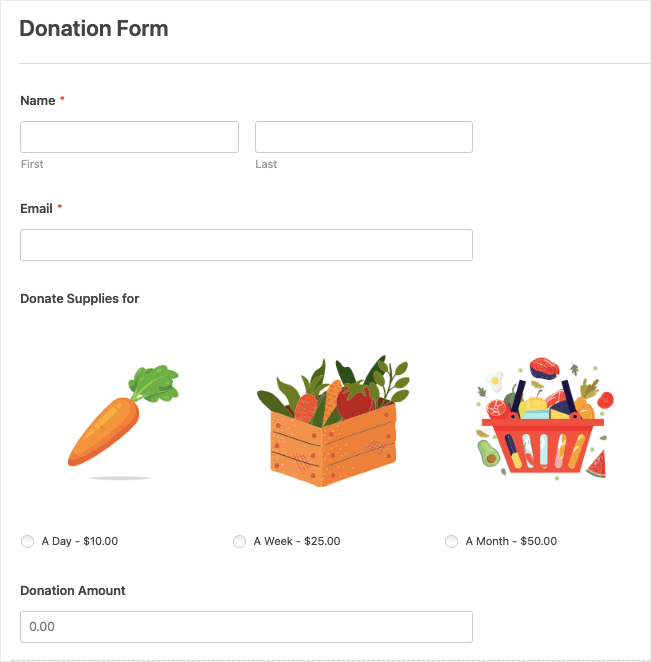
Click on Payments in the form builder, then choose your payment provider. WPForms works seamlessly with Stripe, PayPal, and Square. Enter your payment gateway credentials just like you would with Charitable.
Once your form is ready, you can add it to any page or post using the WPForms block in your page editor. Want a donation form on your homepage? Easy. Need it in your newsletter? Just copy the shortcode.
Your donations will show up under WPForms » Entries where you can see every submission, payment status, and donor information. It’s simple but effective – you get all the essential details without overwhelming dashboards.
The setup process is usually even quicker than Charitable since you’re just building forms, not entire campaigns.
Setting Up WP Simple Pay
WP Simple Pay is the streamlined option – no campaigns, no complex forms, just clean payment buttons and checkout pages that get the job done quickly.
After installing WP Simple Pay, go to Simple Pay » Add New in your WordPress admin. You’ll see options for one-time payments, subscriptions, or both.
Add your organization name, set suggested donation amounts ($25, $50, $100), and write a brief description of what the donations support. You can also enable custom amounts so donors can give exactly what they want.
To connect your payment gateway, click on the Payment tab and choose Stripe (WP Simple Pay works best with Stripe). Enter your Stripe publishable and secret keys – the plugin will walk you through finding these in your Stripe dashboard.
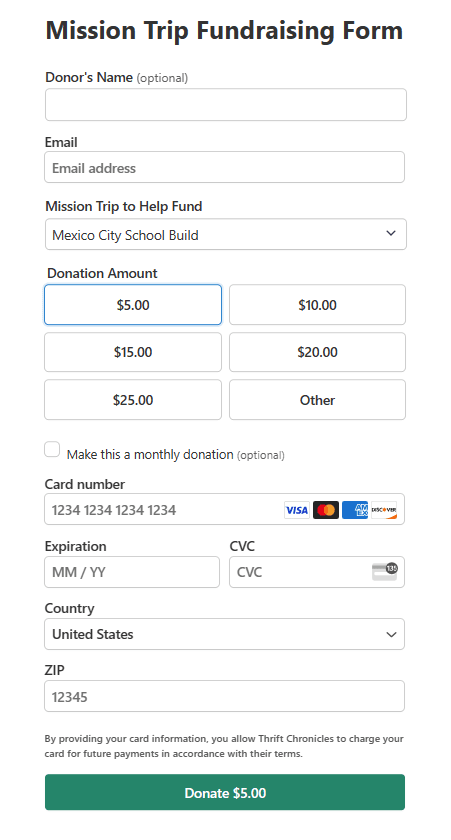
Once your form is ready, you can embed it anywhere using a shortcode or the Simple Pay block in your page editor. The checkout process happens right on your website – no redirecting donors to external pages.
Enable Recurring Donations: If you want monthly givers (and you should), just toggle on the subscription option. Donors can choose between one-time and monthly donations on the same form.
Check your donations under Simple Pay » Payments where you’ll see transaction details, donor information, and payment status. It’s straightforward reporting without unnecessary complexity.
Setup takes about 10 minutes since there’s no campaign building – just create your payment form and start collecting donations.
Tips While Creating Your Online Donation Setup
Now that you know how to get your donation system running, let’s talk about the things that can make or break your success. These aren’t just nice-to-have suggestions – they’re the difference between donations that convert and donors who click away.
Make Mobile Your Priority
Here’s a reality check: most of your donors will try to give from their phones. If your donation form doesn’t work smoothly on mobile, you’re losing money every day. Test your donation process on your phone before you launch anything. Can you complete a donation in under two minutes without zooming in or struggling with tiny buttons? If not, fix it.
Keep Your Form Simple
The longer your donation form, the fewer people will complete it. Ask for the absolute minimum: name, email, donation amount, and payment info. That’s it. You can always follow up later for additional information, but right now you just want to make giving as frictionless as possible.
Offer Suggested Amounts (But Allow Custom)
Don’t make people guess what to donate. Provide three suggested amounts like $25, $50, and $100, but always include a “custom amount” option. Many donors have a specific amount in mind, and you don’t want to lose them because your suggestions don’t match their budget.
Make Recurring Donations Obvious
Monthly donors are gold for nonprofits, but many organizations bury the recurring option. Make it prominent – either as a checkbox or toggle that’s easy to see. Some organizations even make monthly giving the default option (with the ability to change to one-time).
Write Clear Thank You Pages
Don’t just show a generic “payment successful” message. Create a proper thank you page that confirms their donation amount, explains what happens next, and maybe shares a quick story about the impact they’re making. This page is your chance to start building a relationship.
Common Mistakes That Kill Donations
Requiring account creation – Making people create an account just to donate is a quick way to lose potential supporters.
Too many steps – If your donation process has more than three or four steps, it’s too complicated. Simplify it.
Hiding fees – Be upfront about any processing fees. Surprises at checkout make people abandon donations.
No security badges – Display security logos and SSL certificates prominently. People need to feel safe giving you their credit card information.
Broken confirmation emails – Test your thank you emails. If donors don’t get immediate confirmation, they’ll worry their donation didn’t go through.
Test Everything Twice – Before you launch, run through the entire donation process yourself. Try different amounts, test on mobile and desktop, and use different browsers. Then have someone else test it too. What seems obvious to you might be confusing to your donors.
The goal is to remove every possible barrier between someone wanting to help and actually completing their donation.
Understanding Costs & Fees (The Real Numbers)
Let’s talk money – because you need to know exactly what accepting donations online will cost your organization. No surprises, no hidden fees you discover later.
Standard Processing Fees
Every time someone donates, the payment processor takes a small cut. Here’s what you can expect:
Stripe: 2.9% + 30¢ per transaction. So on a $100 donation, you pay $3.20 in fees and keep $96.80.
PayPal: 2.9% + 30¢ for most transactions, but they offer discounted rates for verified nonprofits – sometimes as low as 2.2% + 30¢. Worth applying for their nonprofit program.
Square: 2.9% + 30¢ standard, with nonprofit discounts available.
Plugin Costs
Charitable: The basic version is free and handles simple donations just fine. If you want the advanced features like recurring donations and detailed donor management, the Pro version runs $69 per year – which honestly isn’t bad considering what you get.
WPForms: Their basic plan starts at $49.50 per year, but for payment processing you’ll need their Pro plan at $99.50 annually. It sounds like a lot until you realize how much time it saves you.
WP Simple Pay: The Lite version covers basic payment forms for free. Their professional features cost $49.50 per year, which includes things like subscription management and detailed reporting.
So here’s what these costs mean. On a $50 donation through Stripe, you’ll pay $1.75 in processing fees. That donor intended to give you $50, and you get $48.25. Some organizations add a small “processing fee” checkbox to let donors cover these costs – totally legitimate and many donors are happy to help.
That said, there are ways to recover these fees by asking donors to cover the processing fee. It’s a feature called Fee Relief, check it out »
Hidden Costs to Watch For
- Monthly gateway fees: Most processors don’t charge monthly fees, but some do. Avoid these if you’re just starting out.
- Chargeback fees: If someone disputes a donation (rare but happens), you might pay $15-25 in fees even if you win the dispute.
- International transaction fees: Higher rates for donations from other countries – usually 3.9% instead of 2.9%.
Money-Saving Tips
Apply for nonprofit rates: PayPal, Stripe, and others offer discounted processing for verified nonprofits. It takes a few minutes to apply and can save you hundreds over time.
Encourage larger donations: Multiple donations of $25 donation costs you more (approx $4.12) than a single $100 donation (approx $3.20).
Consider covering fees: Let donors opt-in to cover processing costs. Many will say yes, and it ensures you get the full intended donation amount.
Start Free, Upgrade When You’re Ready: Here’s the thing – you don’t need to spend money upfront to start accepting donations online. Every plugin we’ve mentioned has a free version that lets you test the waters without any monthly costs. You’ll only pay the standard processing fees when someone actually donates.
What You Get for Free
Charitable Lite: You can create basic donation campaigns, accept one-time donations, and track everything in your WordPress dashboard. It’s not fancy, but it works perfectly for getting started. The only limitation? No recurring monthly donations – you’ll need the Pro version for that.
WPForms Lite: Creates simple forms such as contact forms. You won’t get payment options such as PayPal and Stripe integration. You need the Pro version.
WP Simple Pay Lite: Handles one-time payments through Stripe with clean, professional-looking payment forms. No subscriptions or complex features, but honestly, that might be exactly what you need right now. If you collect less than $1,650 annually and only need the basic features to accept payments online via Stripe, then WP Simple Pay is enough.
So the smart approach would be to start small and upgrade as you grow.
Install the free version of whichever plugin appeals to you most. Set it up, start collecting donations, and see how it feels. Are donors using it? Is the process smooth? Do you find yourself wishing for specific features?
Once you’re bringing in regular donations and know what you need, then consider upgrading. Maybe you realize monthly donors would be game-changing for your budget – that’s when Charitable Pro makes sense. Or perhaps you want better-looking forms with more customization – time for WPForms Pro.
The beauty of this approach? You’re not gambling with upfront costs. You prove that online donations work for your organization first, then invest in better tools once you know they’ll pay for themselves.
You’ve made it through the entire guide, which means you’re serious about getting online donations set up. That’s already more progress than most nonprofits make – they bookmark articles like this and never come back to them.
Here’s your next step: pick one plugin and install it this week. Not next month, not when you have more time, this week. Start with the free version if you’re feeling cautious. The hardest part isn’t the technical setup – it’s actually making the decision to begin.
Frequently Asked Questions
Is it safe to accept credit cards on my website?
Yes. Payment processors like Stripe and PayPal handle all sensitive credit card data and are PCI compliant. Just ensure your website has an SSL certificate.
Do I need to be tech-savvy to set this up?
No. If you can send emails, you can set up donations. Setup wizards guide you through everything step by step.
Can donors give anonymously?
Yes. Charitable lets people remain anonymous on public donor lists while still processing payment information for tax receipts.
What about tax receipts for donors?
Charitable automatically send receipt emails with necessary tax information. More detailed receipts may require separate handling through your accounting system.
Will this work with my existing website?
Yes, if you’re using WordPress. Other platforms like Squarespace or Wix have their own payment options but with fewer features.
How long does it take to receive donation money?
Stripe deposits funds in 2-3 business days. PayPal takes 1-2 days. Some processors offer instant transfers for an additional fee.
What if I get stuck during setup?
All mentioned plugins have support documentation and help desks. Plus, WordPress has a large community where most problems have already been solved.
How much does it cost to accept donations online?
Payment processors typically charge 2.9% + 30¢ per transaction. Plugin costs range from free to $199/year depending on features needed.
What’s the best donation platform for small nonprofits?
Charitable or WPForms work well for most small nonprofits. Here’s a complete comparison of the best donation platforms.
Can I accept recurring monthly donations?
Yes, but you’ll need pro versions of most plugins. Charitable Pro ($99/year) and WP Simple Pay Pro ($99.50/year) both support recurring donations.
Do I need a business bank account for donations?
Yes, most payment processors require a business or nonprofit bank account. Personal accounts typically aren’t allowed for organizational fundraising.
How do I handle donation refunds?
Process refunds directly through your payment gateway (Stripe, PayPal, etc.). Most plugins don’t handle refunds directly – you’ll use the processor’s dashboard.
What information do I need from donors?
At minimum: name, email, donation amount, and payment details. Keep forms short – additional information can be collected later through follow-up communications.
What’s the difference between Charitable Lite and Pro?
Charitable Lite is free but includes a 3% transaction fee. Pro plans eliminate this fee and include advanced features like recurring donations, donor management, peer-to-peer fundraising, and more payment gateways.
Are there video tutorials available?
Yes! Subscribe to the Charitable YouTube channel for step-by-step tutorials and success stories.
Do you want non-profit and fundraising tips delivered straight to your inbox? Join our newsletter. We won’t spam you – we send tips, advice, and tutorials that you’ll find helpful.
Ready to get started today?
There’s a lite plan that gives you all the essential fundraising tools you need to create campaigns, launch them, and accept donations – completely free. Sign up for Charitable Lite here »
Ready to supercharge your fundraising and streamline donor communications? Get Charitable Pro here »



Leave a Reply