
Imagine knowing exactly what funds you will have each month for salaries, programs, and outreach.
No more feast-or-famine budgeting, and no more scrambling at the end of the year to cover shortfalls. Monthly giving makes this reality possible for churches.
Many ministries struggle with “slump periods” or inconsistent giving, which makes it difficult to budget for missions and goals. While the Sunday collection plate is a time-honored tradition, it relies on members being physically present to give.
The best way to solve this is by allowing members to give online. However, if you want steady income, you need to offer options for your church members to select a weekly or monthly amount that is automatically contributed.
This is very easy to set up on your website.
In this article, I’ll walk you through how to launch a monthly giving program step-by-step. We will cover the tools, messaging, and strategies that work for real churches so you can build steady support for your mission.
What’s in this Guide?
Why Monthly Giving Works for Churches
Monthly giving transforms unpredictable plate offerings into reliable ministry funding. Here’s why it matters:
- Predictable Budgeting
Know your monthly income for staff salaries, building maintenance, and outreach programs. No more cash flow surprises. - Higher Lifetime Value
Monthly donors give more over time. One $25 monthly gift equals $300 annually with minimal extra effort from you. - Modern Donor Preference
Many Christian givers already participate in monthly programs. They want simple, automatic ways to support your church. - Better Retention
Monthly givers stay committed much longer than one-time donors. They feel connected to your mission. - Less Fundraising Fatigue
Reduce appeals and special offerings. Monthly supporters provide steady baseline funding.
Churches implementing recurring tithing report stronger financial health and more freedom to serve their communities effectively.
Setting Up Recurring Donations on Your Church Website
The first step in launching your monthly giving program is adding a donation form to your WordPress website.
You might be worried that accepting recurring payments requires complex coding or expensive software. The good news is that it is actually quite simple to do using the right WordPress donation plugin.
Haven’t set up your website yet? Follow our easy guide: How to Create a Nonprofit Charity Website using WordPress (7 Easy Steps) or follow our video tutorial:
Step 1: Choose the Right Platform
Choosing the right plugin is crucial because it acts as the foundation for your entire fundraising strategy. You want a tool that allows you to build a solid base for the long term, rather than a system you will have to replace in a year or two.
There are dozens of recurring donation platforms available for non-profits and ministries. However, many of them charge high transaction fees, or they redirect members away from your church website to a third-party page to complete the transaction.
To build trust and keep your branding consistent, it is best to process donations directly on your own WordPress site. Here are the key features you’ll want:
- Easy Recurring Setup
Donors select frequency (weekly, monthly, quarterly) with one click. No complicated forms. - Multiple Payment Options
Credit cards, ACH bank transfers, Apple Pay, Google Pay. Cover all donor preferences. - Donor Management Dashboard
Track monthly givers, view giving trends, export data for tax statements. - Mobile and Text Giving
Many churchgoers prefer giving from phones or responding to SMS reminders. - Integration with Church Tools
Connects with church management software, email platforms, and accounting systems.
With this in mind, Charitable comes out on top as the best recurring donations software for churches to raise funds online.
Charitable is a top-rated WordPress donation plugin that allows you to create fundraising campaigns and donation forms in minutes. It is powerful, beginner-friendly, and perfect for accepting recurring donations.

With Charitable, you can easily let donors subscribe to weekly, monthly, or annual giving plans. Plus, unlike other hosted platforms, Charitable Pro charges 0% platform fees. This ensures that more money goes directly toward your mission and outreach programs.
It is the best way to set up a professional giving program without high costs or complex technical setups.
There’s a dedicated template that churches can use so that you don’t have to start from scratch. Here’s a sneakpeek at some of the templates:


There are multiple payment options so you can cover every donor preference.
Charitable integrates seamlessly with Stripe, Square, PayPal, ACH bank transfers, Apple Pay, and Google Pay. Whether your congregation prefers cards, bank drafts, or mobile wallets, everyone can give easily. See all payment gateway options »
Charitable also makes it incredibly easy to manage donation records, donor profiles, and keep everything organized. It automatically tracks every monthly giver, monitors lifetime value, and generates year-end tax statements with one click.
This means you only have to set it up once, then everything runs on autopilot. You’ll only need to monitor it from time to time.
Added to this, you can enable Donor dashboards – this lets supporters log in and see their giving history. They can download receipts, adjust their contribution, and update their profile. See how easy it is to set this up »
Thousands of churches trust Charitable for recurring tithing. Monthly giving typically grows 30-50% after implementation. No setup fees and a 14-day money-back guarantee make it risk-free to start.
With Charitable handling the technical side, you can focus on ministry while enjoying predictable, growing monthly support.
Explore the Recurring Donations Feature »
Sign up today and get up to 50% off on your plan. We’re confident you’ll love raising funds with Charitable Pro. If, for any reason, Charitable is not the right fit for you, we’ll refund your purchase with our 14-day money-back guarantee
Now that we’ve got the right platform, let’s set up recurring donations on your website.
Step 2: Install and Activate Charitable
Head over to the official Charitable website and choose the Plus plan or higher. Sign up for an account and then you can download the plugin file and copy your license key.

In your WordPress admin, go to Plugins » Add New » Upload Plugin.
Choose the Charitable plugin file you downloaded to your computer. Hit the Install Now button and then activate the plugin on your site.

Now Charitable will show up in your wp-admin menu.
Let’s create a new campaign.
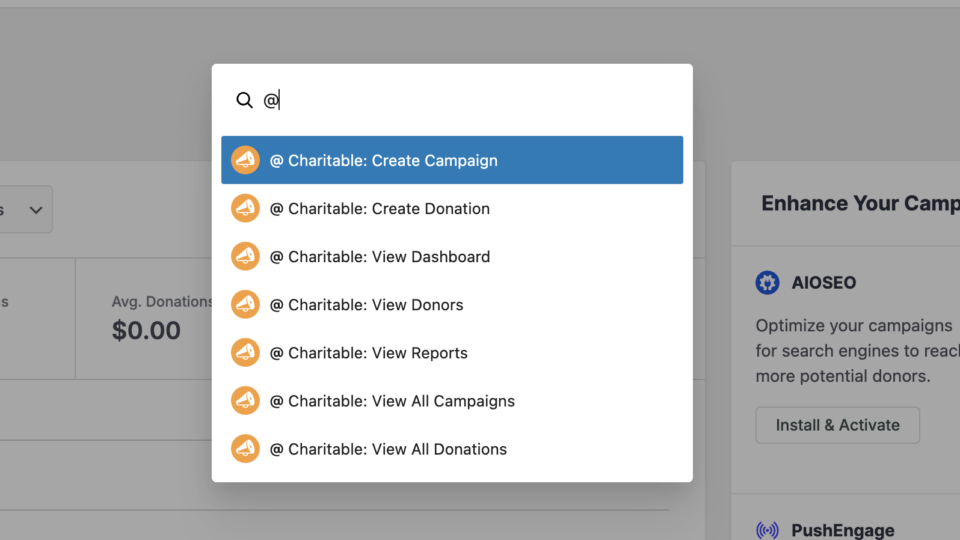
Step 3: Add a New Campaign
From the admin menu, choose Charitable » Add New. This will open up a library of templates to choose from. You can name your campaign at the top and then choose a template – there’s a church template available. You can also start from scratch by choosing a blank layout.

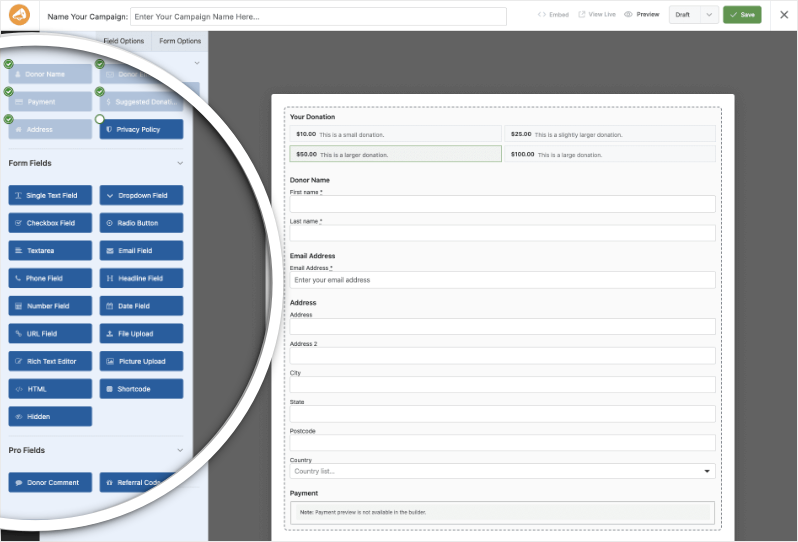
When you choose a template, the campaign builder will open. Here, you can edit and customize the campaign visually. On the right, you’ll see a preview of your fundraiser campaign. On the left, you’ll see a taskbar with settings and blocks that you can add to your campaign.

The builder is designed to be easy for anyone to use. There’s no coding needed. What you see here is what you’ll see when the campaign is live.
To add new blocks, simply drag them from the left menu into your campaign where you’d like them to appear.
You can drag and drop to rearrange blocks in the preview. Simply click on any block and you’ll see options appear to edit the content or image. You can also change the color, borders, padding, margins, and more.
For detailed steps, head over to Setting Up Your First Campaign »
When you’re ready with your campaign design, hit the Save button at the top. Now we can set up recurring donation options.
Step 4: Enable Recurring Donations
Setting up recurring donations only takes a few clicks.
Go to the Settings tab from the far-left menu. Here, click on the Recurring Donations tab.

A popup will appear that lets you know that the Recurring Donations addon is not installed. Click on the Install and Activate button here and Charitable will begin to automatically install the addon for you.

Once it has been installed and activated, you’ll see a success message. Click on the Save and Reload Campaign button to refresh the page and start using the addon.

If the process is successful, move ahead and customize your recurring donation options.
In case this process failed for you, there may be restrictions placed by your hosting provider. You’ll need to install the addon manually.
First, log into your Charitable account at wpcharitable.com. Go to the Downloads tab and scroll down to the addons section.

Here, find the Recurring Donations add-on. and download the file to your computer.

In your WordPress admin, go to Plugins » Add New » Upload Plugin.
Select the Recurring Donations addon file from your computer and click the Install Now button. Once installed, click the Activate Plugin button.

Once done, you’ll see a success message. Now you’re ready to use recurring donations in your campaigns.
Step 5: Customize Recurring Donation Options
Once Recurring Donations is enabled, go to Settings
Inside the campaign builder, go to the Settings » Donation Options tab. First, you’ll see options to set Suggested Donation Amounts.
This makes it easier for the donor to simply choose a preset amount.

For more detailed instructions on this step, see Creating Time-Sensitive or Goal-Based Fundraising Campaigns in Minutes.
Scroll down and you’ll see a Recurring Donations section available now. There’s a toggle button that lets you enable recurring donation options on this campaign. Simply click on it to activate it.

New options will appear that let you configure your recurring donations.
First, you can choose between Simple and Advanced recurring donations.

Simple – Allow donors to make their donation recurring
If you choose the Simple option, a single check box will be added to your donation form like this:

Donors can check it to make their contributions every month. Charitable will handle the process for you, billing the donor every month on the set date.
Advanced – Define unique giving options for recurring donations
If you choose the Advanced option, you gain full control over the donation form layout. This allows you to tailor the giving experience to match how your congregation prefers to tithe.

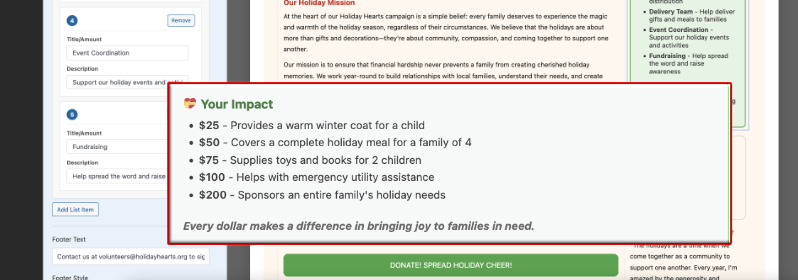
Once selected, you can add suggested donation amounts along with descriptions for each tier. Descriptions are powerful because they help members understand exactly where their contribution goes.
Example: “$200 a month helps stock the food pantry for 4 families.”

Prioritize Consistent Giving
Charitable allows you to choose which tab appears by default to donors: One-time donations or Recurring Donations. If your goal is to stabilize the church budget, make sure to select Recurring Donations as the default view. This subtle “nudge” encourages members to sign up for automatic tithing rather than a single gift.
If you want to prioritize recurring donations, make sure to choose it here.

Set the Donation Frequency
Next, you can set a default recurring donation period or give your donors choices.
Option 1: Restricted (No Donor Choice)
If you choose this option “No – Donors can make a recurring donation only with the default donation period”, you’ll set one fixed recurring donation period that applies to all donors.
You’ll need to select how often donors will be billed from these intervals: weekly, monthly, quarterly, semiannually, or yearly. This creates a standardized donation schedule across your donor base.

You’ll also have the ability to set whether these recurring donations should never expire or have a specific end date such as 2 months, 6 months, up to 24 months.

This is great for specific pledges, such as a “12-Month Building Campaign” where you want everyone on the same monthly schedule. You can even set an expiration date (e.g., stop billing after 12 months) so the commitment ends automatically when the campaign does.
Option 2: Flexible (Yes to Donor Choice)
If you choose to give donors a choice, select “Yes — Allow donors to choose their donation period”.
This option provides the most flexibility, which is often best for general tithing. Since members are paid on different schedules (weekly, bi-weekly, or monthly), giving them the choice ensures they can tithe in a way that fits their personal finances.
You will need to make two decisions here:
Set the Default: Choose what is pre-selected when they load the page (e.g., Monthly).

Select Available Options: Check the boxes for the frequencies you want to offer:
- Weekly
- Monthly
- Quarterly
- Semiannual
- Yearly

Once you’ve configured your options here, make sure to save your changes using the Save button in the top-right corner of the builder.
Now, you can preview your live campaign. When you click your Donate button, you will see a professional, customized form ready to accept recurring tithes.
Step 6: Publish Your Recurring Donations Campaign
Before publishing, make sure you’ve connected your campaign to a payment gateway. Not sure which gateway to choose? See Best Payment Gateways for Nonprofits (Expert Guide) »

Then double-check everything and save and publish your campaign.

Now in the WordPress block editor, you can simply add a new block and search for “Charitable”. Then add the “Charitable Campaign” block and you’ll see a dropdown menu appear.
Here, you can select your campaign and publish your page.

You’re all set to accept recurring donations now. Next, I’ll show you how to manage your donation records.
View and Manage Recurring Donation Records
Charitable automatically records and safely stores all your recurring donations for you. You can access this by going to the Charitable » Recurring Donations page.
Here, you’ll see a list of your recurring donors along with:
- Amount donated
- Campaigns
- Date
- Related Donations
- Status

There are actions you can take on this page. First, you can view individual donor records and delete them.

From the top menu, you can also export this list to use offline or with other tools. You can also use the search bar to quickly find the donor record you’re looking for.
Get Insights In Your Recurring Donations Report
Fundraising reports are so important to find out where your campaigns are performing well and where you need to make changes.
Charitable automatically records and safely stores all your recurring donations. You can access this by going to Charitable » Recurring Donations.
Here, you’ll see a list of your recurring donors along with amounts, dates, and status. You can view individual donor records, manage subscriptions, or export this list to use with your other church management tools.
Viewing Reports
Charitable also creates fundraising reports for you.
Go to Charitable » Reports to see the financial health of your church. Under the Donors tab, select the Recurring Donors report to view total donations, average gift size, and retention rates.

Now you can view a list of your donors along with:
- Total donations
- Number of donations
- Average
- Number of campaigns
- Last donation.
Start Building Steady Support Today
Thousands of churches trust Charitable for recurring tithing. With no setup fees and a 14-day money-back guarantee, it is risk-free to start.
Using another platform and want to migrate to Charitable? Follow our guide here »
Charitable Has 1+ Million Downloads!
Trusted by millions to power successful fundraising campaigns. Try Charitable risk-free today.
✅ 14-day money-back guarantee
✅ Transparent pricing
✅ Code-free setup
Stay Connected for More Nonprofit Resources
For more tutorials and videos tailored to nonprofits, subscribe to our YouTube channel. We regularly publish expert tips, step-by-step guides on migrations like this GiveWP to Charitable switch, fundraising strategies, and practical resources to help your organization succeed.
🗞️ Get weekly tips and exclusive guides in your inbox
Join our newsletter →
🎥 Watch step-by-step tutorials and success stories
Subscribe to our YouTube channel →
👩🏽💻 Connect with our community and get daily nonprofit insights
Follow us on LinkedIn →
🥳 Fun reels and non-profit insights
Follow us on Instagram →
👀 Insightful & fun videos to help you grow your cause
Follow us on TikTok→
🌎 Subscribe and follow for general fundraiser tips
Get Fundraiser Tips on TikTok →
Need more ideas to raise funds for your church? See our guide on 30+ Proven Ways to Raise Money Online.
Want to automate more of your fundraising? Then check out AI for Non-Profits: The Ultimate Guide (Strategies, Tools, Free Courses).


Leave a Reply