We’ve designed Charitable to be easy to set up and use so that anyone can raise funds online without any technical knowledge. This guide provides step-by-step instructions for installing and activating the plugin on your WordPress website.
Prerequisites
- A self-hosted WordPress website (version 5.0 or higher)
- Administrative access to your WordPress dashboard
- PHP 7.4 or higher
- MySQL 8.0 or higher
Charitable is available in two versions: Charitable Pro (Premium) and Charitable Lite (Free). Both versions allow you to create donation campaigns and accept payments on your WordPress website, with Premium offering additional features and enhanced functionality.
Installing Charitable Pro
Here’s how to install the premium version of Charitable on your WordPress site.
Step 1: Choose Your Charitable Plan
To get the pro version, first, head over to the Charitable Plans page. It details all the features available in the plugin, along with the different pricing tiers available. You can review the options and see which best fits your organization’s needs.
There are four plans you can choose from:
- Basic: Gives you the essential tools to raise funds and manage donations with ease.
- Plus: Designed for growing non-profits who want to expand their fundraising with recurring donations, fee relief, and annual receipts.
- Pro: For more powerful integrations, automation, peer-to-peer fundraising, ambassadors, fundraising teams, and more.
- Elite: Designed for agencies and non-profits with multiple websites.
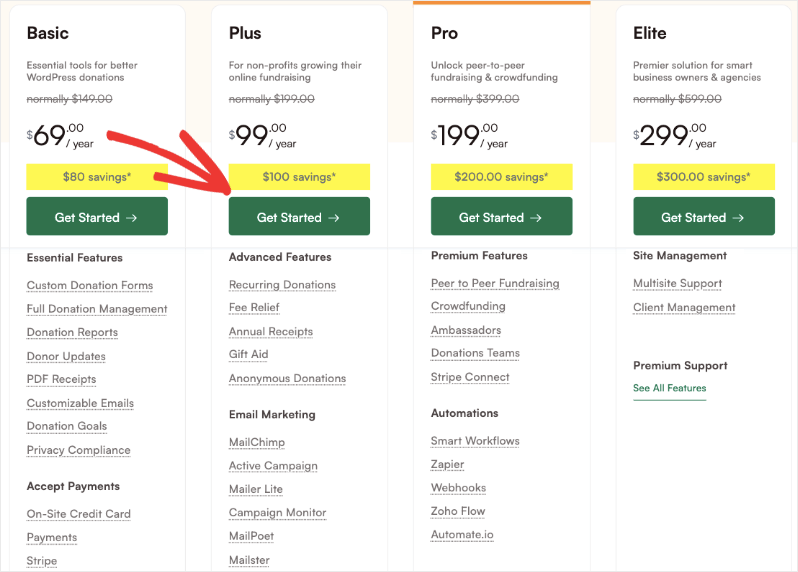
Once you’ve found the right plan, click the Get Started button to proceed to checkout. Complete your purchase, and Charitable will create a new account for you.
Step 2: Download the Plugin File
Now, you’ll be logged into your Charitable account. In the Downloads tab, you’ll see a plugin file and a license key.
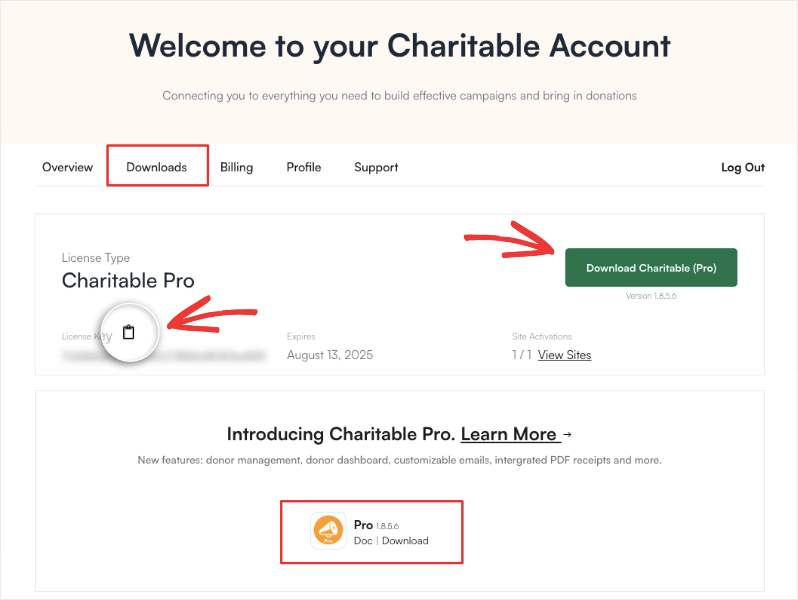
Download this file to your computer and copy the license key by clicking on the clipboard icon next to it.
We’ve added a link to the documentation on this page as well, so you can easily access these step-by-step instructions any time you need.
Step 3: Install and Activate the Plugin
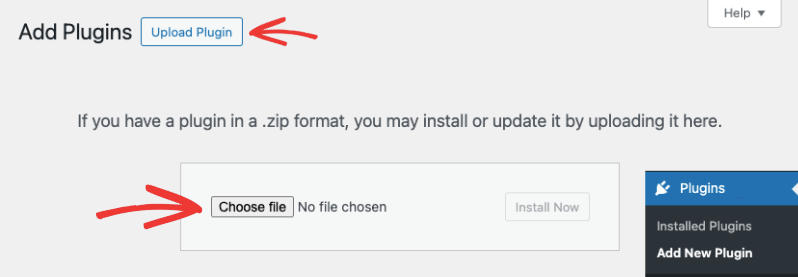
In your WordPress admin panel, go to Plugins » Add New » Upload Plugin. Here, select the plugin file and upload it to your WordPress site. Then install and activate the plugin.
Once done, for new installations, the setup wizard will appear, which will take you through all the essential steps on getting started.
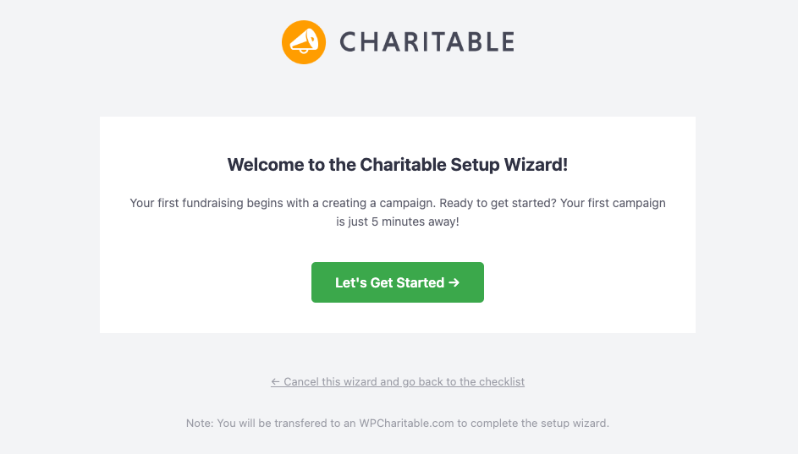
We’ve designed the wizard to be simple and self-explanatory. No matter your level of expertise, you’ll be able to configure important settings such as your payment gateway and launch your first fundraising campaign.
Step 4: Activate Your License Key
The last step in setting up is activating your Charitable license. In your WordPress menu, open the Charitable » Settings page.
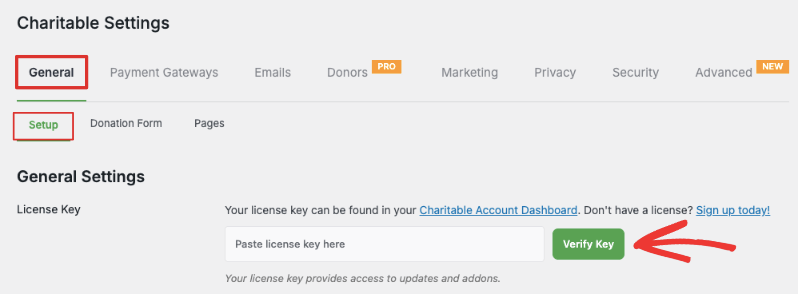
You’ll see a field where you can paste your license key and verify it. Once done, your plan details will appear here.
That’s it. You’re ready to build and launch fundraising campaigns to collect donations online.
Need help with setting up other features of Charitable? Find all the guides you need here: Charitable Documentation »
Installing Charitable Lite
Charitable offers a free version with all the essential features you need to raise funds online. This includes unlimited donation campaigns, donation records, and built-in Stripe integration.
To get started with Charitable Lite, go to Plugins » Add New in your WordPress dashboard. In the search bar here, type in ‘Charitable’. Once you find the plugin, install and activate it.
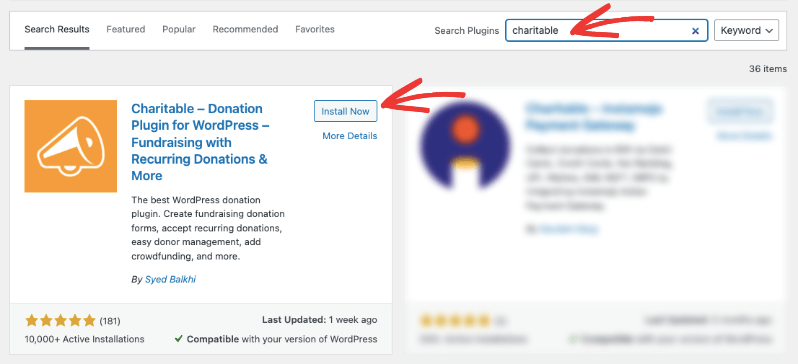
That’s it. You’re all set to use Charitable Lite. No license key required.
Here too, for new installations, Charitable’s setup wizard will launch. We recommend using this wizard to quickly configure essential settings and payment gateway options.

Now you’re all set to raise funds online and manage your donations with ease. For more on how to set up your first campaign with Charitable, refer to our comprehensive documentation here: Get Started with Charitable »
