Our latest plugin is Charitable Automation Connect, which allows you to send information about your campaigns, donations and recurring donations to automation platforms like Zapier.
In this blog post, I’ll show you how you can integrate Charitable, Zapier and Google Calendar to automatically register new donors as attendees to your Google Calendar event.
Getting started with Zapier
Zapier is an app that lets you create automated workflows that connect different apps. With over 3000 apps integrated, there are endless possibilities for how you can use it.
Automation might sound like a scary thing that, but Zapier makes it easy with an intuitive process for building your workflows (or Zaps as they are known in Zapier lingo). You can create a Zap without needing a developer.
What is a Zap?
A Zap connects two or more different apps to create an automated workflow.
The starting point for a Zap is a Trigger. This is the event that kickstarts the automation, and usually it’s an event taking place in a 3rd party app. For example, a Trigger Event could be a new email arriving in your Gmail inbox, or a new contact form submission on your website.
The other part of your Zap is an Action that takes place after a Trigger Event occurs. As with Triggers, Actions are events taking place in 3rd party apps, and you can add more than one Action in the workflow, so a single Trigger Event can set off a number of actions in a row.
This is really where the Zapier magic happens. It’s how you can take a new email and add it to your day’s to-do list, or respond to each new contact form submission by adding the submitter’s email address to your CRM.
You can also create conditional workflows. For example, maybe instead of adding every new email to your day’s to-do list, you only want to add emails from your boss?
Does Zapier have special pricing for non-profits?
While Zapier does have a free plan (and it works with Charitable’s Zapier integration), we found that for most use-cases you will need the features and allowances included in the paid plans. The Starter plan is the most affordable plan and costs $20 USD per month.
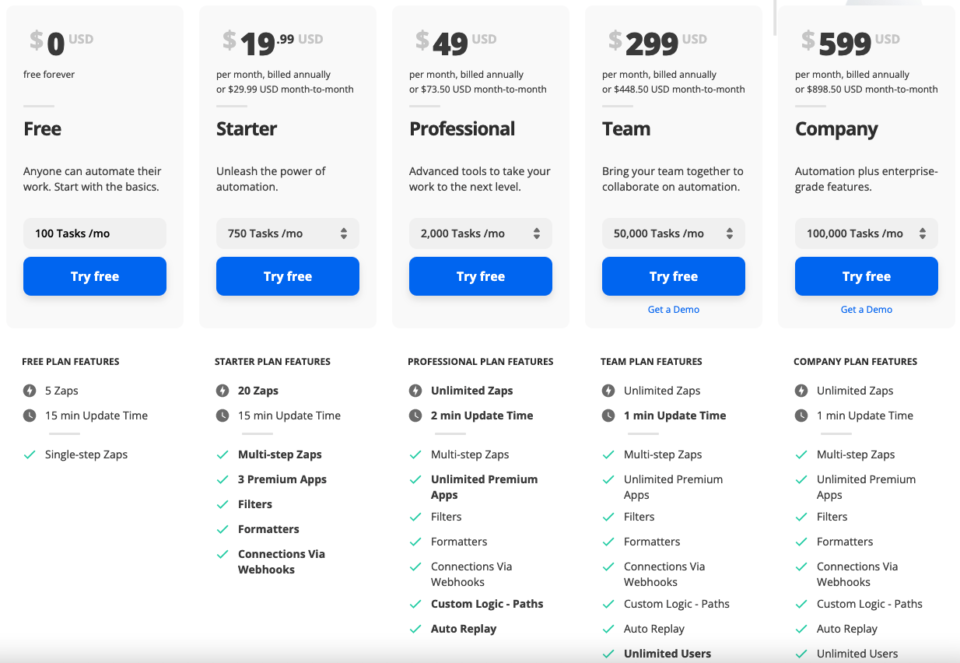
Of course, every dollar counts for non-profits. Luckily, Zapier offers non-profits a 15% discount off its paid plans.
The discount is available upon application, and you will need to be able to supply Zapier with proof of your organization’s non-profit status.
An introduction to Google Calendar for non-profits
Google Calendar is part of the popular collection of online apps that Google has created for organizations of all shapes and sizes. Your organization can use it keep track of important dates, meetings, handle events or coordinate volunteers.
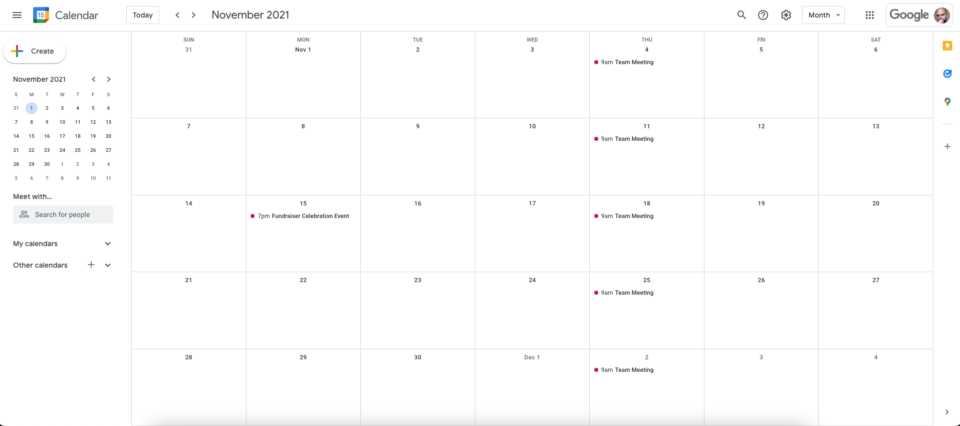
The nice thing about Google Calendar is that you can maintain both private and public calendars. Private calendars can easily be limited to only be viewable by others inside the organization, while public calendars are available to anyone.
We also like the way Google Calendar ties in with another one of Google’s apps, Meet, Google’s alternative to Zoom. It makes Google Calendar a nice way to organize meetings, or even set up a virtual peer-to-peer fundraising event.
Best of all, Google Calendar is included in Google Workspace, which is free for non-profit organizations. Besides Calendar, Google Workspace includes access to apps like Gmail, Meet, Drive, Docs, Sheets and much more.
As with Zapier, you will need to apply to get non-profit access, and you will need to provide evidence of your organization’s non-profit status.
How to manage a fundraising event in Google Calendar
Now that we’ve covered the basics of both Zapier and Google Calendar, let’s look at how we can use Charitable’s Zapier integration to invite donors to a fundraising event.
Our end goal is to automatically invite donors to attend our fundraising event.
With Zapier acting as the middleman between Charitable and Google, we can achieve that easily — without writing any code.
1. Create a new event in Google Calendar
To get started, go to Google Calendar:
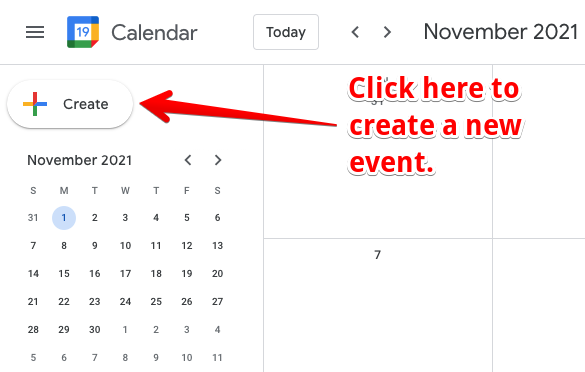
You can add a new event by clicking on the date where you would like to add the event, or by clicking on the large Create button in the top left corner:
Next, set up your event:
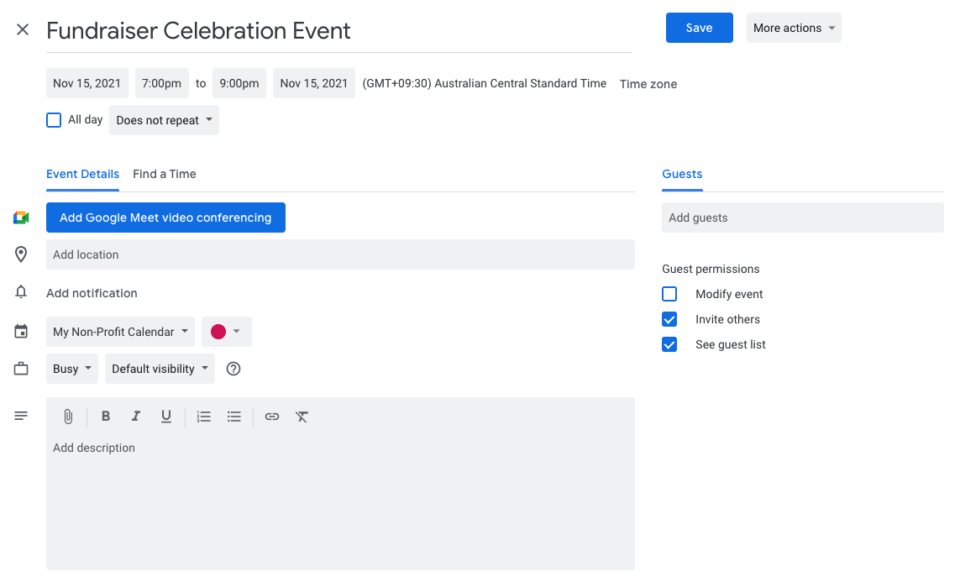
Creating an event is a relatively straightforward process, with the ability to set a title, specify the event date, start time and end time, as well as providing a location, optionally turning on Google Meet video conferencing, and setting up a more detailed event description.
When setting up your event, be sure to double-check that the correct time zone is used!
2. Install and activate Charitable Automation Connect
Next, let’s log into our WordPress dashboard and get the Charitable Automation Connect plugin.
Automation Connect is an extension for Charitable, which is a fancy way of saying it’s a regular WordPress plugin designed to add to the features of Charitable, our free WordPress donation plugin.
Since Automation Connect is a paid extension, you will first need to purchase a license. You’ll find the best value available with one of the Charitable packages, all of which include Automation Connect and a range of other Charitable extensions adding more payment options, recurring donation support, email marketing tools, peer-to-peer fundraising, and more.
Level up your online fundraising
Charitable is the top-rated and most affordable WordPress donation plugin. Upgrade your WordPress fundraising today.
Installing Charitable Automation Connect
Once you have the Automation Connect plugin, you can install it via your WordPress dashboard:
- Download your extension through the link in your purchase receipt email, or from your account page on wpcharitable.com.
- In your WordPress dashboard, go to Plugins > Add New.
- Next, click the Upload Plugin button at the top of the page.
- Select the zip file you downloaded earlier and click Install Now.
- Activate Charitable Automation Connect.
With that, you’ve done all you need to do on the WordPress side of things. Automation Connect is now active and ready for you to connect Charitable with Zapier.
3. Set up the Charitable Zapier integration
Not signed up with Zapier yet? You’ll need an account for these next steps. Click here to sign up.
The Charitable integration with Zapier is in an invite-only stage. You can use it by clicking the link below:
https://zapier.com/developer/public-invite/145749/3951e2d476c62199212c9731642ed145/
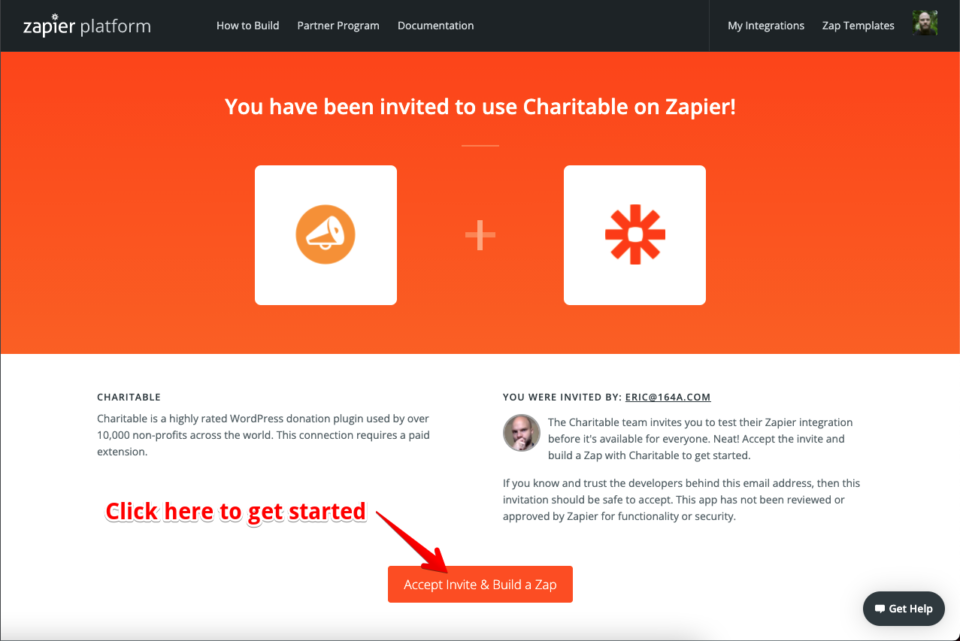
On the following page, click the Accept Invite & Build a Zap button, which will add the Charitable integration to your Zapier account:
4. Create a new Zap to invite donors to attend fundraising event
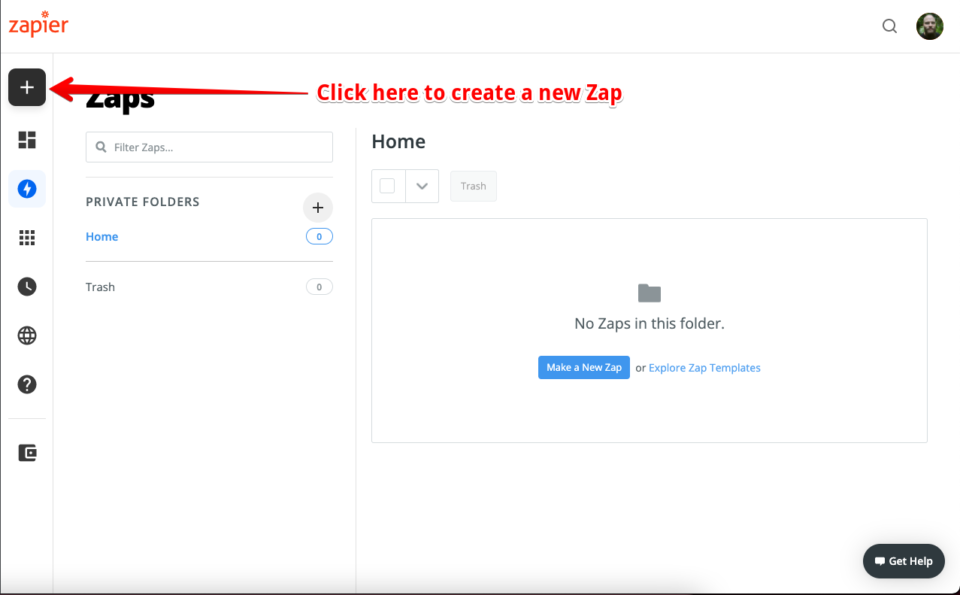
With that done, it’s time to set up our Zap. In the top left corner, click on the Create Zap button (on smaller screens, the button will be replaced by a large + button, as shown below):
Set up the Zap’s trigger
As discussed earlier, a Zap starts with a Trigger. Our Zap’s Trigger will be an event in Charitable — a new donation.
In the search field, search for “charitable” and then select it as the App:
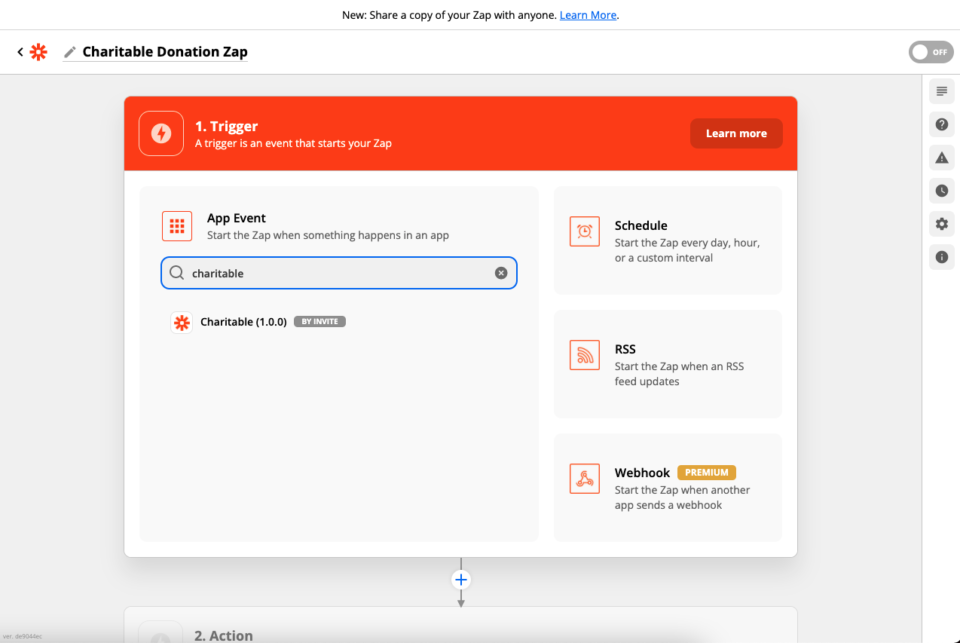
Next, we choose our Trigger Event. At this stage we’re picking which Charitable resource (Donation, Campaign, or Recurring Donation) the Trigger Event will apply to. In a little while we’ll pick the specific event (a new donation, a trashed campaign, etc.):
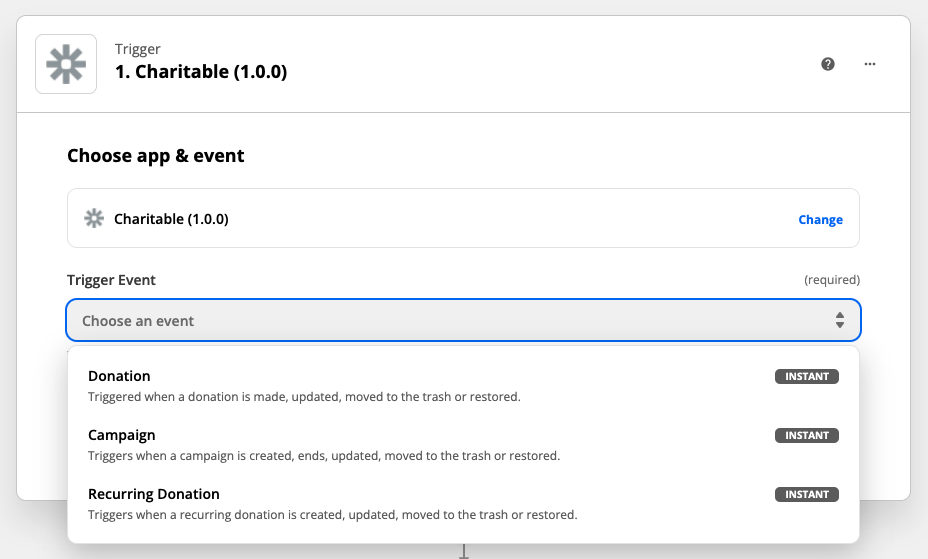
When you use the Charitable Zapier integration for the first time, you will need to connect your website to Zapier. Click on Sign in to Charitable.
In the form that opens up, you will be asked to set up details to allow Zapier to access your Charitable account. To be clear, this is your account on your WordPress website — not your account on wpcharitable.com.
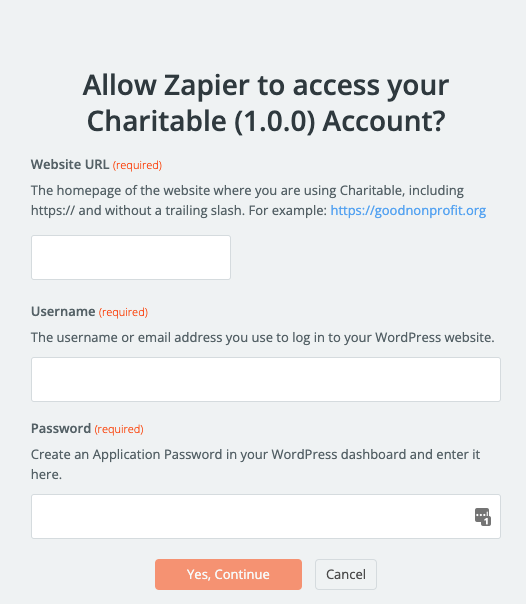
In the Website URL field, add the homepage URL of the website where you have Charitable installed. Be sure to include https:// at the start and leave out the backslash at the end.
In the Username field, add the username or email address you use to log in to your WordPress dashboard.
For the Password field, you could use your regular WordPress password, but for security purposes we strongly recommend setting up an Application Password to be used exclusively by Zapier.
Setting up an Application Password
Creating an Application Password is a simple 3-step process:
1. Go to Users > Profile in your WordPress dashboard.
2. Scroll down and click on Add New Application Password.
3. Copy and paste the password into Zapier.
With those details filled out, click on Yes, Continue.
In the next step, you can choose the specific event that will start your workflow. For donations, there are four options:
- When a donation is created.
- When a donation is updated.
- When a donation is moved to trash.
- When a donation is restored from the trash.
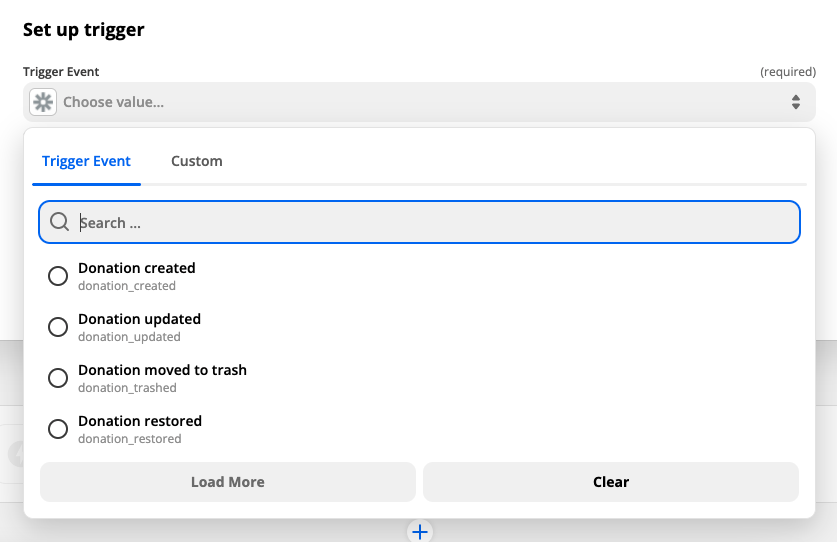
In our case, we’ll pick the “Donation updated” event. While “Donation created” might seem like a better fit, we want to make sure that donors are only added as attendees when their donation has been paid. Donations start off as Pending by default, so when the “Donation created” event happens, the payment will not be confirmed yet.
Later, we will use a filter to make sure that the donation is paid before adding the donor as an attendee.
With that done, click on Continue and then click Test Trigger in the following step to make sure everything is working.
Set up the action
As we mentioned above, we only want donors to be added as attendees when they finish paying their donation. To achieve that, we can use the Filter tool in Zapier. In the Action section, click on Filter in the right hand column:
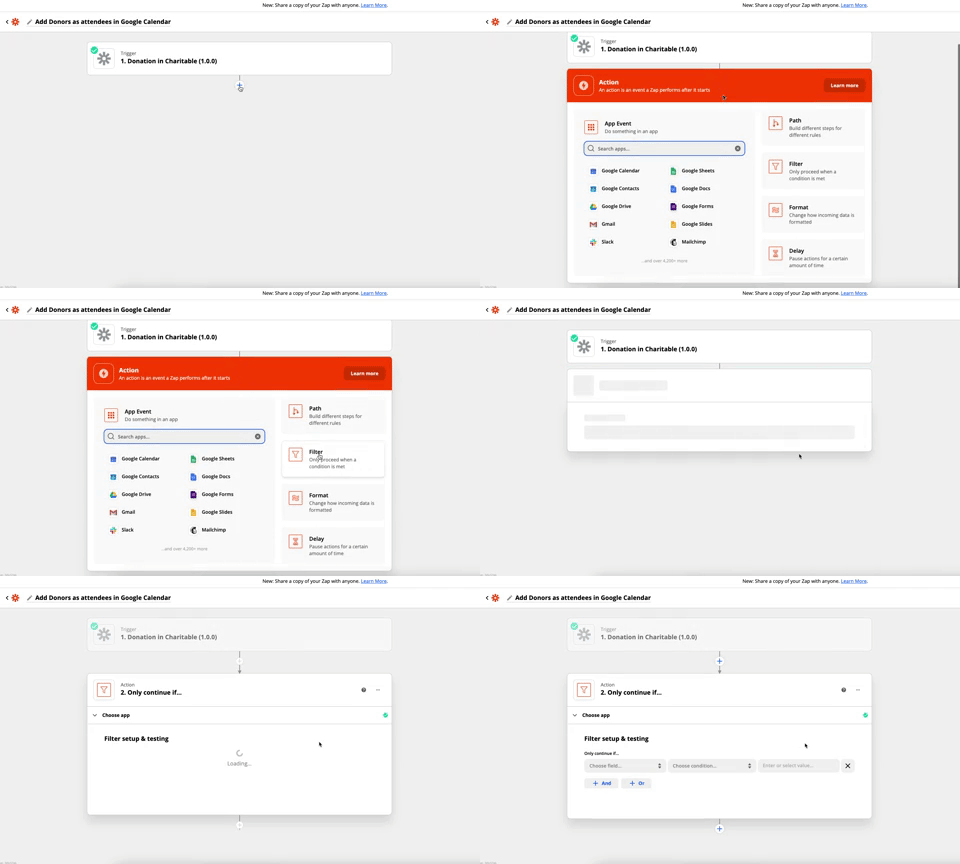
Next, set up the filter by choosing the “Donation status” field for the filter and making sure that it exactly matches “charitable-completed”:
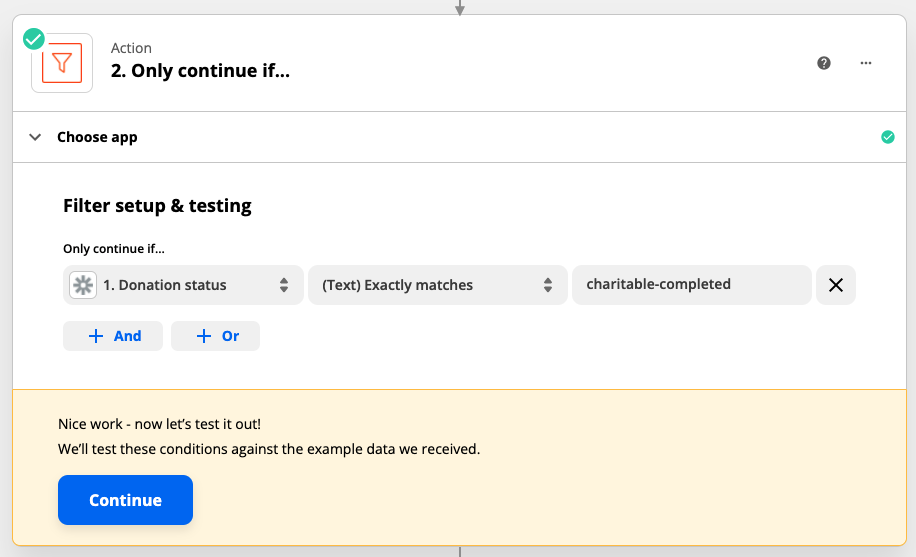
Click Continue to test the filter. Zapier should tell you that the Zap would have continued, given the test data provided by Charitable.
With that done, we can move on to setting up our Google Calendar action. Click the + icon at the bottom of the Zap process to add a new action, and then search for Google Calendar.
Once you have done that, click on “Choose an event” and choose “Add Attendee/s to Event” as the Action Event for your Zap:
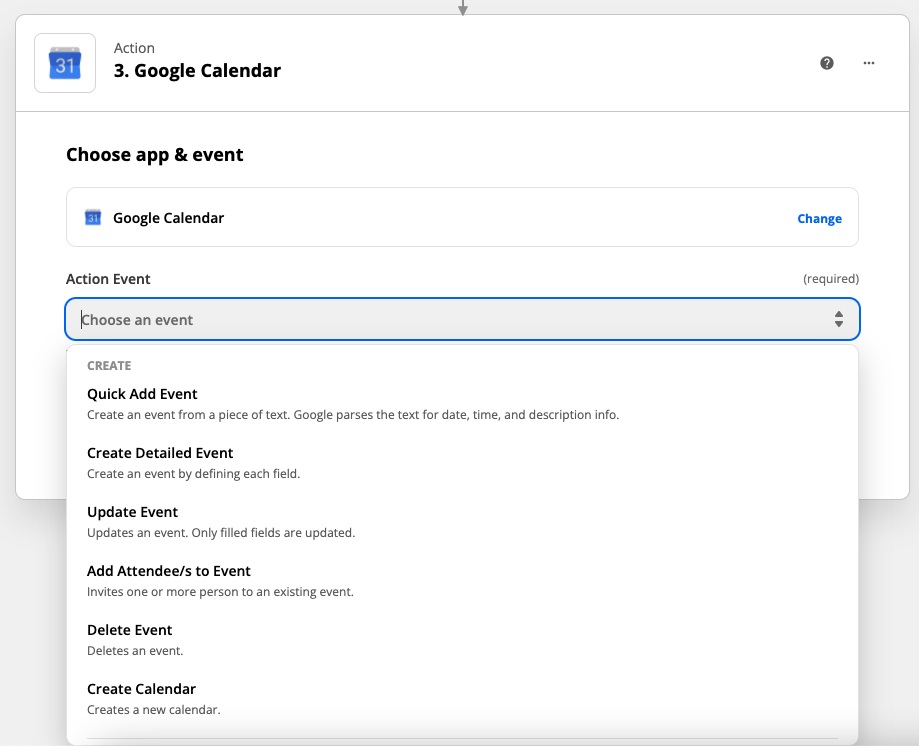
Click Continue to save the Action Event and move on to the next step.
If this is the first time you’ve used the Google Calendar integration in Zapier, you will need to connect your Google account to allow Zapier to access your calendars and add event attendees.
Next, step through the final few steps of setting up your action by choosing your Google Calendar and picking the calendar event you created earlier for your fundraising event.
Finally, for the “Attendee/s” field, select the Email data field sent by Charitable:
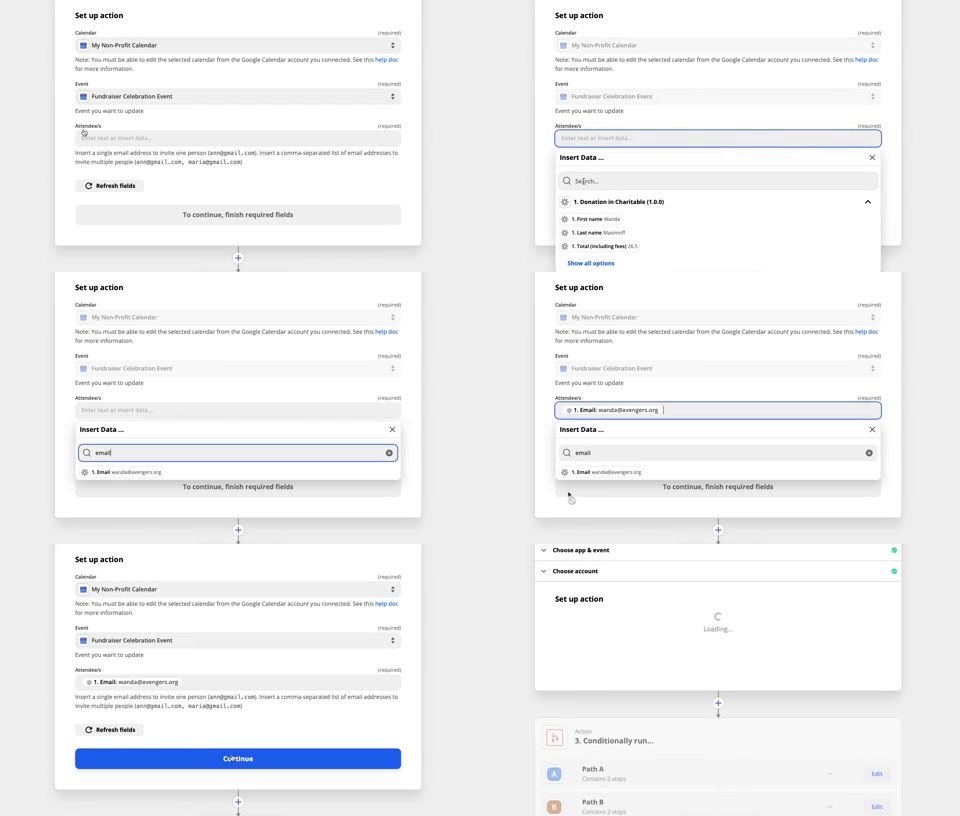
With that done, click on Continue to test the action step using the test data. If successful, you should see one new attendee added to your event in Google Calendar. Don’t forget to remove them before finishing up. 🙂
Finally, take your Zap live by clicking on Turn on Zap. From now on, every new donor on your website will be added to your Google Calendar event, automatically. Magic!
Bonus tip: Make the event exclusive to your biggest donors
Our Zap is now set up to effortlessly add attendees to our event, but we may want to tweak it so that only our top donors are added as attendees. By adding to the Filter action we used earlier, we can do that easily:

In the example shown, we’re only inviting donors who gave more than $100 to attend the event.
Start automating your non-profit with Charitable today
As you’ve seen, Charitable Automation Connect is a powerful new tool available to non-profits. You can use it to build automated workflows like the one we described here, but there are so many more possibilities.
With Charitable seamlessly handling integration with Zapier, you can easily connect Charitable to any of the thousands of apps that Zapier integrates with — without writing any code.
Level up your online fundraising
Charitable is the top-rated and most affordable WordPress donation plugin. Upgrade your WordPress fundraising today.


Leave a Reply