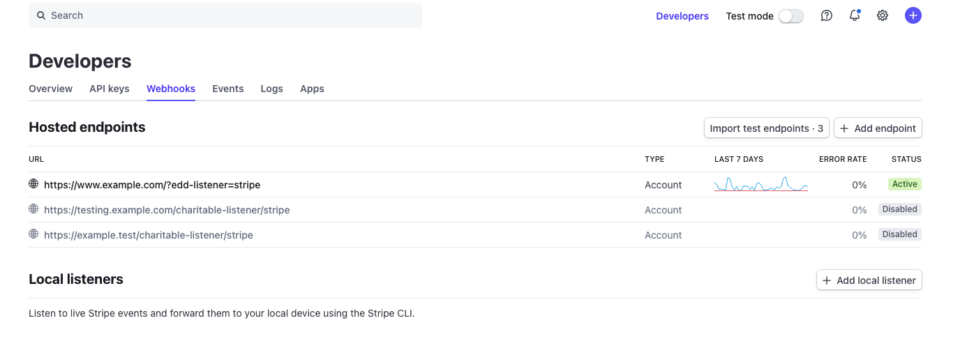
Note: Most of the time, you will not need to create a Stripe webhook manually, as Charitable will set one up for you automatically. However, if something goes wrong with that process, you can follow the steps below to (re)set up your webhook manually or to confirm your webhooks exist in Stripe.
What is a webhook?
Webhooks allow Stripe to send messages to your website when certain “events” take place. For example, if a payment is refunded in Stripe, Stripe can automatically send a notification to your webhook to let it know.
Charitable uses webhooks to automatically process refunds, mark recurring donation subscriptions as active (with Recurring Donations) and check the status of accounts created with the Stripe Connect integration.
How to create your webhook
To set this up, you will need to register a new webhook in your Stripe account.

- Log into your Stripe dashboard.
- Find the “Developers” link at the top of the page.
- Click on the Webhooks tab.
- Click on Add endpoint.
- The URL for the webhook endpoint will take either of the following two forms:
- https://yoursite.com/charitable-listener/stripe
- https://yoursite.com/?charitable-listener=stripe
- For the “Events to send” setting, select “receive all events” or enter the following:
- invoice.payment_action_required
- checkout.session.completed
- charge.refunded
- invoice.created
- invoice.payment_failed
- invoice.payment_succeeded
- customer.subscription.updated
- customer.subscription.deleted
- payment_intent.payment_failed
- payment_intent.succeeded
- Click Add endpoint.
Once you have added that, Stripe will automatically start sending messages to your website, and Charitable will pick those up and handle the rest.
Note that if you have test mode enabled on your website, you should create a separate webhook endpoint for the test data. To do that, first toggle on “View test data” mode in the Stripe dashboard and then follow the steps above to add the endpoint.
