
Whether you run your own charity or raise funds for a charity you support, creating a multilingual charity donations website can help you broaden your reach to potential customers across the world. Not to mention, it’s a great way to build a platform where donors, sponsors, and volunteers can get information and collaborate with one another.
Aside from increasing user experience, a multilingual charity donations website can also help you improve your charity’s online visibility. With this in mind, in this article, we’ll explain how you can set up and configure a multilingual charity donations website using two plugins – Weglot and Charitable.
Why language localization is important for charity websites
The key benefit of creating a multilingual charity donations website is that it enables you to increase your charity’s outreach. As a result, you can effectively generate more awareness for your charity or cause.
In addition to this, it’s also worth mentioning that a multilingual site makes it easier for more people across the world to learn about your cause. In fact, out of the world’s 7.5 billion inhabitants, only 1.5 billion (nearly 20%) speak English. Out of those, only 360 million speak English as their first language.
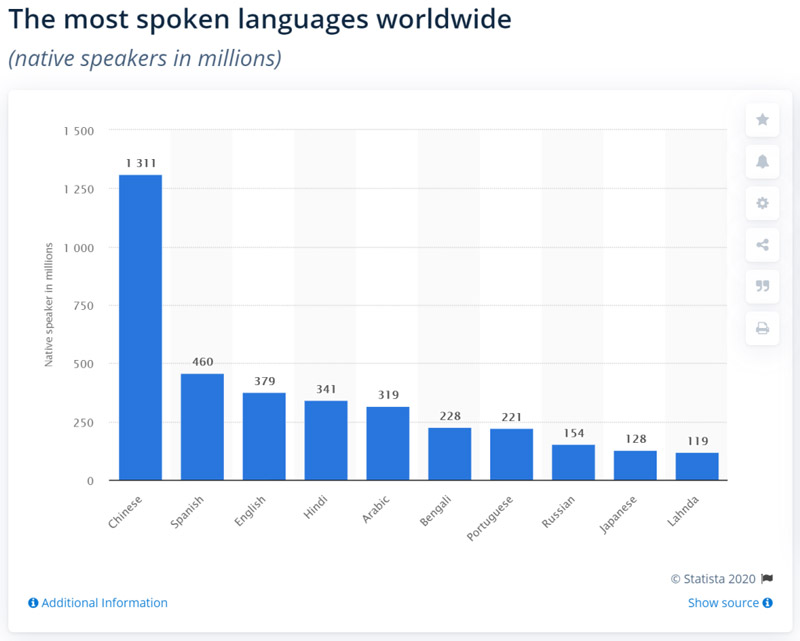
When you translate your charity site’s content into multiple languages, you make it easier for existing donors and sponsors to get involved with events and activities and allow potential new donors to learn more about your cause.
In addition to this, people searching for charities in their native language through search engines will also be able to find your charity donations website. This is a great way to boost search engine visibility.
Of course, it’s important to make sure you translate your website content into the right non-English language. The best place to start is by analyzing your existing traffic. For example, if you receive a lot of traffic from South America, you might consider offering Spanish and Portuguese translations.
How to create a multilingual charity donations website
Weglot is a WordPress translation plugin that lets you create a multilingual website by translating all of your content into various languages. This includes content generated by any WordPress themes, plugins, or add-ons you’re using on your website – including forms plugins.
Weglot integrates seamlessly with the Charitable plugin making it easy to create a multilingual charity donations website. It comes with a built-in language switcher that lets visitors choose from the different languages you decide to offer.
Weglot utilizes machine translation to translate your site’s content into 108 different languages. In addition to this, it lets you manually manage your translations directly from the Weglot dashboard.
Here’s what you need to do to create a multilingual charity donations website:
Step #1: Install the Charitable plugin
The easiest way to install the Charitable plugin is through the WordPress dashboard. Login to your website and head over to Plugins > Add New. Next, type Charitable in the search bar.
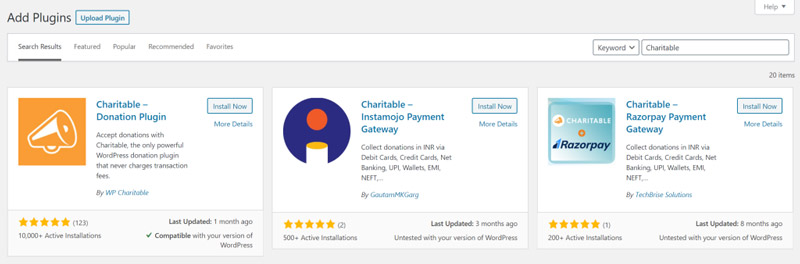
You should see Charitable – Donations Plugin listed in the search results. Click the Install Now button to proceed. Once you’ve installed the plugin, you’ll need to activate it. Click the Activate button after installation completes.
The Charitable plugin lets you accept donations (via PayPal and offline payment methods) for your charity website. Once you have the plugin set up, you can create a new campaign, add a fundraising goal, and set suggested donation amounts. The Charitable plugin also lets you manage donations directly from your WordPress website.
Step #2: Set up the Weglot plugin and choose languages
Now that you’ve successfully installed and activated the Charitable plugin, we’ll look at how you can configure the Weglot plugin and languages you want to offer to site visitors.
The first thing you need to do is install the Weglot plugin to your WordPress website and activate it. Once that’s done, sign up for a Weglot account. You’ll get an API key that connects your WordPress site to the Weglot service.
Next, navigate to the Weglot section from the sidebar menu and configure the following settings in the Main configuration screen.
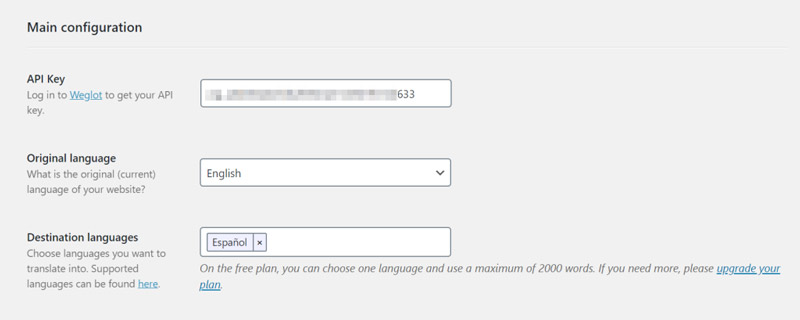
- Copy and paste the API key you received in the API Key text box.
- Select the Original language of your charity website. This is the language your originally publish content in e.g. English.
- Choose the languages that you wish to translate your website’s content into from the Destination languages section. Here’s a complete list of available languages to choose from.
When you’re done, click the Save Changes button at the bottom of the screen to proceed. Weglot will now automatically translate all of your website’s content – including content generated by themes and plugins – into your chosen destination language(s).
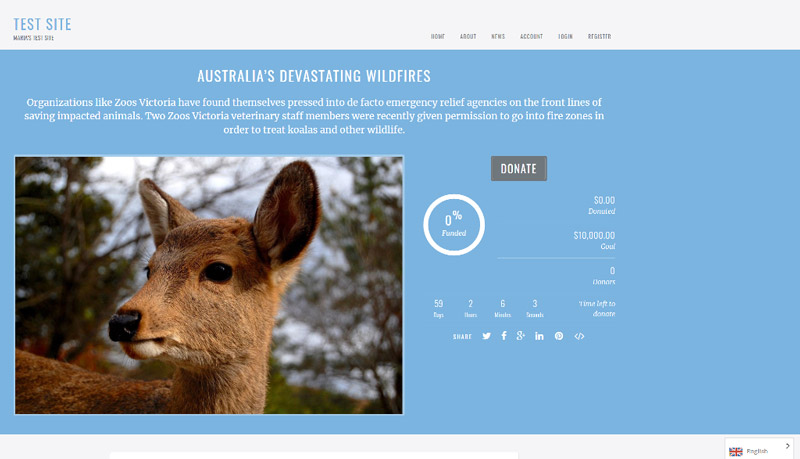
In addition to this, a language switcher will be added to the bottom-right corner of your charity website’s front-end. Your site’s visitors can use the language switcher to choose their preferred (or native) language.
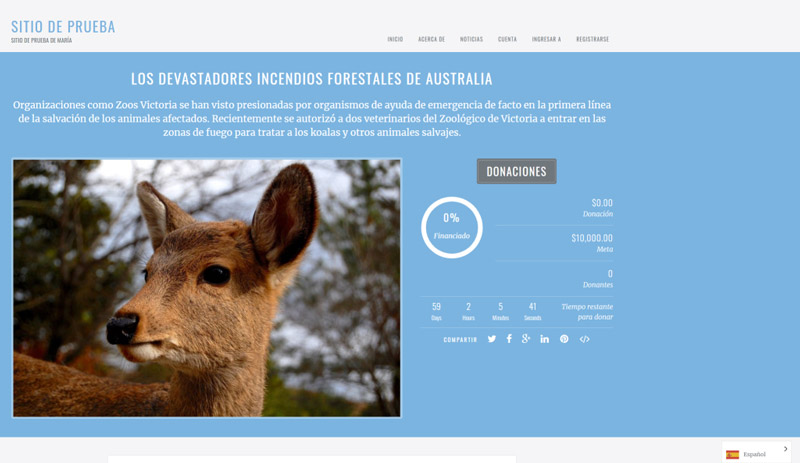
Step #3: Refine translations
Weglot automatically translates your entire website to selected destination languages once you’ve set it up. However, it also lets you manually change the automatically-generated translations in two different ways – either by using the list editor or the visual editor.
You can access the list editor by logging into your Weglot dashboard and heading over to the Translations tab. It should look something like this:
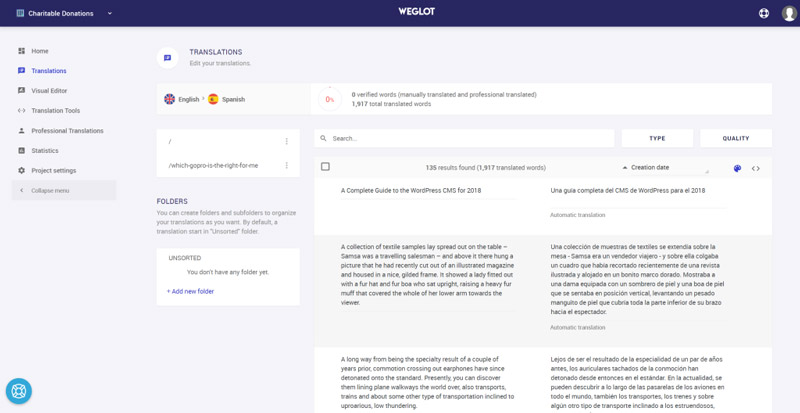
The list editor gives you a side-by-side view of your site’s original content along with the translated content. You can modify a translation manually by clicking and typing or you can use a professional third-party translation service to do it for you.
Alternatively, you can use Weglot’s visual editor by navigating to the Visual Editor tab. This will show you a live preview of your website’s front-end.
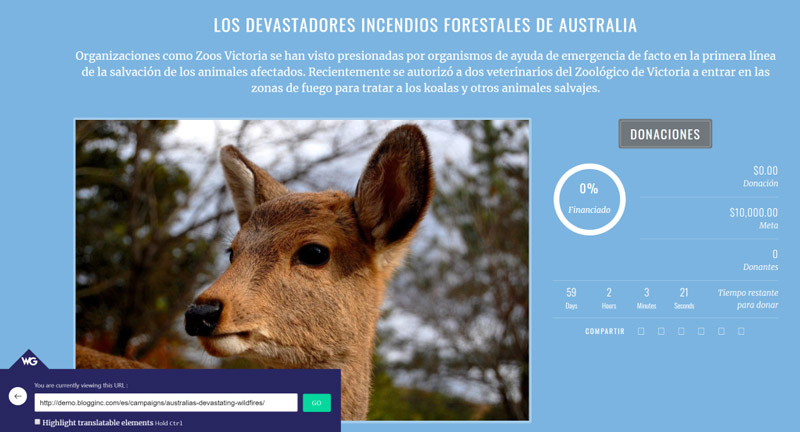
You can translate any content by hovering over it and clicking the pencil icon. Clicking the green pencil icon opens a popup window which lets you change the translation.
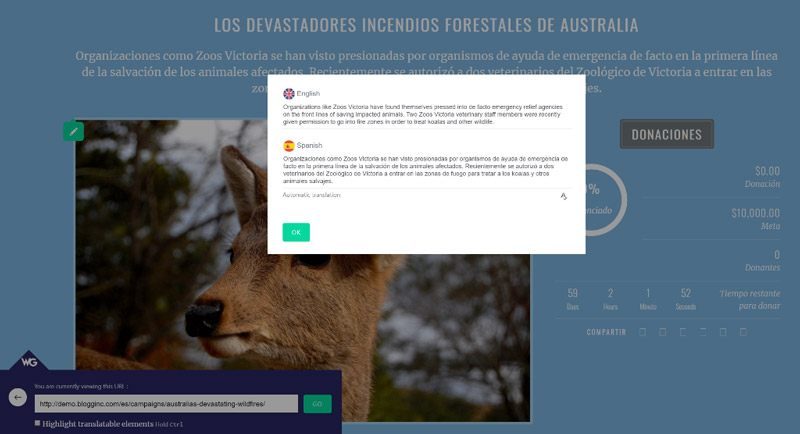
Regardless of the translation method you choose, all your translations will be automatically synchronized with your multilingual charity donations WordPress website.
Step #4: Customize the front-end language switcher
Once you activate the Weglot WordPress plugin, a floating language switcher is automatically added to the bottom-right corner of your website. You also have the option to change its location by choosing one of the four placement options offered by Weglot:
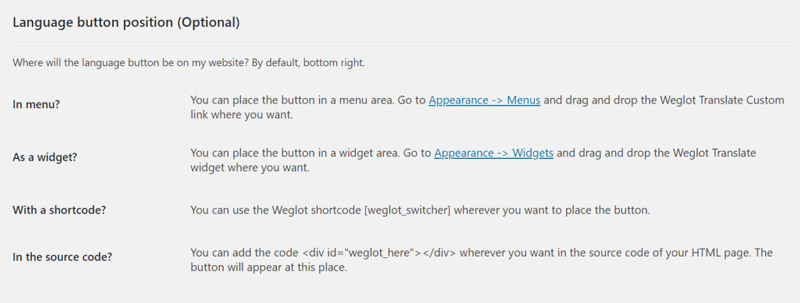
- As a menu item (in your main navigation)
- In your website’s source code
- As a widget in a widget area
- In a shortcode on your website
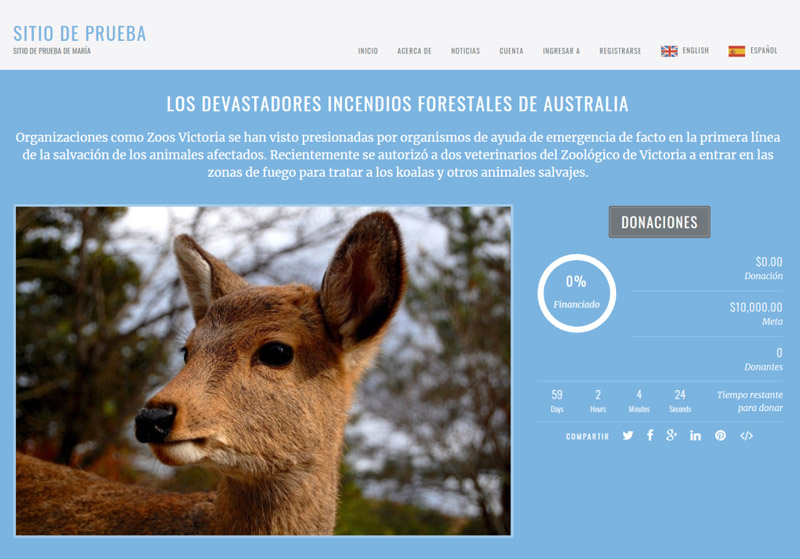
For instance, here’s how the language switcher will appear if you move it to your website’s navigation menu.
Conclusion
Having a multilingual charity website is a great way to connect with potential donors, secure new sponsors, and raise awareness about your cause. In addition to this, it also improves your site’s user experience as people can choose to read your content and interact with your website in their preferred language.
Using the Charitable plugin for WordPress in tandem with Weglot, you can get started with a step in the right direction. Charitable lets you create a charity website and the Weglot plugin automatically translates your content (including content generated by themes and plugins).
Which languages will you offer on your multilingual charity website? Let us know by commenting below.
About the Author: Elizabeth Pokorny is the Content Manager at Weglot.





Leave a Reply