

For non-profits trying to stick to a low overhead, WordPress is a great choice because it keeps your website costs down.
WordPress itself is free. There are thousands of free plugins. Likewise with themes. And you can find many more paid plugins or themes that will cost less than $100.
But with all that choice comes one big challenge: Where do you begin?
In this post, I will show you how to build a powerful non-profit website with WordPress. By the time we’re done, we will have a website with these components:
- A homepage that highlights your organisation’s mission
- A donation page
- A blog
- A newsletter signup form
You can take a look at the demo site at http://demo.wpcharitable.com/make/.
The tools we will use
We’re going to use Make theme by The Theme Foundry. The great thing about Make is that it’s free and revolves around a powerful drag and drop Page Builder. This makes it a great way to create a unique website without knowing any code.
Oh, and we use Make here on wpcharitable.com.
We’re also going to use a few plugins:
- Charitable for donations (free)
- Ninja Forms + MailChimp extension for the newsletter signup form ($29)
So that’s a complete non-profit fundraising website for $29. Sound good? Let’s get started.
Charitable is the top-rated WordPress donation plugin. Best of all, you can get it for free! Click here to start now.
Prerequisites
Before we get started, let’s just make sure you have all the basics in place. I’m going to assume a few things:
- You already have a domain.
- You have signed up with a hosting provider.
- You have WordPress installed on your hosting service.
If you don’t have these three set up yet, you can tick all three boxes with SiteGround’s WordPress hosting, which is what we use here on WP Charitable.
1. Install Make
Now that you have WordPress installed, log into your website dashboard (usually accessible by going to http://mysite.com/wp-admin/). Let’s install Make:
- Go to Appearance > Themes.
- Click on the Add New button.
- Search for “Make” in the theme search bar.
- You will see Make listed. Click on Install.
- Now click Activate.
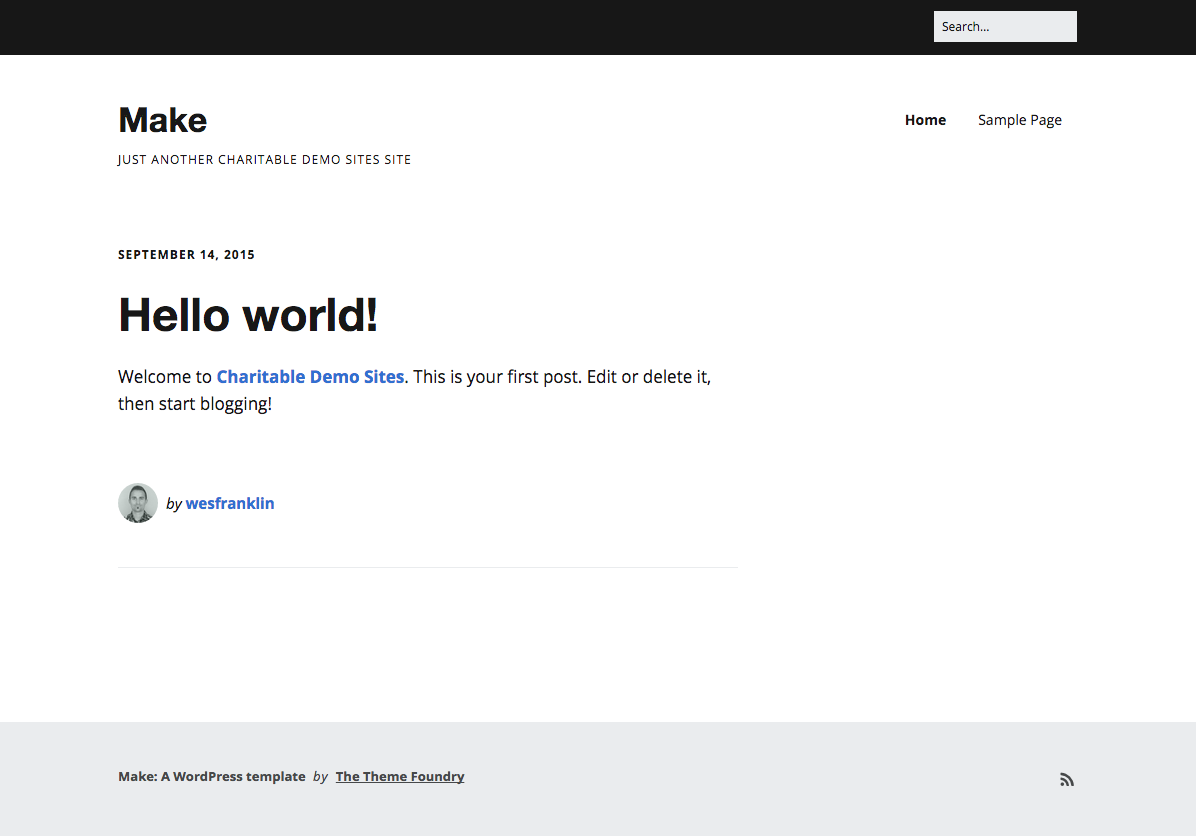
With Make activated, your site should look like this:
2. Set up your Homepage
With Make, it’s quick and easy to create an engaging homepage.
- First create a new page by clicking Pages > Add New.
- Normally you would add a title, but in this instance we don’t want the title to show so we’ll leave it blank.
- To make use of Make’s Page Builder, select Builder Template under Page Attributes on the right hand side of the screen. This will change the interface and you’ll now see Page Builder options in the body of the page.
Note: once you have finished adding content, be sure to click Publish.
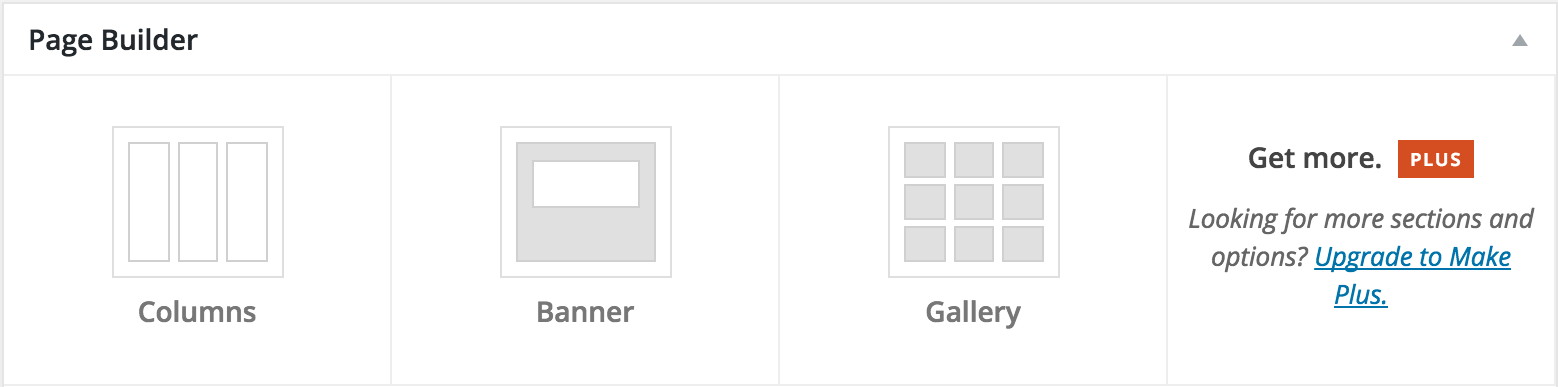
You can add whatever content you want to your page, but here I’m going to show you how to set things up the way we have it on our demo site.
Banner
Right at the top of the page, we’ll add a banner — an eye-catching section at the top of the page with an image and a headline. This is a great place to highlight your organization’s core vision.
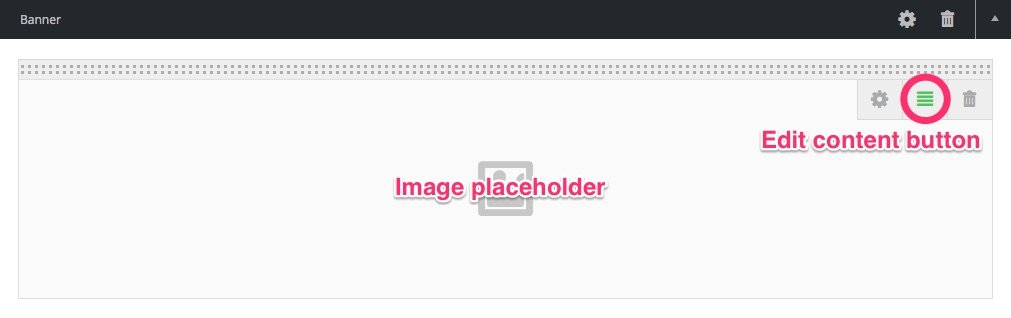
- Add a banner by clicking on the Banner block.
- Add an image to the banner by clicking on the image placeholder box.
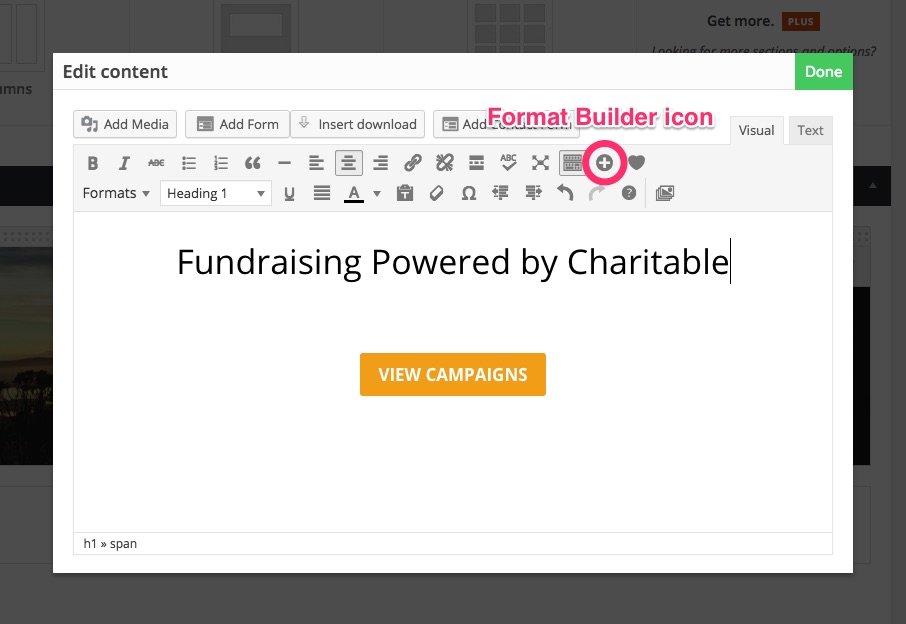
- Add a headline by clicking the green Edit Content button. While you’re there, try adding a call-to-action button – type some text for your button, select it, then click the Format Builder icon and select Button. Now use the options to format your button.
single Column
The next thing we will add is a full-width block with a bold heading. You might use this to share your organization’s purpose or mission statement.
- Add a column below your banner by clicking on the Columns block. Three columns are added by default, but you can adjust the number of columns by clicking on the Cog icon in the top right of the block. We’re going choose a one column layout.
- Add content by clicking in the lower half of the column.
three columns
So far, you have added an attention-grabbing banner and shared your organization’s core purpose and vision. Next, give your visitors a little more information about what your organization does:
- Add more columns by clicking on the Columns block again. I’m using these as three product features, but you may use this area to share information about the projects you run, highlight volunteer opportunities or anything else — whatever is appropriate for your organization.
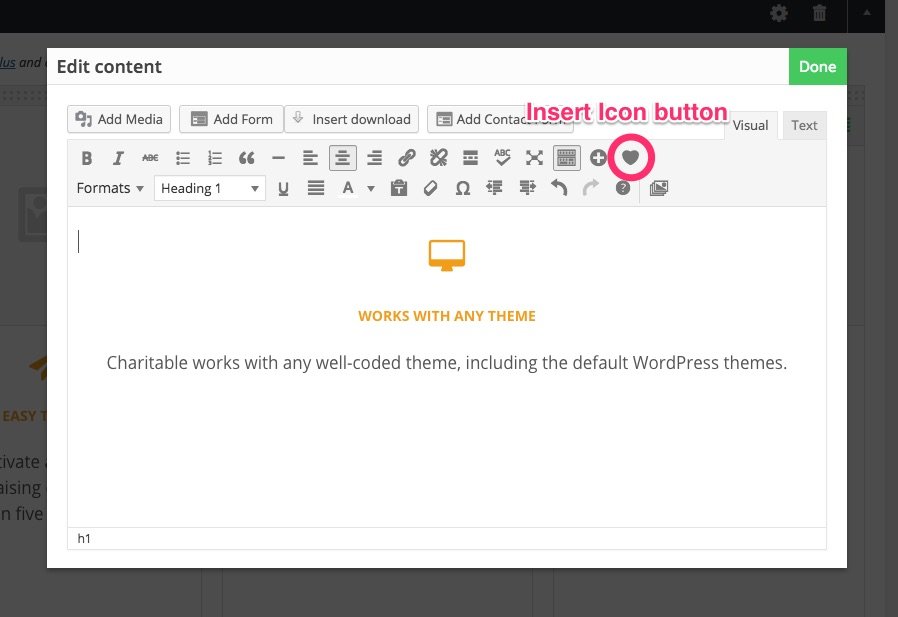
- Add content to each column. While you’re there, add icons using the Insert Icon button.
Newsletter form
If you’ve been following along on the demo, you’ll know that the newsletter signup form comes next. For now though, we’re going to Publish our page — we’ll get back to the signup form a little later.
set the front page
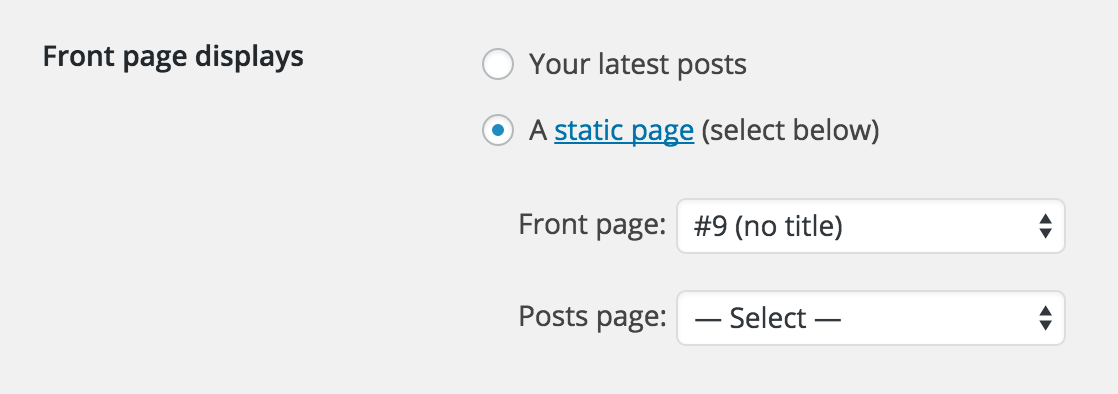
The last thing you need to do is set your front page to display the page you just created. Go to Settings > Reading and change your Front Page Display to A static page, then select your new homepage from the list (you didn’t name your homepage, so it will be called no title).
Your Homepage should be looking pretty good now.
3. Add a newsletter signup form
Newsletter signup forms are a great way to grow your mailing list. To add a signup form like I have on our demo, you’ll need a few things:
- MailChimp account (free)
- Ninja Forms plugin (free)
- The Ninja Forms MailChimp extension ($29)
Create a mailchimp account
MailChimp is a fantastic tool for designing and sending emails to your mailing list, and it’s free for up to 2000 subscribers! Once you’ve created an account, you’ll need to find your API key:
- Click your profile name to expand the Account Panel, and choose Account.
- Click the Extras drop-down menu and choose API keys.
- Copy an existing API key or click the Create A Key button (you’ll need this in the next step).
Install Ninja Forms
Now that you have created your MailChimp account, let’s go back to your WordPress dashboard and install Ninja Forms.
- Go to Plugins › Add New.
- In the search bar, type “Ninja Forms”. Hit Enter on your keyboard.
- You will see Ninja Forms listed as per the screenshot below. Click the Install Now button.
- After installing the plugin, you need to activate it. Click the Activate Now link after installing. You can also activate the plugin by going to Plugins > Installed Plugins.
Install Mailchimp Extension
Once you have purchased the MailChimp extension from Ninja Forms, follow the same steps as for installing Ninja Forms, but instead of searching for the plugin, click the Upload Plugin button.
After activating the extension, go to Forms > Settings > MailChimp and paste in your MailChimp API Key.
create a signup form
- Go to Forms > Add New.
- In the Fields column on the left, choose First Name, Email and Submit.
- Click Save, then add a title (eg. Newsletter).
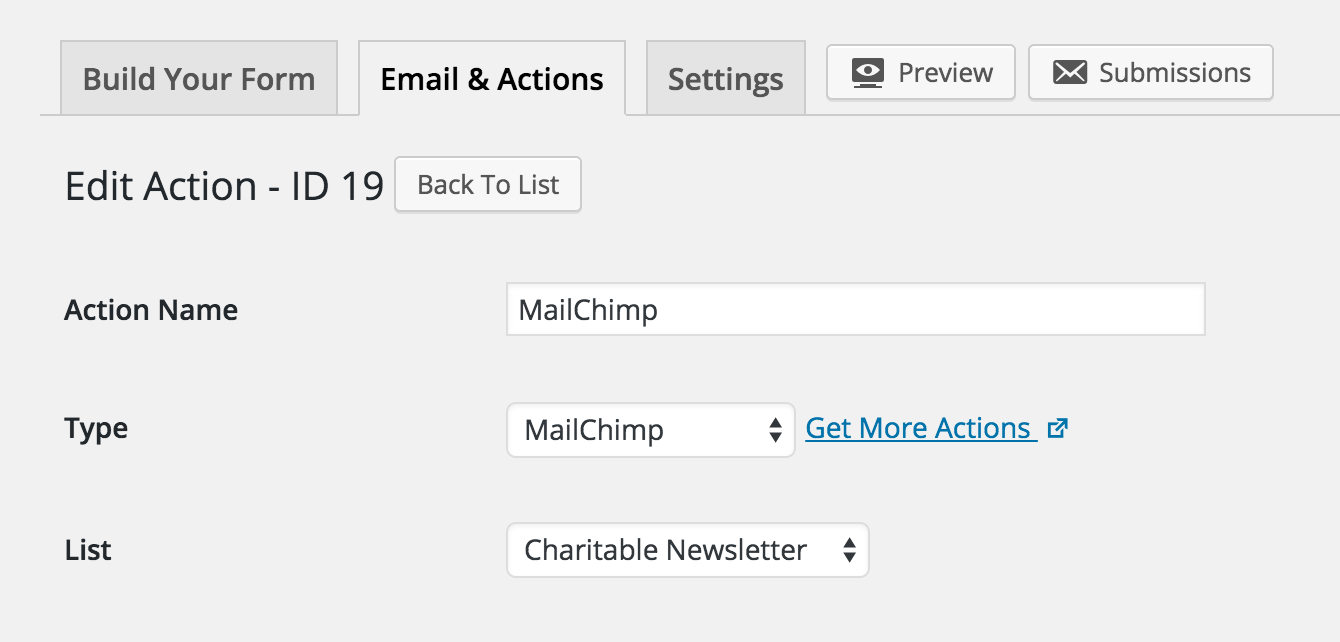
- Next, click on the Email & Actions tab.
- Click Add New, enter an Action Name (eg. MailChimp), select MailChimp from the Type drop-down, then choose a List (if no lists are available, go to your MailChimp account and add a new list – this is the mailing list new subscribers will be added to). Once you’re done, be sure to click Save.
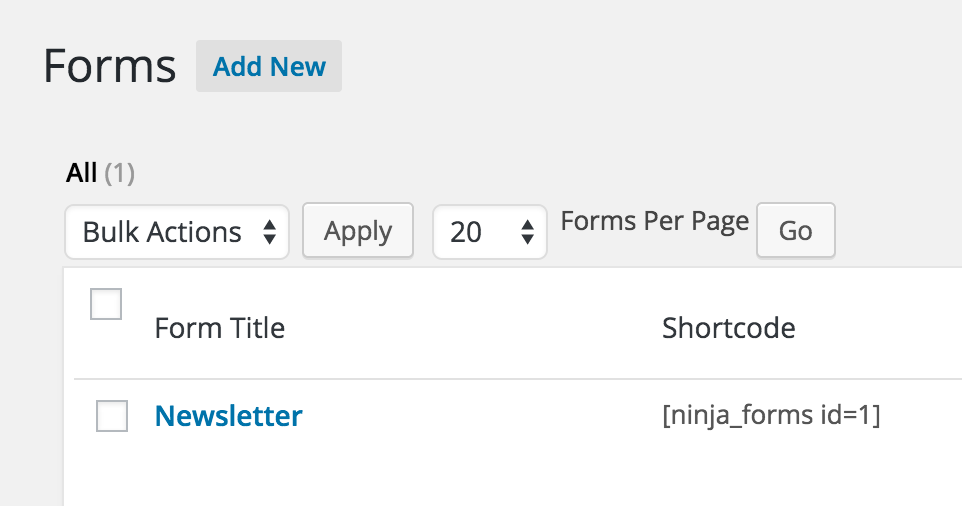
- Go to Forms > All Forms.
- Copy the shortcode corresponding to your newsletter form (you’ll need this in the next step).
Add signup form to homepage
- Go to Pages > All Pages and select the Homepage you created earlier.
- Add two columns by following the previous steps. While you’re setting the number of columns, add a background colour to help the newsletter block stand out.
- In the first column, add some text introducing the newsletter.
- Paste the newsletter shortcode into the second column.
- Click Preview to see how it’s looking. Once you’re happy, click Publish.

4. Add a donation page
Install Charitable
To accept donations, you’ll need to install the Charitable plugin. Follow the same steps as for the Ninja Forms plugin.
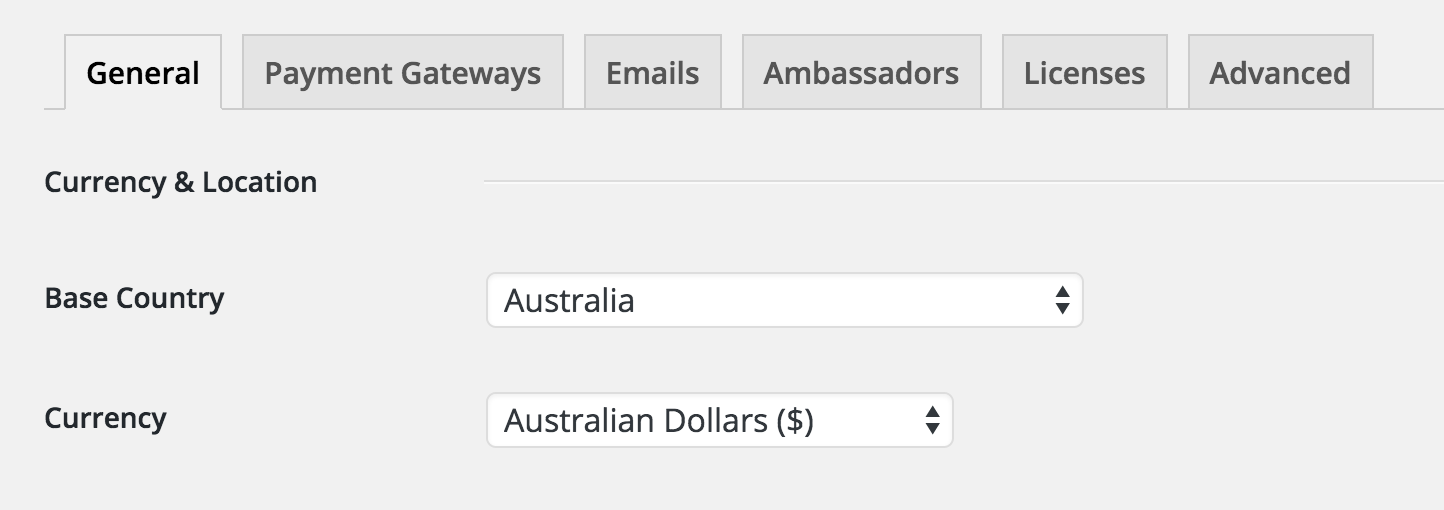
Once Charitable is installed, go to Charitable > Settings.
- General tab – set the Base Country and Currency.
- Payment Gateways tab – enable PayPal by clicking Enable Gateway, then click Gateway Settings to add your PayPal email address.
- Click Save Changes once you’re finished.
create a donation page
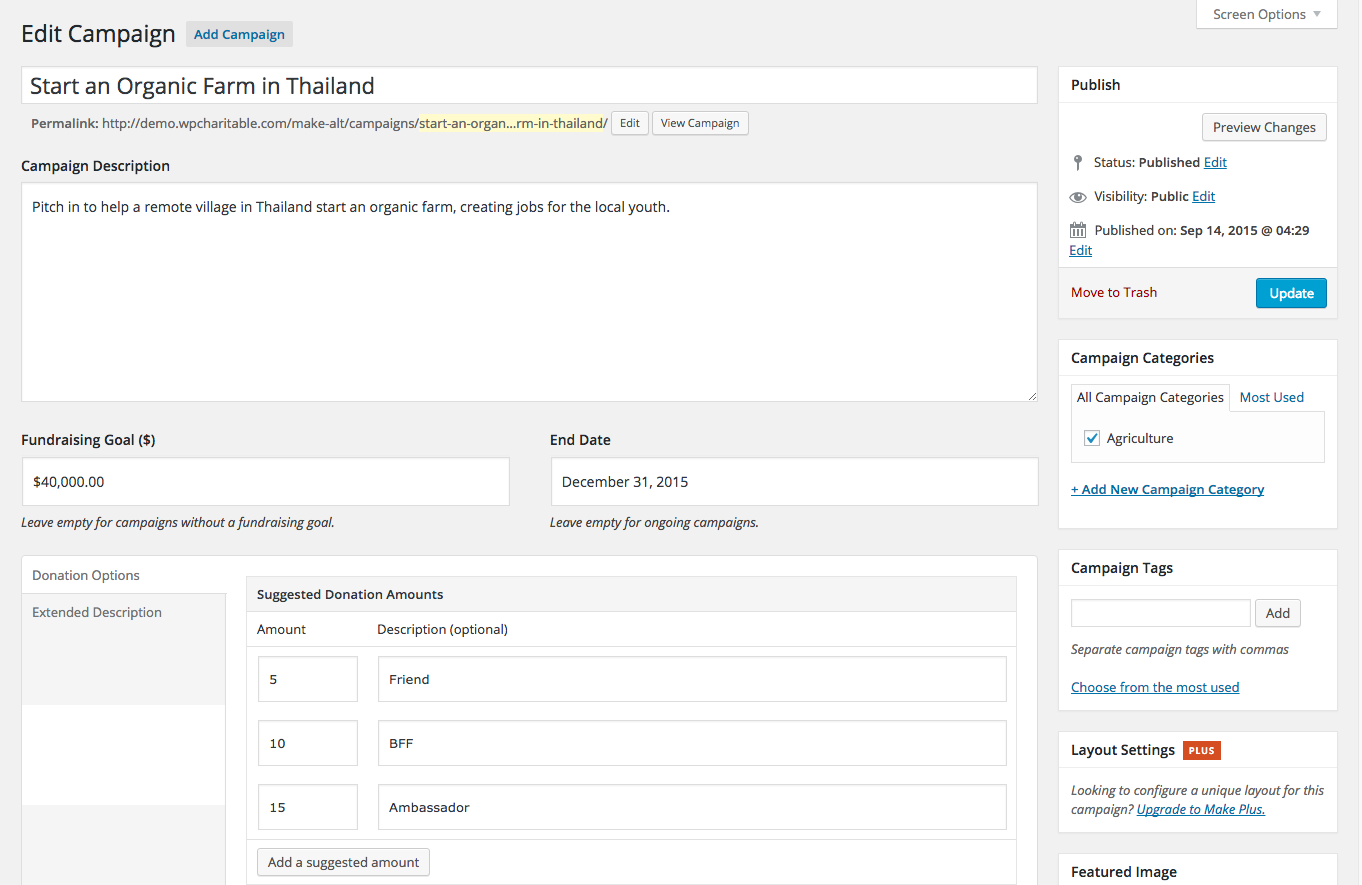
- Go to Charitable > Add Campaign.
- Enter your campaign title.
- Add a short description.
- If you have a specific fundraising target, you can add a fundraising goal.
- If your campaign needs to end on a certain date, you can set an end date.
- Next, scroll down to the Donation Options area. Here, you can add suggested donation amounts and choose whether to allow custom donations.
- Finally, add a photo or image using the Featured Image box.
- Click the Preview button to see how your campaign is looking. Once you are happy with your campaign, click Publish. Your fundraising campaign is now live!
5. Set up a Blog
Now that we have our homepage, newsletter signup form and donation page done, let’s add a simple blog, where you can share updates about your organization:
- First, go to Pages > Add New, give the title of Blog, then click Publish.
- Next, go to Settings > Reading and set Posts page to Blog, and click Save Changes.
- Now go to Posts > Add New and write your first Blog post!
Finishing touches
Set your menu
You’ll probably notice that the pages you have created aren’t showing up in your website’s navigation.
- Go to Appearance > Menus and create a new menu.
- Under the Pages section, select the pages you want to display in your navigation, and click Add to Menu.
- Under Menu Settings, tick Primary Navigation, then click Save Menu.
Now you should see your pages displaying in your website’s main navigation.
Footer
You can add secondary navigation and other content to the footer via widgets.
- Go to Appearance > Widgets
- Add a widget from the left hand side by clicking on it, selecting Footer 1, then clicking Add Widget.
- Repeat the process for the other footer widgets.
Sidebar
The right sidebar display on the blog and campaign pages. Follow the same steps as above to set the sidebar widgets.
customizing
You can use the customizer to fine-tune your website – go to Appearance > Customize.
Here you can add a logo, change the fonts and colours, and make other detailed changes to get your website looking just right.
Are we done?
No! We’ve only just begun. But I hope that by now you’re feeling well satisfied with what you have achieved. After all, you now have your own fundraising website up and running!
There are many ways to improve your website:
- Write some blog posts and share them on social media
- Add an About page so people can get to know you more
- Use the Ninja Forms plugin to create a contact form
- Add the Events Calendar plugin to create and manage fundraising events
- Send out a MailChimp newsletter to keep your subscribers up-to-date
- Expand your fundraising features with Charitable’s extensions.
Useful links
Charitable documentation
Make documentation
We’d love to hear your feedback and see what you create – leave a comment below!
Using WordPress and want to start collecting donations with Charitable for free?
[ninja_form id=’48’]






Leave a Reply