With Charitable Newsletter Connect, your donors can opt-in to join your newsletter when they make their donation. Compatible with MailChimp, Campaign Monitor, MailerLite, Mailster and MailPoet (including MailPoet 3).
Installation
Installing Charitable Newsletter Connect is the same as installing any other Charitable extension. If you’re not sure how to do that, we recommend first reading our guide to installing Charitable extensions.
General Setup
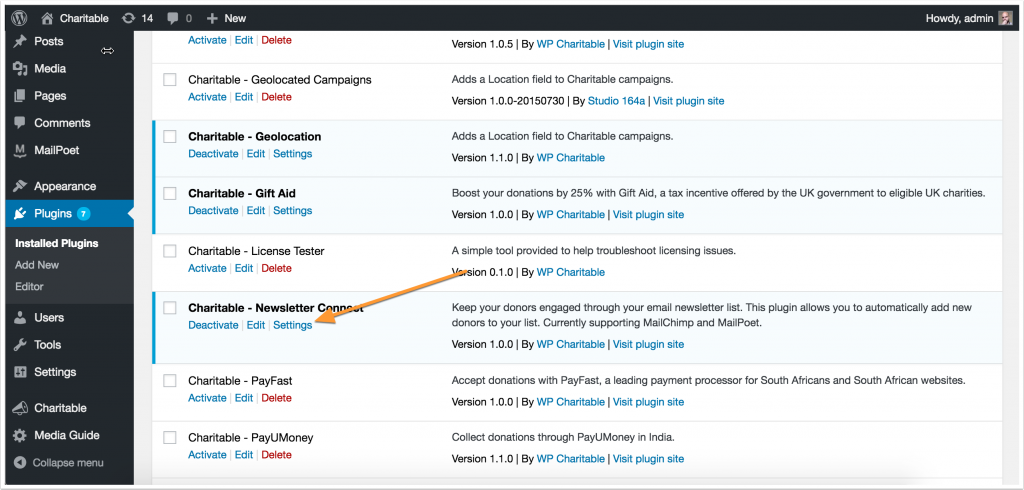
After activating Newsletter Connect, you can click on the Settings link to set up the plugin. (Note: You can also get to the plugin settings by going to Charitable > Settings > Extensions.
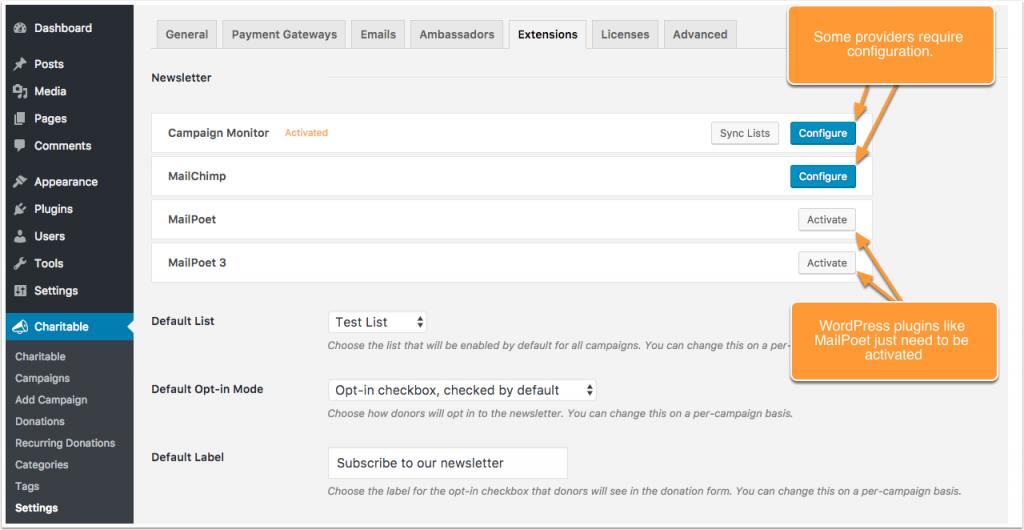
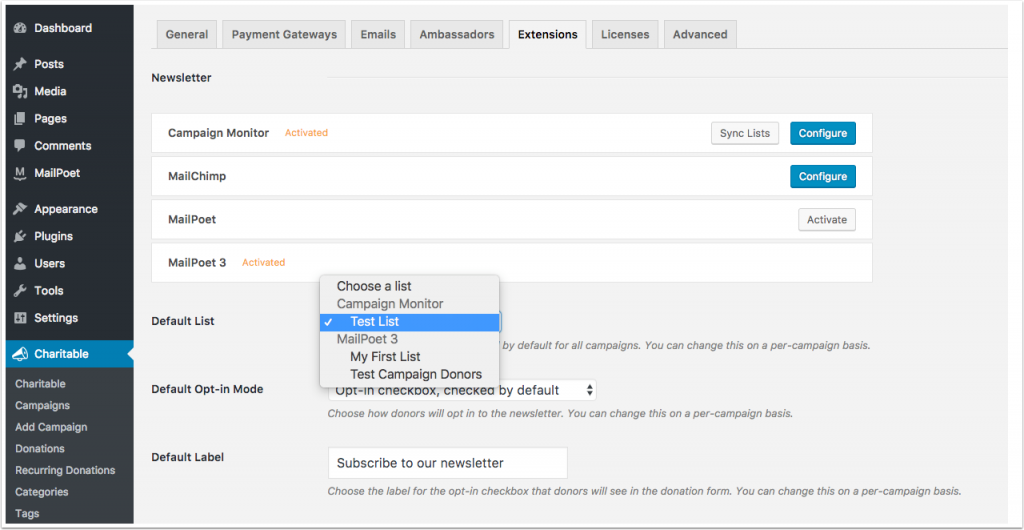
On the settings page you will see a list of all available providers.
If you’re using a WordPress newsletter plugin like MailPoet or Mailster, all you need to do is make sure that MailPoet/Mailster is activated. No further configuration is required.
Providers like MailChimp, MailerLite and Campaign Monitor need an API key or other settings in order to be connected.
Set up MailChimp
On the Extensions settings page, click the “Configure” button for MailChimp.
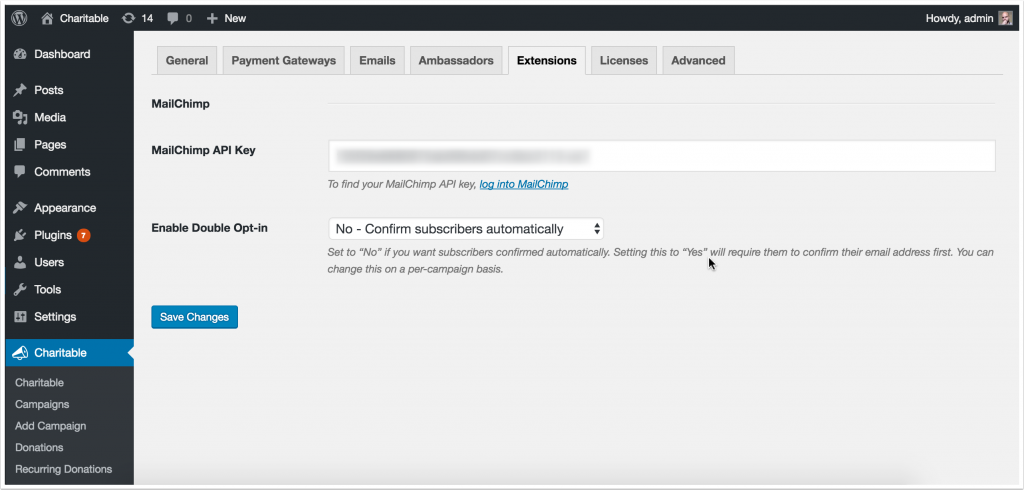
There are two settings you can configure:
- Your API Key: Find this in your MailChimp account by going to your account page > Extras > API keys. (For more information about MailChimp API keys, read this).
- Double Opt-in: Set this to “Yes” if you want subscribers to confirm their email address before being added to your newsletter list.
Configure Campaign Monitor
On the Extensions settings page, click the “Configure” button for Campaign Monitor.
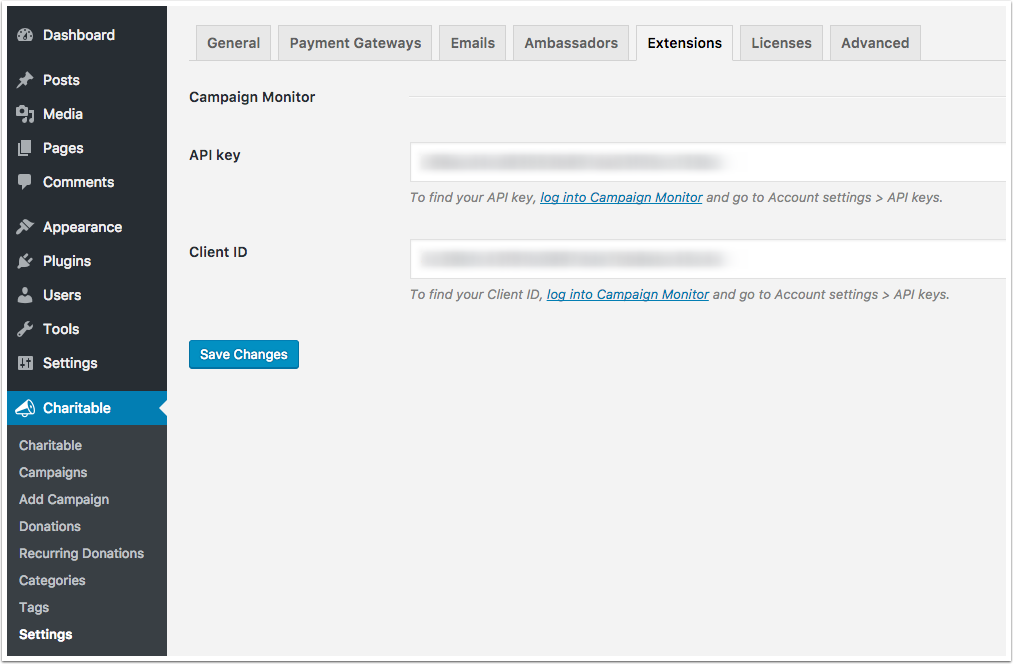
Campaign Monitor requires an API key and a Client ID. You can find both of these by logging into your Campaign Monitor account and going to Account settings > API keys.
Set up MailerLite
On the Extensions settings page, click the “Configure” button for MailerLite.
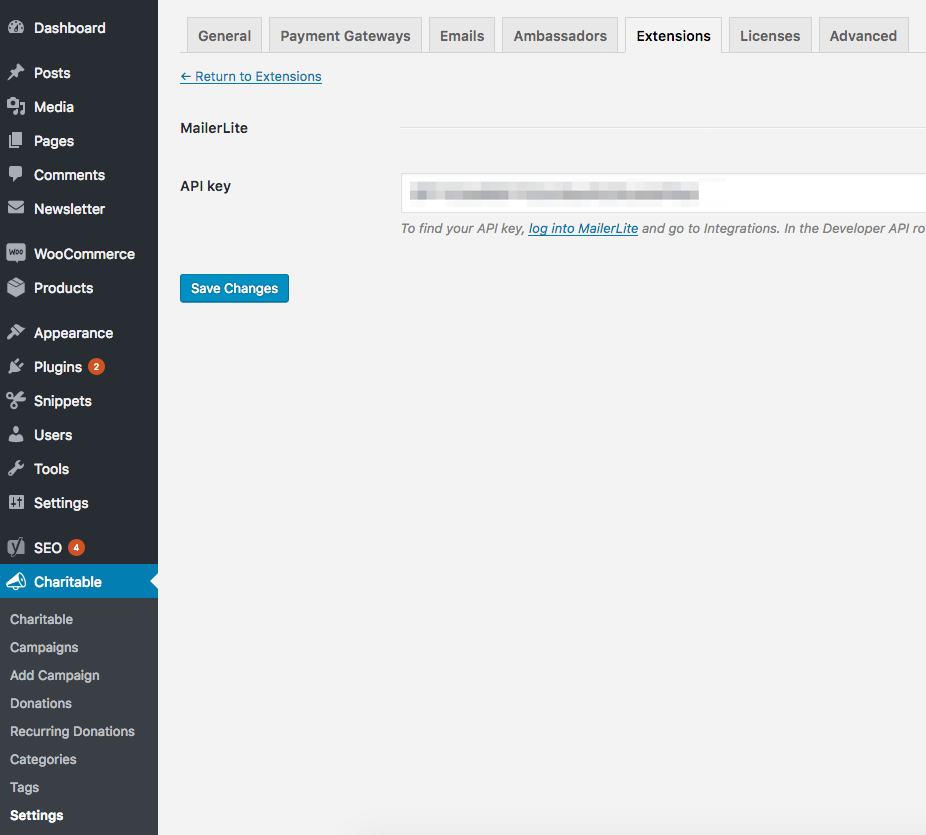
MailerLite just needs an API key, which you can find in your MailerLite dashboard. Once you have this, copy it into the API key field in the Charitable settings.
Set default settings
After activating or configuring the newsletter providers you want to use, you should configure the default settings for your website. These will be applied to all campaigns, but you can override them on a per-campaign basis.
- Default List: This is the list that donors will be subscribed to when they opt-in. It will show any available lists from your providers.
- Default Opt-in Mode: There are three opt-in modes to choose from:
- An opt-in checkbox in the donation form which isn’t checked by default.
- An opt-in checkbox in the donation form which is checked by default.
- Automatic opt-in means that donors do not see a checkbox but are automatically subscribed when they donate.
- Default Label: The label that will be shown alongside the opt-in checkbox in your donation form.
Sync lists from a provider
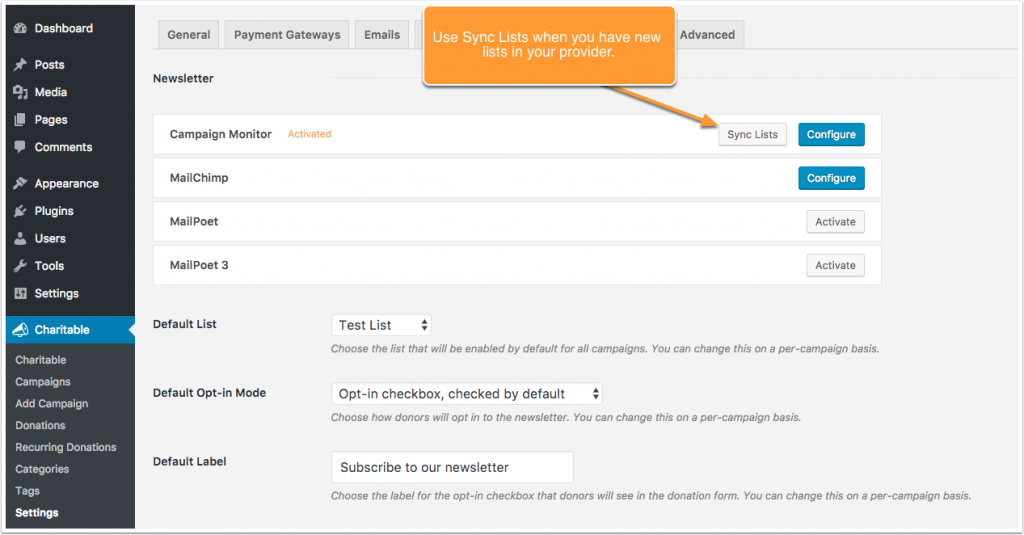
Charitable avoids checking for new lists with providers like MailChimp, MailerLite and Campaign Monitor. This improves performance, but it does mean that new lists you create in your provider’s account will not automatically appear as an option in your WordPress dashboard.
To fetch all your lists from a provider, you can use the Sync Lists button.
Setting up per-campaign configurations
You can also configure newsletter signup options on a per-campaign basis. When you edit a campaign, open the Newsletter tab.
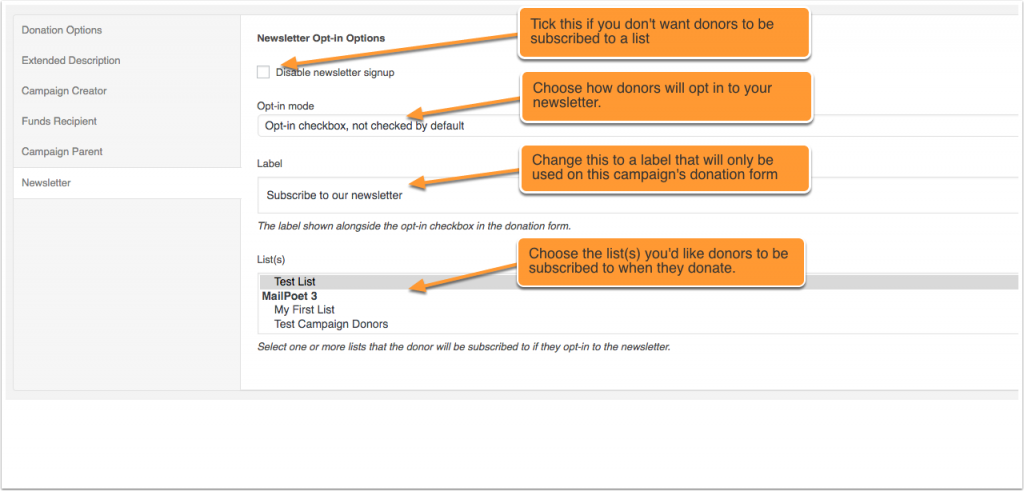
There are three settings to configure:
- Disable newsletter signup: Tick this to remove the opt-in for this campaign.
- Mode: Choose how donors will opt in to your newsletter.
- Label: Change this to a label you’d prefer instead of the default label you provided.
- List(s): Select all the lists that you would like your donors to be subscribed to if they opt-in.
